Parts
Parts
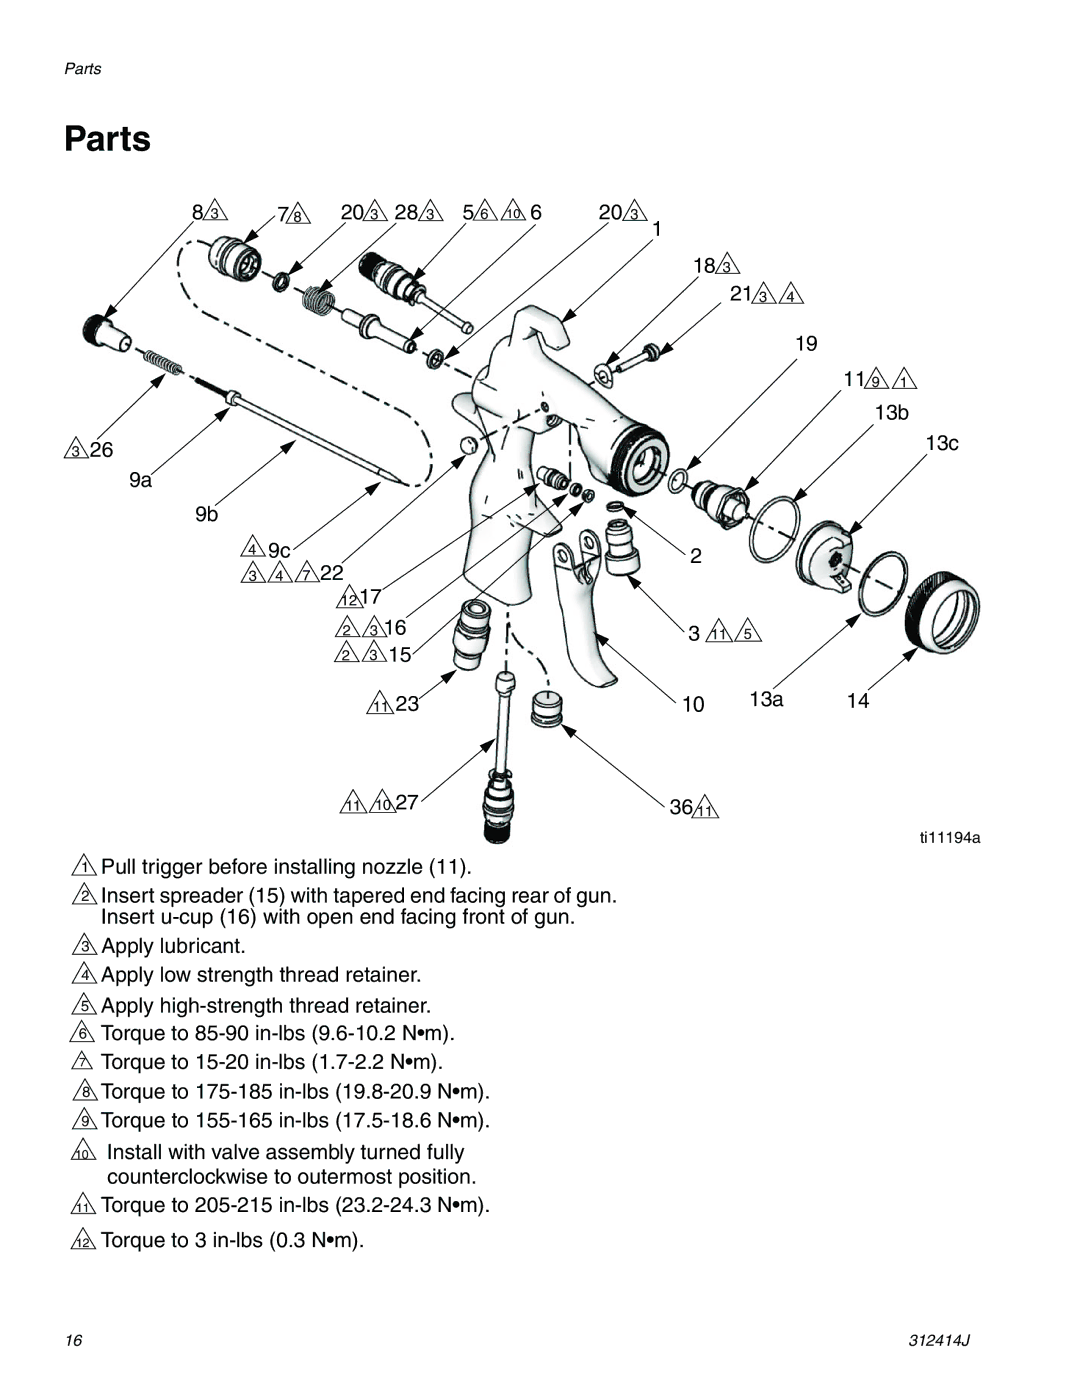
8 3 | 7 8 | 20 3 | 28 3 | 5 6 | 10 | 6 | 20 3 |
3 26
9a
9b
49c
3 4 7 22
1217
23 16
23 15
11 23
11 10 27
![]() 1 Pull trigger before installing nozzle (11).
1 Pull trigger before installing nozzle (11).
![]() 2 Insert spreader (15) with tapered end facing rear of gun. Insert
2 Insert spreader (15) with tapered end facing rear of gun. Insert
![]() 3 Apply lubricant.
3 Apply lubricant.
![]() 4 Apply low strength thread retainer.
4 Apply low strength thread retainer.
![]() 5 Apply
5 Apply
![]() 6 Torque to
6 Torque to ![]() 7 Torque to
7 Torque to
8Torque to ![]() 9 Torque to
9 Torque to
10Install with valve assembly turned fully counterclockwise to outermost position.
11Torque to
12Torque to 3
1
18 3
21 3 4
19
2
3 11 5
1013a
36 11
11 9 1
13b
13c
14
ti11194a
16 | 312414J |
