Setup
Adjust Spray Pattern
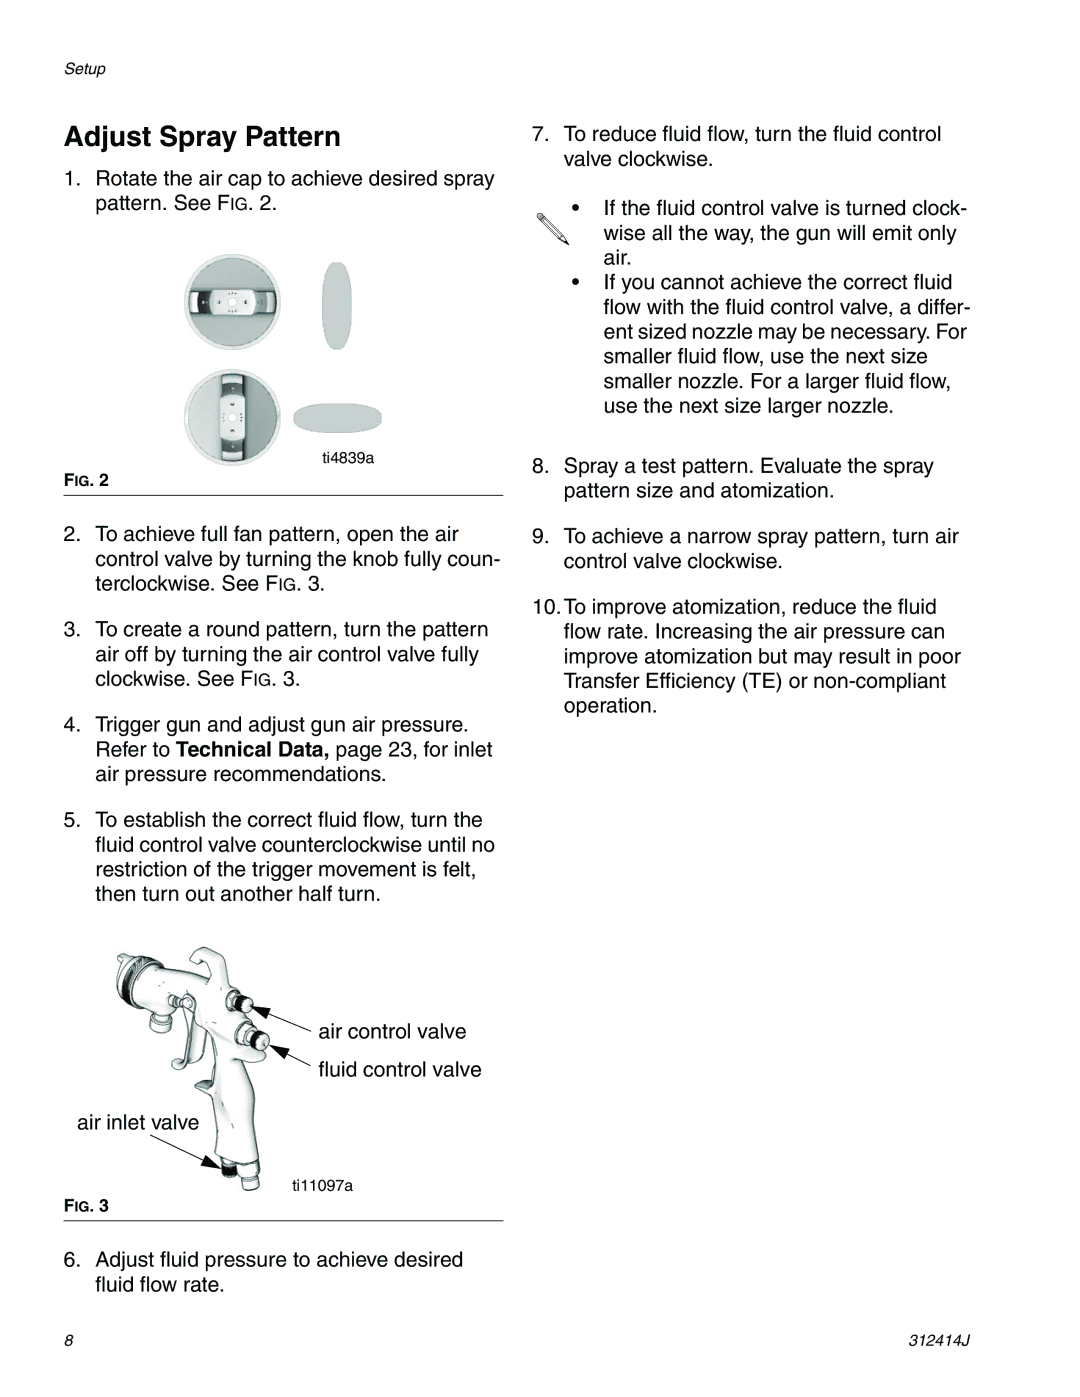
1.Rotate the air cap to achieve desired spray pattern. See FIG. 2.
ti4839a
FIG. 2
2.To achieve full fan pattern, open the air control valve by turning the knob fully coun- terclockwise. See FIG. 3.
3.To create a round pattern, turn the pattern air off by turning the air control valve fully clockwise. See FIG. 3.
4.Trigger gun and adjust gun air pressure. Refer to Technical Data, page 23, for inlet air pressure recommendations.
5.To establish the correct fluid flow, turn the fluid control valve counterclockwise until no restriction of the trigger movement is felt, then turn out another half turn.
7.To reduce fluid flow, turn the fluid control valve clockwise.
•If the fluid control valve is turned clock-
wise all the way, the gun will emit only air.
•If you cannot achieve the correct fluid flow with the fluid control valve, a differ- ent sized nozzle may be necessary. For smaller fluid flow, use the next size smaller nozzle. For a larger fluid flow, use the next size larger nozzle.
8.Spray a test pattern. Evaluate the spray pattern size and atomization.
9.To achieve a narrow spray pattern, turn air control valve clockwise.
10.To improve atomization, reduce the fluid flow rate. Increasing the air pressure can improve atomization but may result in poor Transfer Efficiency (TE) or
![]() air control valve
air control valve
fluid control valve
air inlet valve
ti11097a
FIG. 3
6.Adjust fluid pressure to achieve desired fluid flow rate.
8 | 312414J |
