Flushing
When to Flush
1.New sprayer. Your new sprayer was factory tested with lightweight oil which was left in to protect pump parts from corrosion.
Before using oil- base paint, flush with mineral spirits only.
Before using water- base paint, flush with mineral spirits, followed by soapy water, then a clean water rinse.
2.Changing colors. Flush with a compatible solvent such as mineral spirits.
3.Changing from
4.Changing from
5.Storage.
Water- base paint: flush with water, then mineral spirits and leave the pump, hose and gun filled with mineral spirits. Follow the Pressure Relief Procedure Warning, page 10.
Oil- base paint: flush with mineral spirits. Follow the Pressure Relief Procedure Warning, page 10.
6.Startup after storage.
Before using water- base paint, flush out mineral spirits with soapy water and then clean water. When using oil- base paint, flush out mineral spirits with fluid to be sprayed.
How to Flush
WARNING
SKIN INJECTION HAZARD
Follow the Pressure Relief Procedure
Warning on page 10. Remove the spray tip before flushing.
1.Engage the gun safety latch. Remove the spray tip from the gun.
2.Pour enough clean, compatible solvent to fill the pump and hoses into a large, grounded metal pail.
3.Place the suction tube into the pail or tilt the sprayer back (it will support itself) and place the pail under the pump. Then tilt the sprayer forward to lower the pump into the pail.
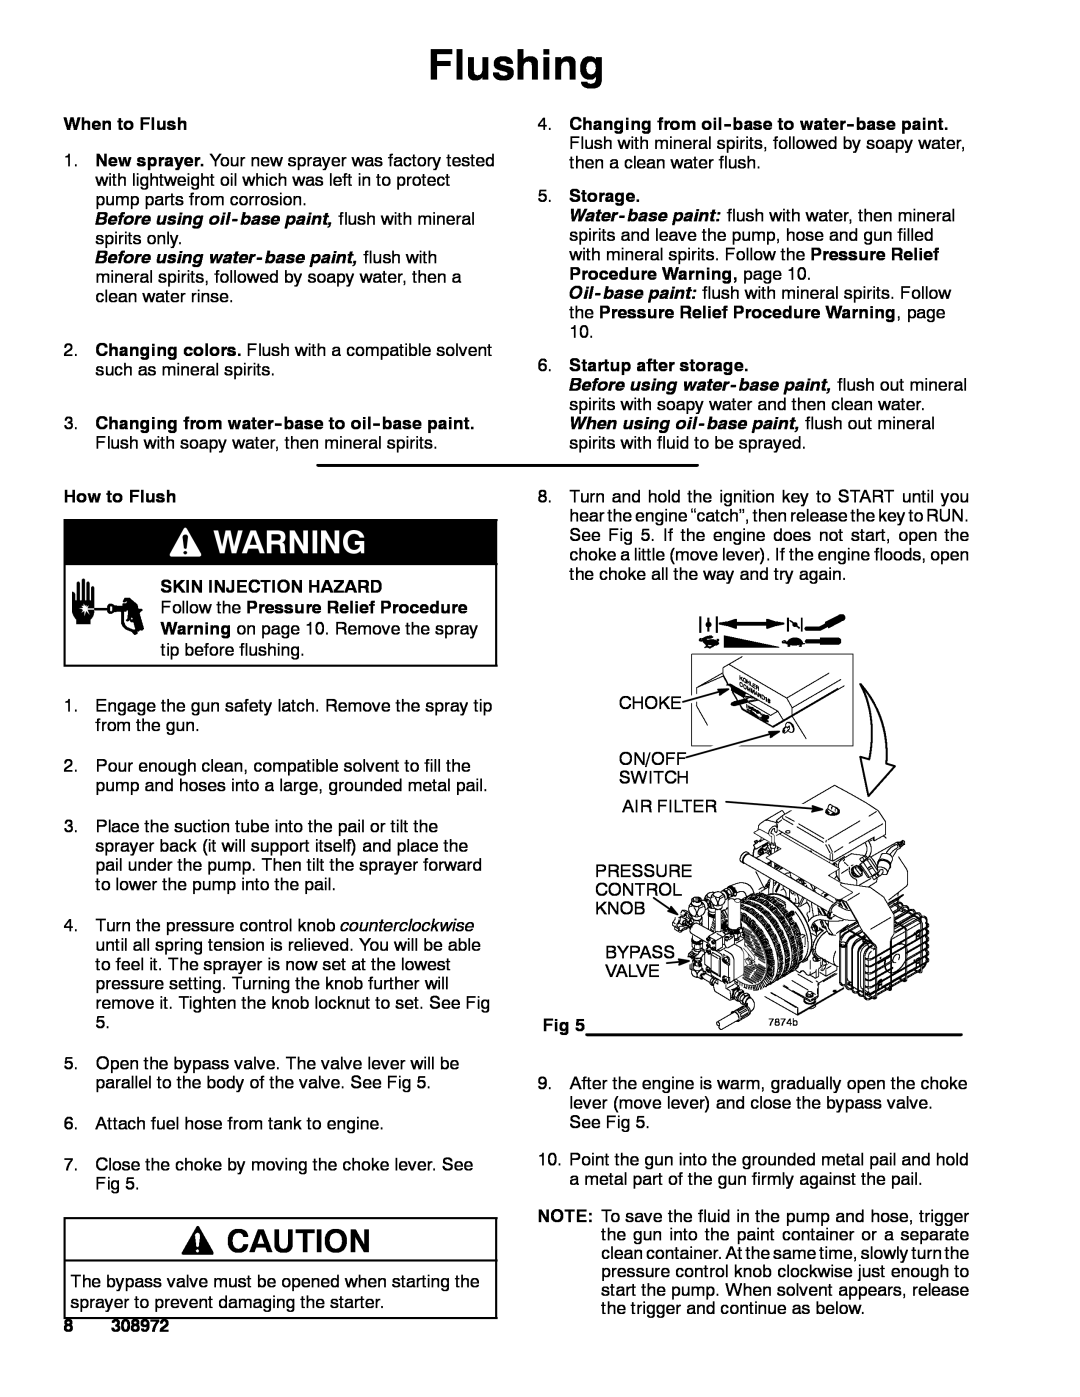
4.Turn the pressure control knob counterclockwise until all spring tension is relieved. You will be able to feel it. The sprayer is now set at the lowest pressure setting. Turning the knob further will remove it. Tighten the knob locknut to set. See Fig 5.
5.Open the bypass valve. The valve lever will be parallel to the body of the valve. See Fig 5.
6.Attach fuel hose from tank to engine.
7.Close the choke by moving the choke lever. See Fig 5.
![]() CAUTION
CAUTION
The bypass valve must be opened when starting the sprayer to prevent damaging the starter.
8 308972
8.Turn and hold the ignition key to START until you hear the engine “catch”, then release the key to RUN. See Fig 5. If the engine does not start, open the choke a little (move lever). If the engine floods, open the choke all the way and try again.
CHOKE![]()
![]()
![]()
![]()
![]()
![]()
![]()
![]()
ON/OFF![]()
SWITCH
AIR FILTER ![]()
PRESSURE
CONTROL
KNOB ![]()
BYPASS
VALVE ![]()
Fig 5 | 7874b |
|
9.After the engine is warm, gradually open the choke lever (move lever) and close the bypass valve. See Fig 5.
10.Point the gun into the grounded metal pail and hold a metal part of the gun firmly against the pail.
NOTE: To save the fluid in the pump and hose, trigger the gun into the paint container or a separate clean container. At the same time, slowly turn the pressure control knob clockwise just enough to start the pump. When solvent appears, release the trigger and continue as below.