
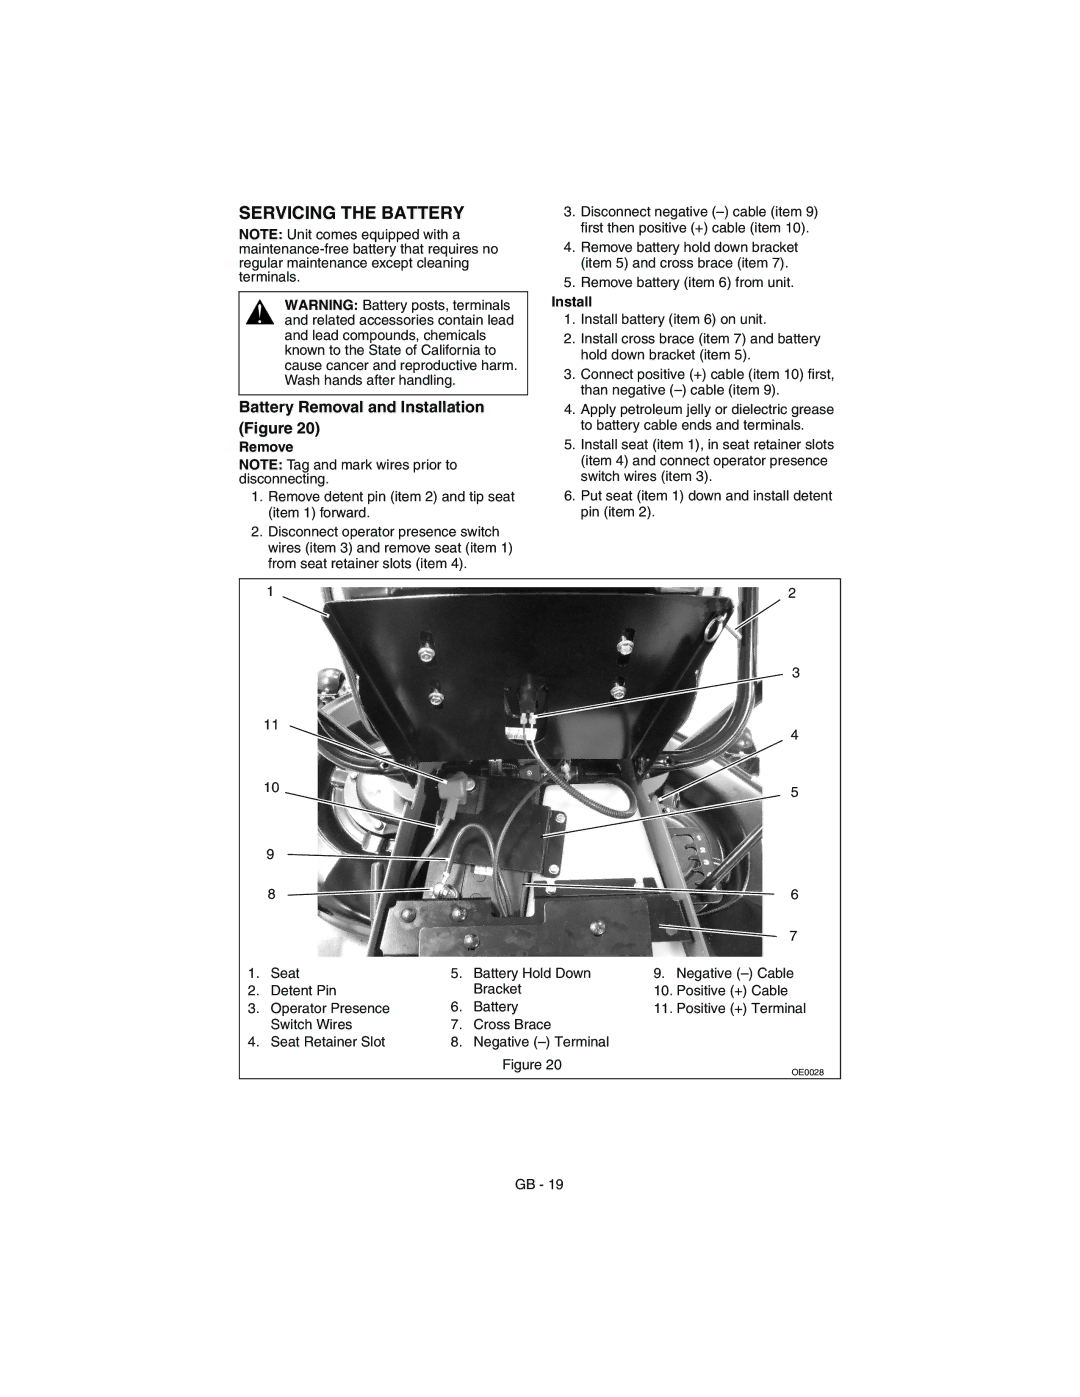
927060-1028, 927062-1232, 927064-1440 specifications
The Gravely models 927064-1440, 927062-1232, and 927060-1028 are part of Gravely's esteemed lineup of zero-turn mowers, designed to deliver exceptional performance and durability for both residential and commercial users. Each of these models stands out due to their unique features, advanced technologies, and robust characteristics.The Gravely 927064-1440 is equipped with a powerful engine, ensuring efficient cuts even in challenging mowing conditions. With a 1440cc engine, this model provides ample horsepower, allowing for faster mowing speeds and improved productivity. Its 60-inch cutting deck is designed for precision, enabling users to tackle larger lawns with fewer passes. The adjustable cutting height feature allows for tailored mowing to suit varying grass types, ensuring a clean and professional finish.
Moving on to the 927062-1232, this model is notable for its compact size without compromising on performance. With a 32-inch cutting deck and a reliable engine, the 927062-1232 is perfect for residential yards and small commercial properties. It boasts a tight turning radius, making it maneuverable in tight spaces, such as flower beds and around trees. This versatility is complemented by a comfortable operator seat and easy-to-use controls, enhancing the mowing experience.
Lastly, the Gravely 927060-1028 offers a balance between power and efficiency with its 1028cc engine and 60-inch cutting deck. This model is engineered for durability, featuring a heavy-duty steel frame that withstands the rigors of regular use. The innovative suspension system enhances ride comfort, allowing operators to navigate uneven terrains with ease. Additionally, the 927060-1028 includes advanced twin-blade technology, ensuring a consistent cut and superior grass discharge.
All these models feature user-friendly interfaces, including intuitive control systems and ergonomic seating, making them accessible for users of all skill levels. The integration of modern technologies such as advanced air filtration and fuel efficiency measures helps prolong engine life and reduce environmental impact.
Overall, Gravely's 927064-1440, 927062-1232, and 927060-1028 zero-turn mowers are engineered for exceptional performance, reliability, and comfort. They represent Gravely's commitment to quality and innovation, making them ideal choices for anyone seeking a dependable mowing solution. Whether for residential lawns or commercial landscaping, these models provide the efficiency and effectiveness that today's users demand.