
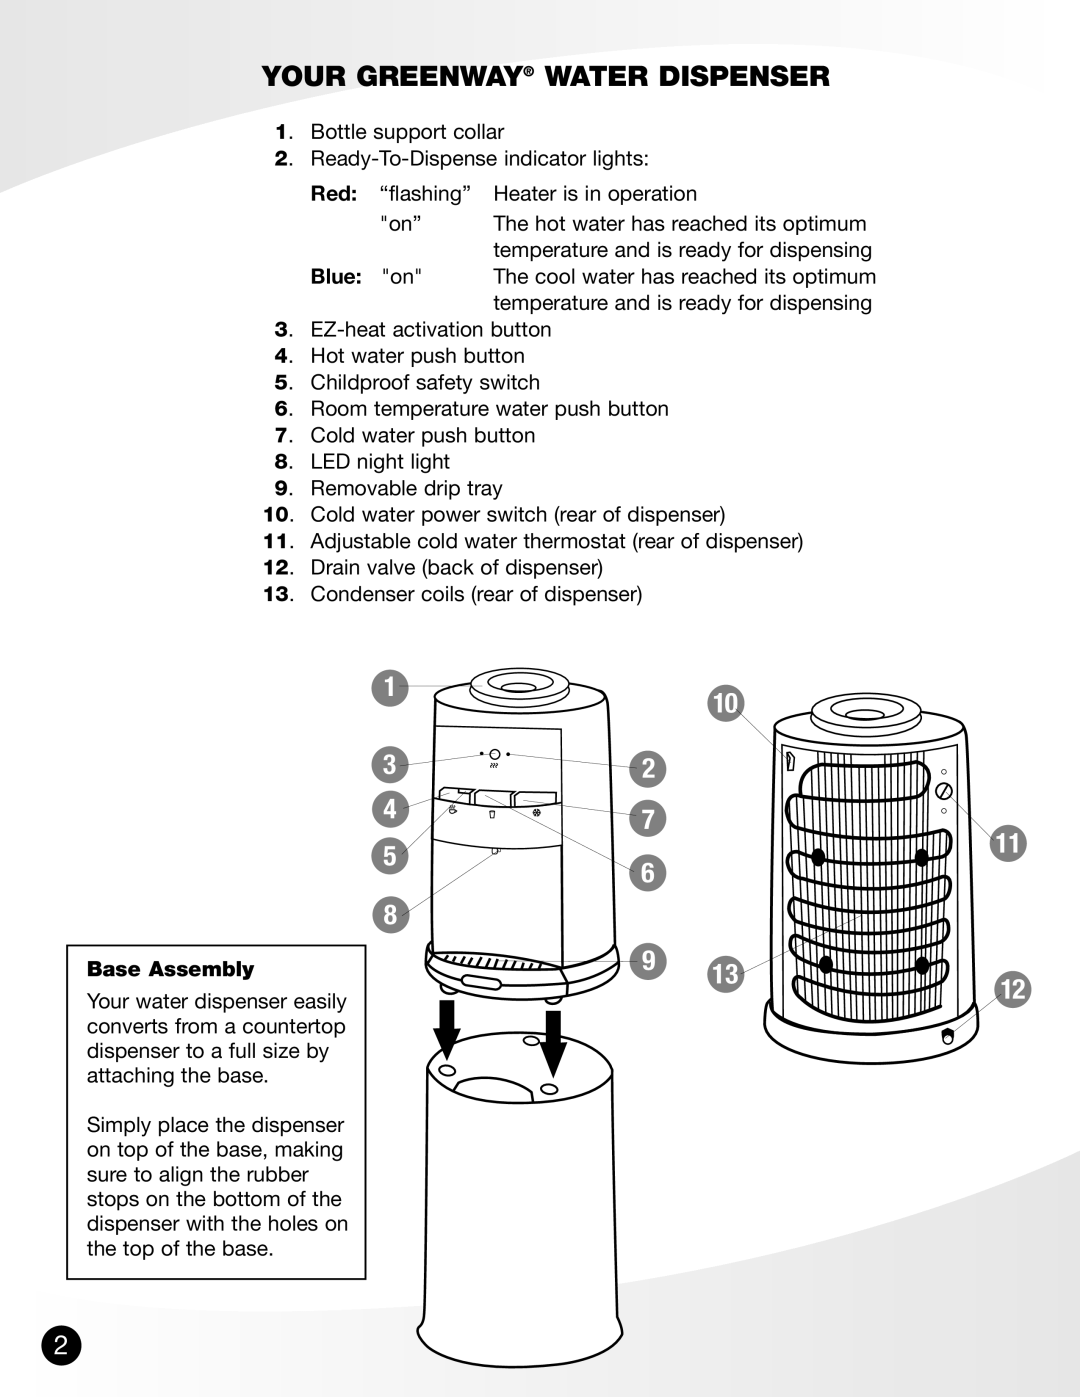
GWD-4650W specifications
Greenway Home Products GWD-4650W is a highly efficient and innovative home appliance designed for optimal water purification and filtration. Aimed at providing households with clean and safe drinking water, this advanced water filtration system incorporates several cutting-edge technologies to enhance character and overall functionality.One of the standout features of the GWD-4650W is its multi-stage filtration process. This system integrates multiple filters, including sediment, carbon block, and reverse osmosis, to effectively remove contaminants such as chlorine, lead, and other harmful substances present in tap water. By utilizing this comprehensive filtration approach, users can be assured of receiving purified water that meets their health and safety standards.
Another significant characteristic of the GWD-4650W is its sleek and modern design. Its compact size allows for easy installation under kitchen sinks, making it an ideal choice for smaller spaces. The unit's user-friendly interface includes an LED indicator that alerts users when it is time to change the filters, ensuring that the system is always operating at peak efficiency.
The GWD-4650W also boasts a high production rate, enabling it to deliver a robust supply of purified water when needed. With a filtration capacity of up to 50 gallons per day, this appliance is well-equipped to meet the demands of an entire household, making it a practical solution for families and individuals alike.
In addition to its impressive filtration capabilities, the GWD-4650W is designed with environmental sustainability in mind. By reducing reliance on bottled water, this system helps minimize plastic waste, contributing to a healthier planet. Furthermore, its energy-efficient operation ensures that users can enjoy purified water without incurring high energy costs.
Maintenance of the GWD-4650W is straightforward and convenient. With simple filter replacement procedures and easy access to components, users can keep the system running smoothly without the need for professional assistance.
Overall, the Greenway Home Products GWD-4650W stands out as a reliable and effective water filtration system. Its combination of advanced filtration technologies, user-friendly design, high production rate, and commitment to sustainability makes it a valuable addition to any home seeking to improve water quality and promote health and wellness.