Adjustments
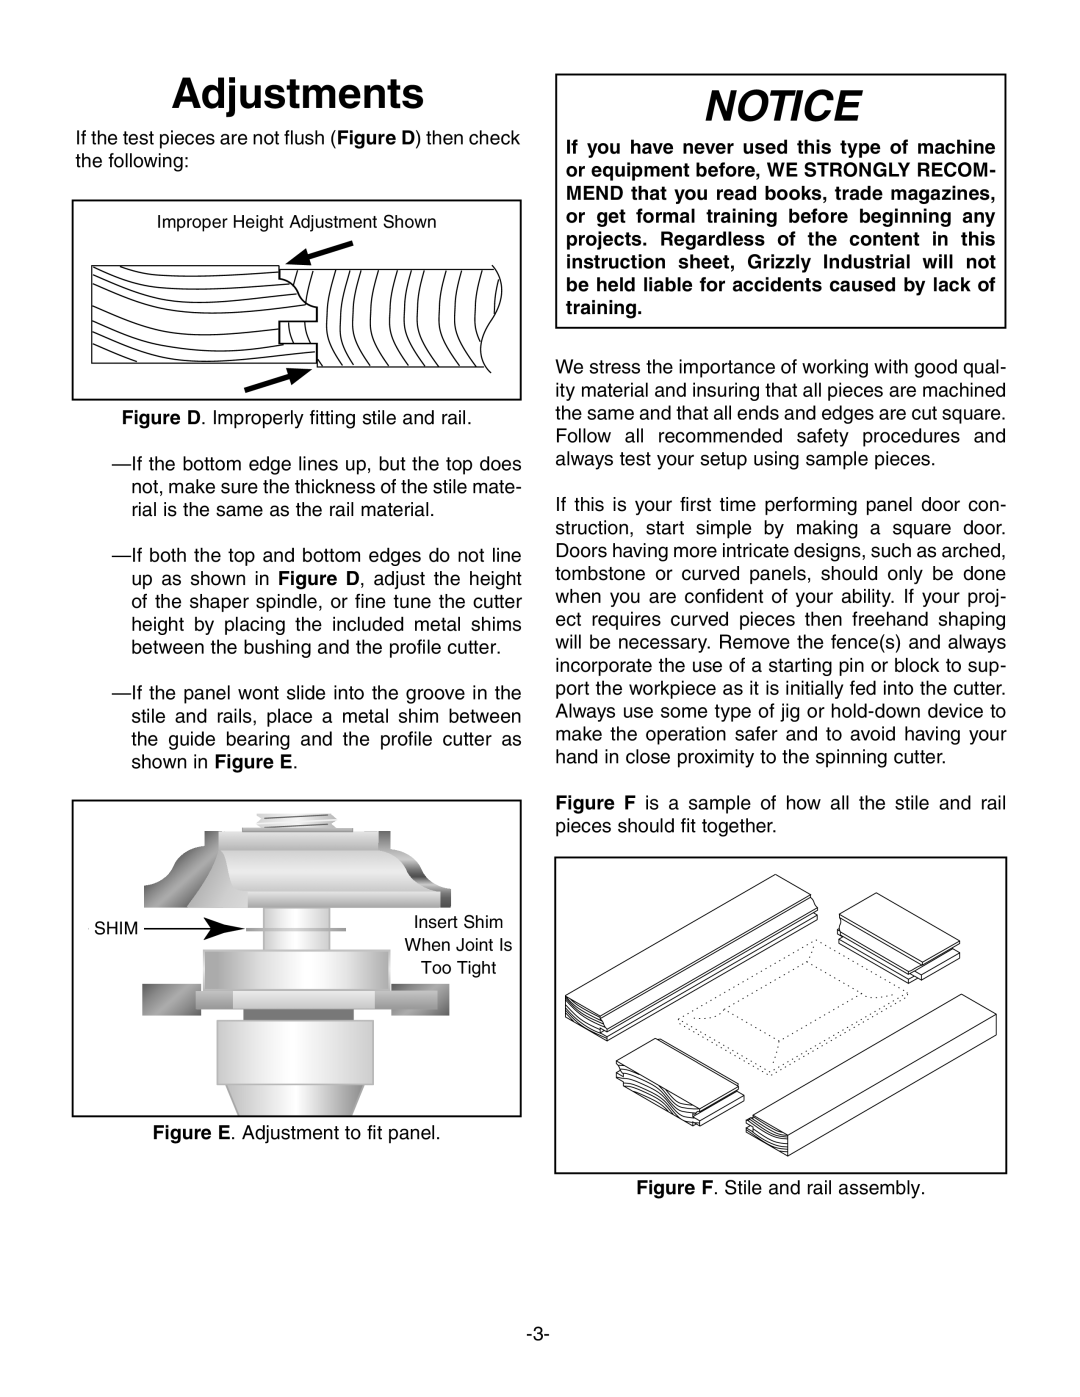
If the test pieces are not flush (Figure D) then check the following:
Improper Height Adjustment Shown |
Figure D. Improperly fitting stile and rail.
—If the bottom edge lines up, but the top does not, make sure the thickness of the stile mate- rial is the same as the rail material.
—If both the top and bottom edges do not line up as shown in Figure D, adjust the height of the shaper spindle, or fine tune the cutter height by placing the included metal shims between the bushing and the profile cutter.
—If the panel wont slide into the groove in the stile and rails, place a metal shim between the guide bearing and the profile cutter as shown in Figure E.
SHIM | Insert Shim | |
When Joint Is | ||
| ||
| Too Tight |
Figure E. Adjustment to fit panel.
NOTICE
If you have never used this type of machine or equipment before, WE STRONGLY RECOM- MEND that you read books, trade magazines, or get formal training before beginning any projects. Regardless of the content in this instruction sheet, Grizzly Industrial will not be held liable for accidents caused by lack of training.
We stress the importance of working with good qual- ity material and insuring that all pieces are machined the same and that all ends and edges are cut square. Follow all recommended safety procedures and always test your setup using sample pieces.
If this is your first time performing panel door con- struction, start simple by making a square door. Doors having more intricate designs, such as arched, tombstone or curved panels, should only be done when you are confident of your ability. If your proj- ect requires curved pieces then freehand shaping will be necessary. Remove the fence(s) and always incorporate the use of a starting pin or block to sup- port the workpiece as it is initially fed into the cutter. Always use some type of jig or
