Miter Gauge
The miter gauge needs to be adjusted perpendic- ular to the face of the wheel when it is mounted in the table slot.
To adjust miter gauge:
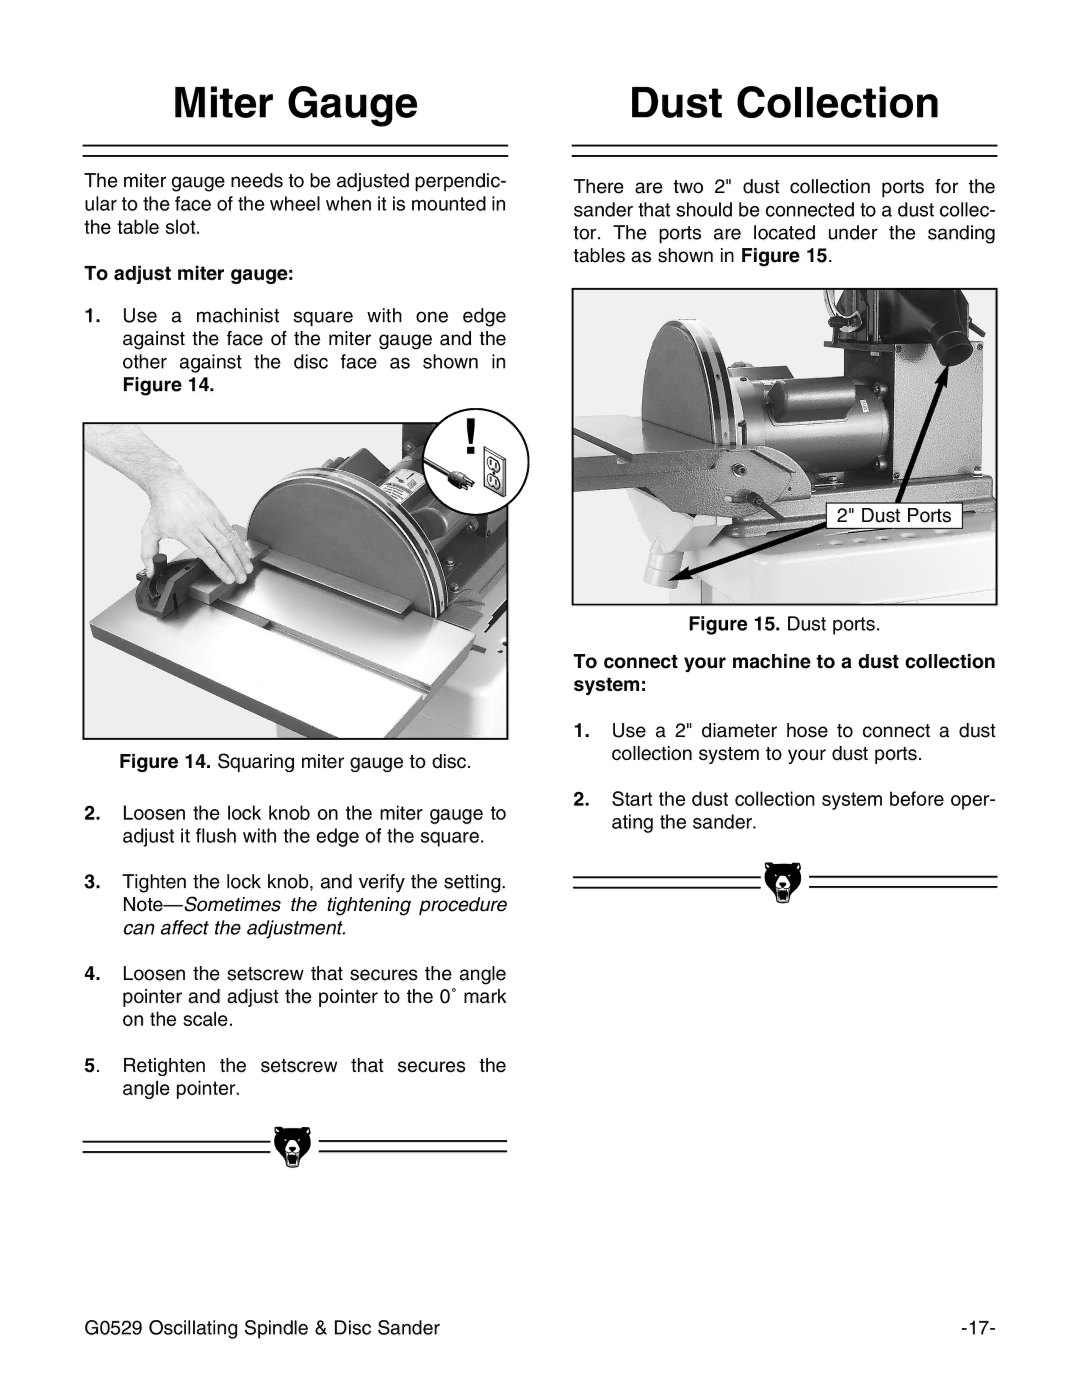
1.Use a machinist square with one edge against the face of the miter gauge and the other against the disc face as shown in
Figure 14.
!
Figure 14. Squaring miter gauge to disc.
2.Loosen the lock knob on the miter gauge to adjust it flush with the edge of the square.
3.Tighten the lock knob, and verify the setting. NoteÑSometimes the tightening procedure can affect the adjustment.
4.Loosen the setscrew that secures the angle pointer and adjust the pointer to the 0û mark on the scale.
5. Retighten the setscrew that secures the angle pointer.
Dust Collection
There are two 2" dust collection ports for the sander that should be connected to a dust collec- tor. The ports are located under the sanding tables as shown in Figure 15.
2" Dust Ports
Figure 15. Dust ports.
To connect your machine to a dust collection system:
1.Use a 2" diameter hose to connect a dust collection system to your dust ports.
2.Start the dust collection system before oper- ating the sander.
G0529 Oscillating Spindle & Disc Sander |
