Tip: Attach a piece of 3Ú4" thick hardwood to the blade side of the fence as shown in Figure 29. This will keep thin materials from wedging between the fence and table and will also protect the fence from coming in contact with the blade when dadoing or ripping thin stock. Remember to flip and adjust the mea- surement scale on the rail to compensate for the thickness of the sacrificial fence.
Sacrificial Fence |
Rip Fence |
Wood Screws |
Figure 29. Attaching a sacrificial fence.
To install and adjust the Model Z fence:
1.First, make sure the front clamp is engaging the front rail with the lock handle at
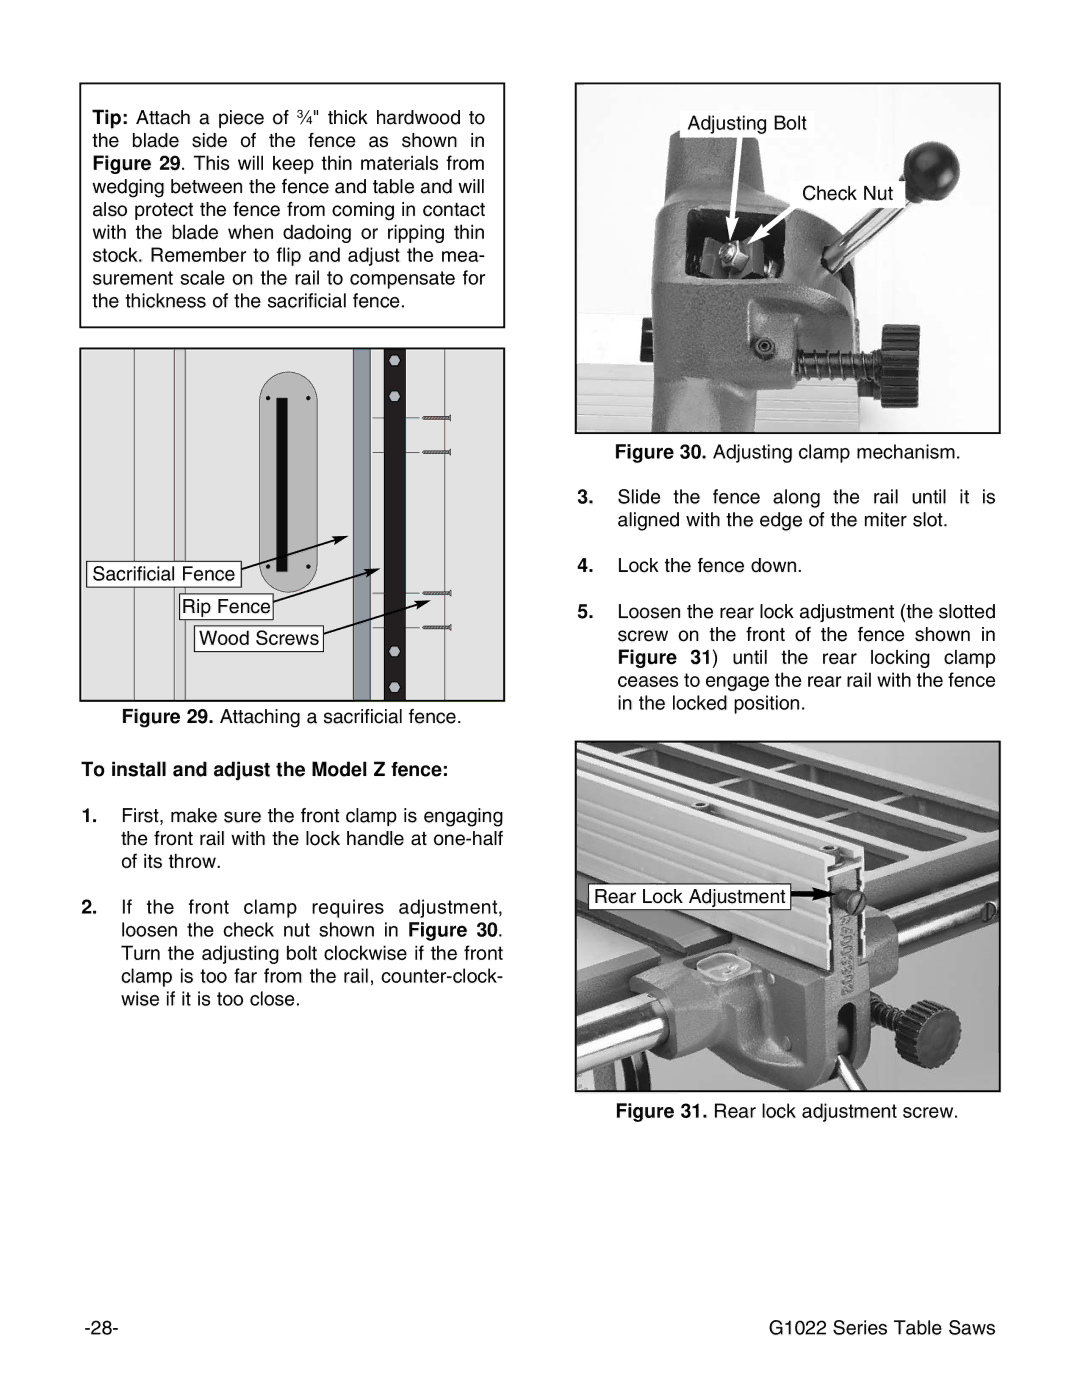
2.If the front clamp requires adjustment, loosen the check nut shown in Figure 30. Turn the adjusting bolt clockwise if the front clamp is too far from the rail,
Adjusting Bolt
Check Nut
Figure 30. Adjusting clamp mechanism.
3.Slide the fence along the rail until it is aligned with the edge of the miter slot.
4.Lock the fence down.
5.Loosen the rear lock adjustment (the slotted screw on the front of the fence shown in Figure 31) until the rear locking clamp ceases to engage the rear rail with the fence in the locked position.
Rear Lock Adjustment
Figure 31. Rear lock adjustment screw.
G1022 Series Table Saws |