3.Tighten the lock nuts and recheck the align- ment using the same hardwood block. Tightening the lock nuts will pull the drum downward slightly. Be sure to adjust to com- pensate for this movement. Do not over tighten the lock nuts. The bearing blocks can break if over tightened.
4.For Models G1066/G1079 repeat steps
Use care when tightening lock nuts. While they are made of durable cast metal, the bearing blocks are susceptible to breakage if the metal is fatigued by excess tension caused by overtightening.
Figure 9. Model G1066Z rear drum
adjustment control.
To adjust the drums perpendicular to the feed direction:
1.Disconnect the sander from the power source!
2.First measure the distance between the out- side of the front drum and the inside of the front brace. The distances should be within 1⁄8" of each other at each end of the drum.
3.Repeat the measurements with the rear drum and brace. If the measurements are not within 1⁄8", the drums can be moved by loosening the lock nuts on the bearing blocks and moving one end of the drum forward or backward as necessary in the slotted holes. If the drums are not perpendicular to feed direction, the sandpaper will creep toward one end of the drum. After you have adjust- ed the drums, do not forget to tighten the lock nuts and recheck the alignment.
To adjust the drums parallel to the conveyor belt:
1.Disconnect the sander from the power source!
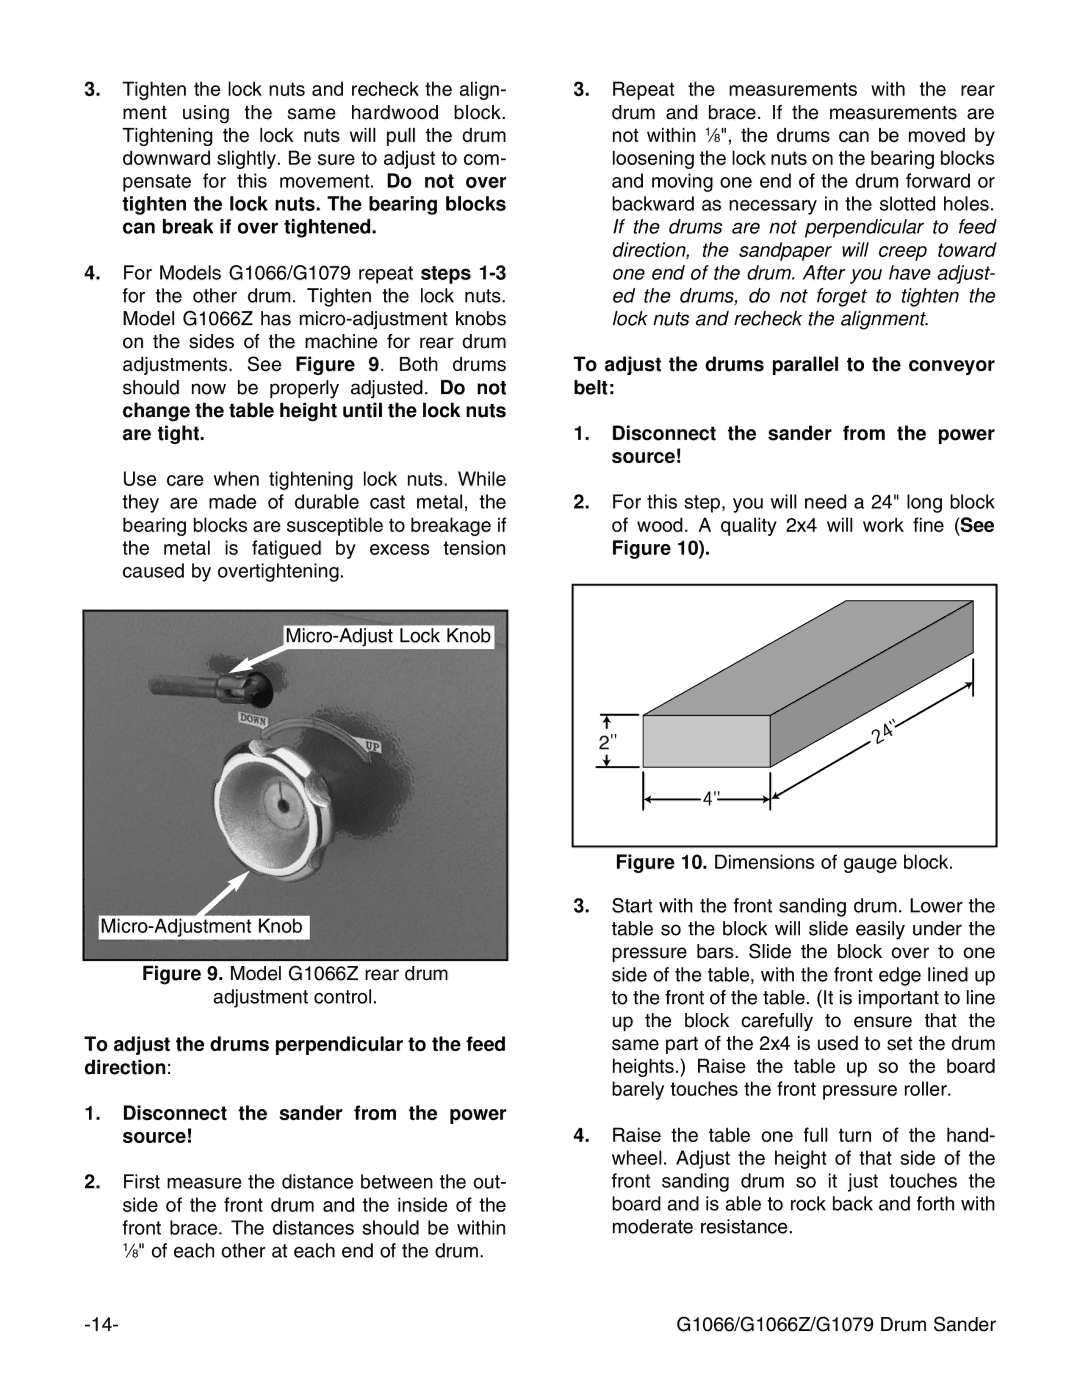
2.For this step, you will need a 24" long block of wood. A quality 2x4 will work fine (See
Figure 10).
Figure 10. Dimensions of gauge block.
3.Start with the front sanding drum. Lower the table so the block will slide easily under the pressure bars. Slide the block over to one side of the table, with the front edge lined up to the front of the table. (It is important to line up the block carefully to ensure that the same part of the 2x4 is used to set the drum heights.) Raise the table up so the board barely touches the front pressure roller.
4.Raise the table one full turn of the hand- wheel. Adjust the height of that side of the front sanding drum so it just touches the board and is able to rock back and forth with moderate resistance.
G1066/G1066Z/G1079 Drum Sander |