Bearing Replacement
The tools necessary for this job are a large round shaft screwdriver and a bench vise. Replace bearing as follows:
1.Remove the roller housing from the drum sander and clamp it tightly in a bench vise.
2.Insert the screwdriver into the center hole of the bearing as shown in Figure 18. Lever the bearing until it turns perpendicular to the housing. Once the bearing is turned 90° from the housing, it should slide free with little effort. The housing is designed with notches that allow the bearing to be inserted and removed. It is important that you lever the bearing so it turns in alignment to those notches.
Figure 18. Detaching bearing from housing.
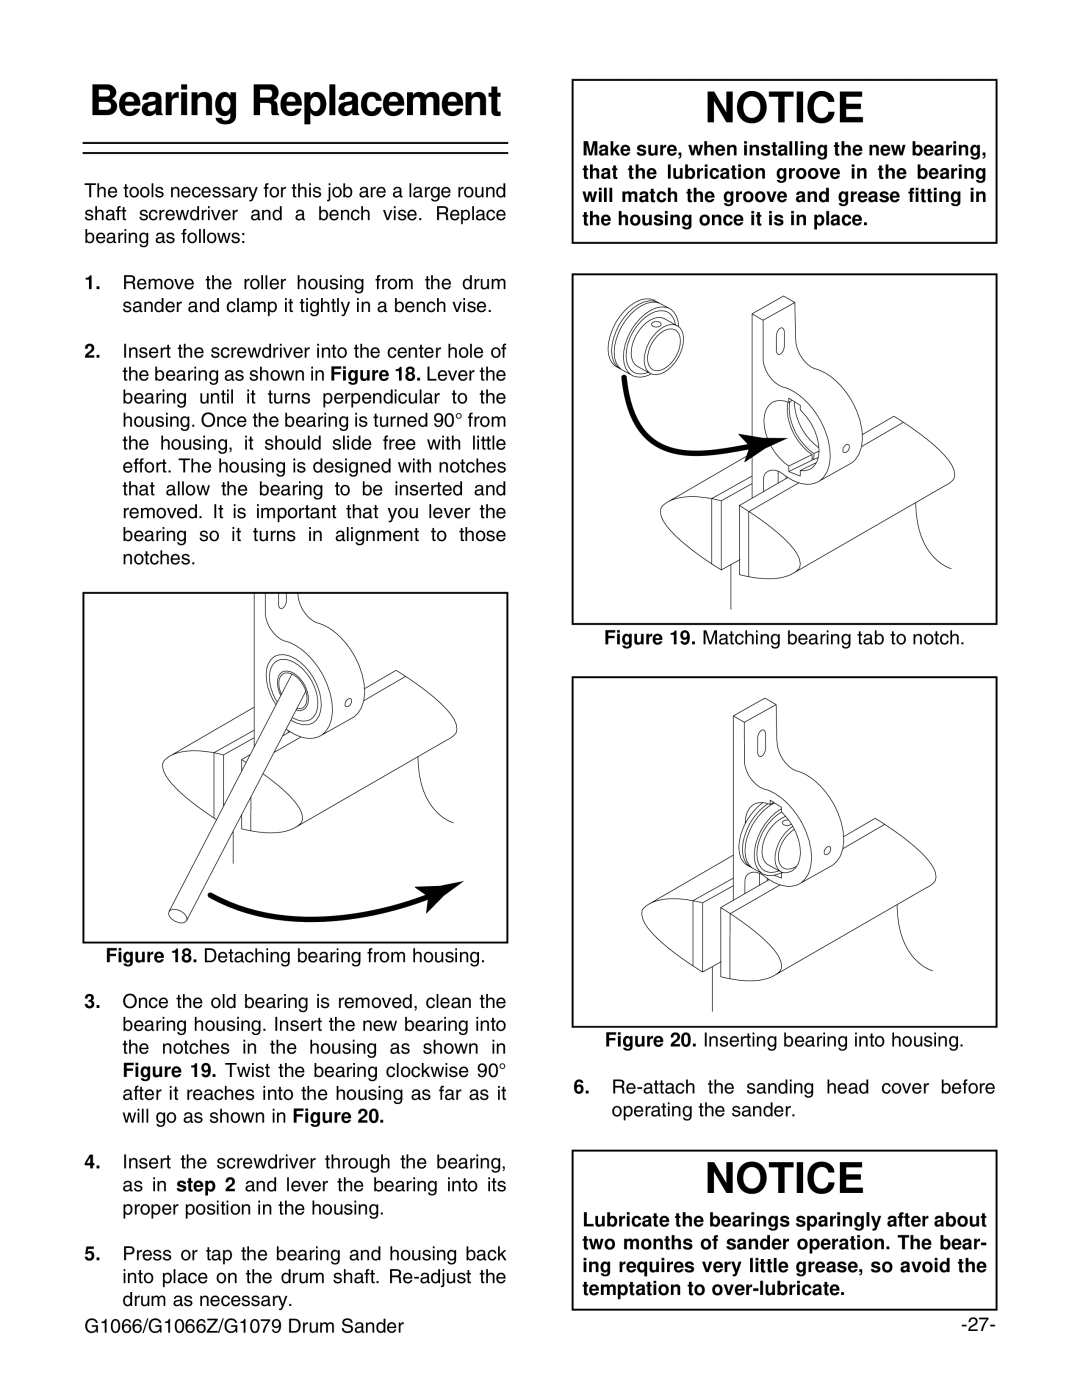
3.Once the old bearing is removed, clean the bearing housing. Insert the new bearing into the notches in the housing as shown in Figure 19. Twist the bearing clockwise 90° after it reaches into the housing as far as it will go as shown in Figure 20.
4.Insert the screwdriver through the bearing, as in step 2 and lever the bearing into its proper position in the housing.
5.Press or tap the bearing and housing back into place on the drum shaft. Re-adjust the drum as necessary.
G1066/G1066Z/G1079 Drum Sander
NOTICE
Make sure, when installing the new bearing, that the lubrication groove in the bearing will match the groove and grease fitting in the housing once it is in place.
Figure 19. Matching bearing tab to notch.
Figure 20. Inserting bearing into housing.
6.Re-attach the sanding head cover before operating the sander.
NOTICE
Lubricate the bearings sparingly after about two months of sander operation. The bear- ing requires very little grease, so avoid the temptation to