Back Stop |
| Belt Installation |
|
|
|
|
|
|
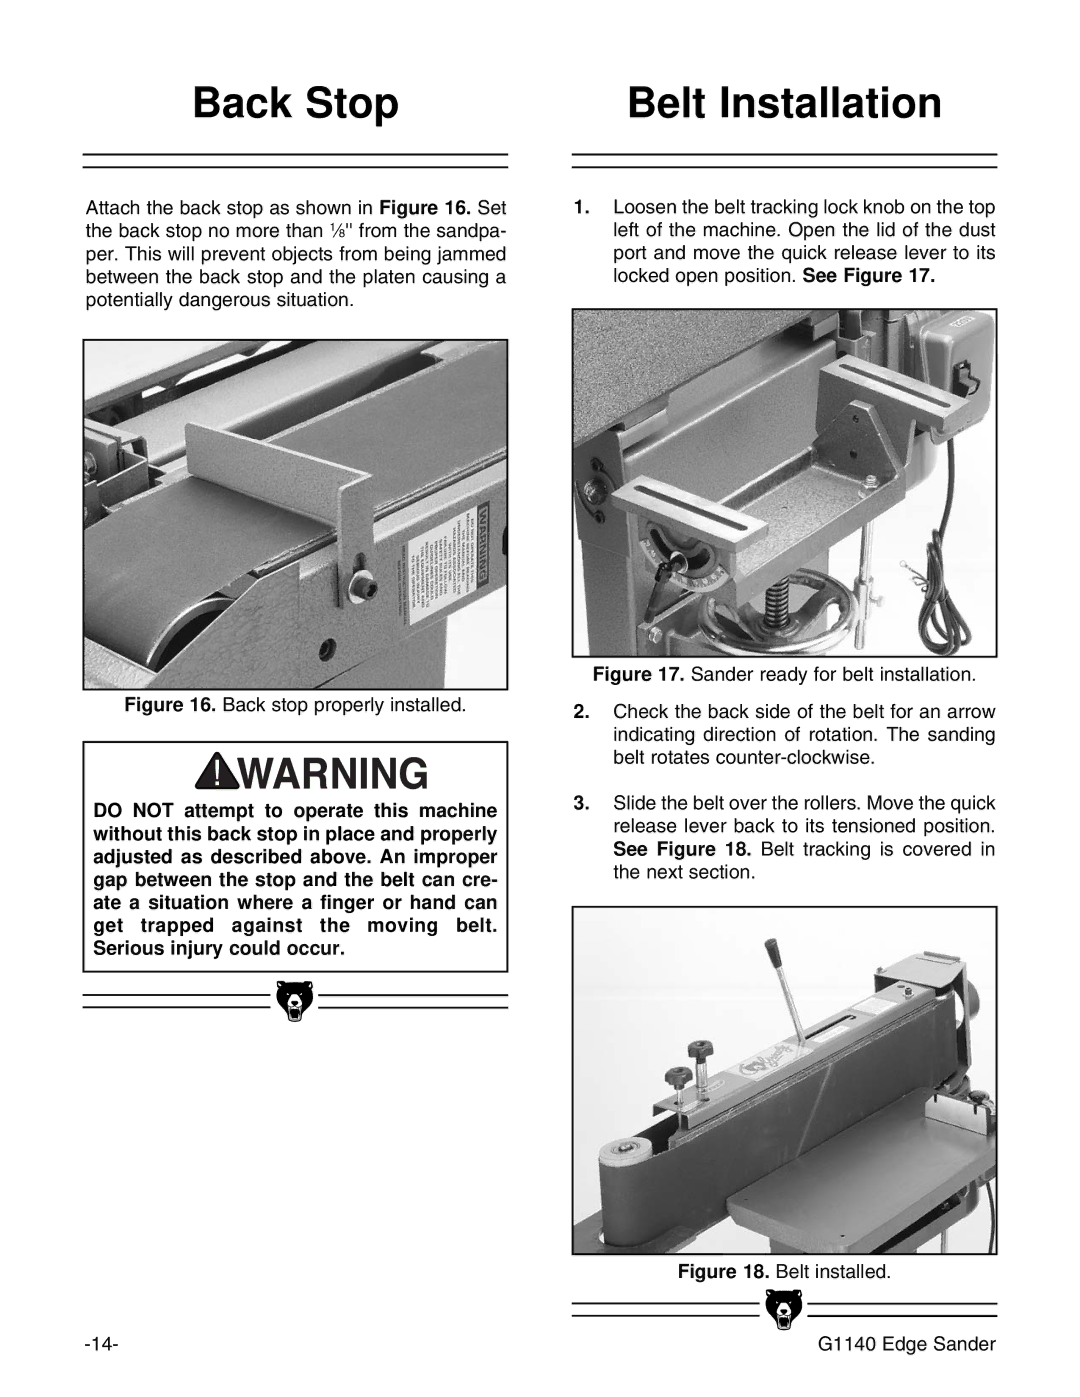
Attach the back stop as shown in Figure 16. Set the back stop no more than 1⁄8'' from the sandpa- per. This will prevent objects from being jammed between the back stop and the platen causing a potentially dangerous situation.
Figure 16. Back stop properly installed.
DO NOT attempt to operate this machine without this back stop in place and properly adjusted as described above. An improper gap between the stop and the belt can cre- ate a situation where a finger or hand can get trapped against the moving belt. Serious injury could occur.
1.Loosen the belt tracking lock knob on the top left of the machine. Open the lid of the dust port and move the quick release lever to its locked open position. See Figure 17.
Figure 17. Sander ready for belt installation.
2.Check the back side of the belt for an arrow indicating direction of rotation. The sanding belt rotates counter-clockwise.
3.Slide the belt over the rollers. Move the quick release lever back to its tensioned position. See Figure 18. Belt tracking is covered in the next section.
Figure 18. Belt installed.
|
|
|
|
|
|
|
|
|
| G1140 Edge Sander | |
|
|
