Manuals
/
Grizzly
/
Power Tools
/
Sander
Grizzly
G9985, G9984
instruction manual
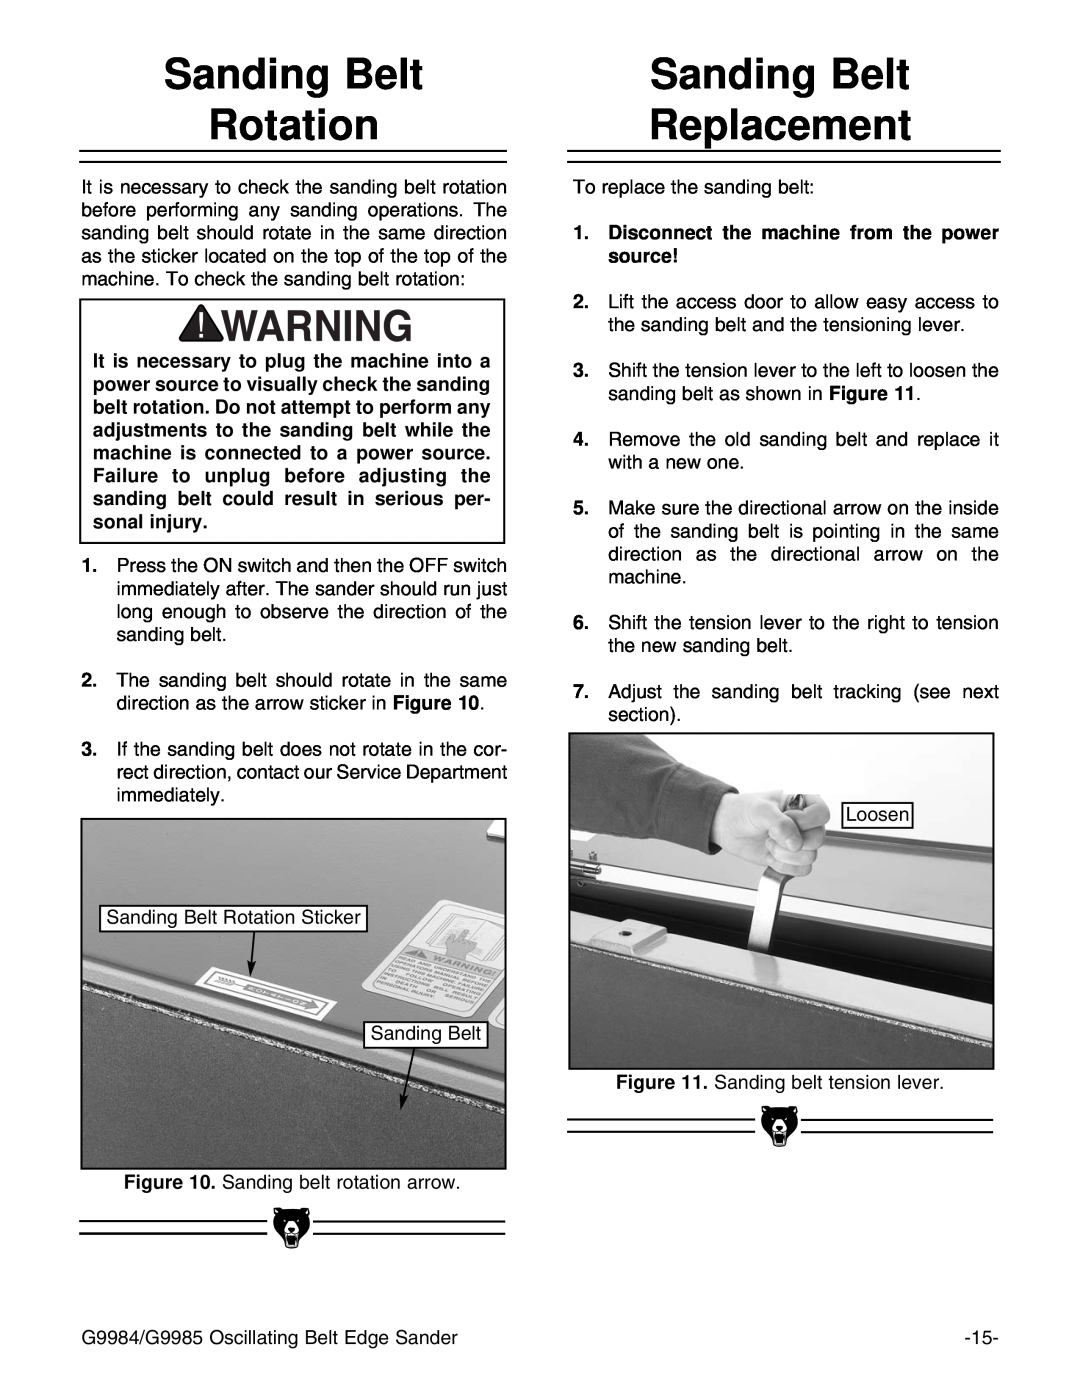
Sanding Belt Rotation, Sanding Belt Replacement
Models:
G9984
1
17
44
44
Download
44 pages
3.21 Kb
14
15
16
17
18
19
20
21
Hardware Recognition Chart
Machine Data Sheet
Warranty
Maintenance
Assembly
Adjustments
220V Single-Phase
Clean Up
Sanding Belt Replacement
Safety
Page 17
Image 17
Page 16
Page 18
Page 17
Image 17
Page 16
Page 18
Contents
INSTRUCTION MANUAL
MODEL G9984/G9985
OSCILLATING BELT EDGE SANDER
Lead from lead-based paints
SAFETY
Table Of Contents
ASSEMBLY
ADJUSTMENTS
Safety Instructions For Power Tools
SECTION 1 SAFETY
AMP RATING
LENGTH
25ft
50ft
Additional Safety Instructions For The Oscillating Belt Edge Sander
SECTION 2 CIRCUIT REQUIREMENTS
220V Single-Phase
220V Three-Phase
Extension Cords
Grounding
Commentary
SECTION 3 INTRODUCTION
Unpacking
Piece Inventory
Hardware Recognition Chart
Site Considerations
Clean Up
FLOOR LOAD
WORKING CLEARANCES
Rubber Feet
SECTION 4 ASSEMBLY
Beginning Assembly
Base Supports
Dust Collection
SECTION 5 ADJUSTMENTS
Power Switch
1. Disconnect the machine from the power source
Sanding Belt Replacement
Sanding Belt Rotation
3. Disconnect the machine from the power source
Sanding Belt Tracking
Main Table Height
Miter Gauge
Main Table Angle
Side Table Height
Side Table Angle
Sanding Belts
SECTION 6 OPERATIONS
Test Run
General
SECTION 7 MAINTENANCE
Tables
Lubrication
SECTION 8 CLOSURE
G9984/G9985 Oscillating Belt Edge Sander
G9984/G9985 Oscillating Belt Edge Sander
Overall Dimensions and Specifications
MACHINE DATA SHEET
Features
Specifications, while deemed accurate, are not guaranteed
GRIZZLY MODEL G9985 OSCILLATING EDGE SANDER
Page
DESCRIPTION
REF PART #
Page
LOCK HANDLE M10-1.5 X
149 149
LOCK HANDLE M12-1.75 X
P9984149
Page
EXT RETAINING RING 25mm
Page
THREADED ROD M12-1.75 X
Page
3 H.P. 220V 1750 R.P.M. MOTOR THREE PHASE
3 H.P. 220V 1750 R.P.M. MOTOR SINGLE PHASE
G9984/G9985 Oscillating Belt Edge Sander
G9984/G9985 Oscillating Belt Edge Sander
WARRANTY AND RETURNS
Name Street City StateZip Phone NumberE-MailFAX
WARRANTY CARD
MODEL # Order # Serial #
course, all information is strictly confidential
Send a Grizzly Catalog to a friend Name Street CityStateZip
Place Stamp Here
GRIZZLY INDUSTRIAL, INC P.O. BOX BELLINGHAM, WA
Top
Page
Image
Contents