MODEL H0613 |
HAND CRANK |
HOSE REEL |
INSTRUCTIONS |
Mounting |
To reduce the risk of injury when using this | Use 3/8" hardware through the four holes of the |
hose reel base to firmly secure the assembly to a | |
tool: | convenient and stable location. |
•Make sure the incoming air pressure
does not exceed the maximum rating |
| Assembly |
|
|
|
|
|
| ||||
of 250 PSI. Otherwise the fittings could |
|
|
|
|
|
|
| |||||
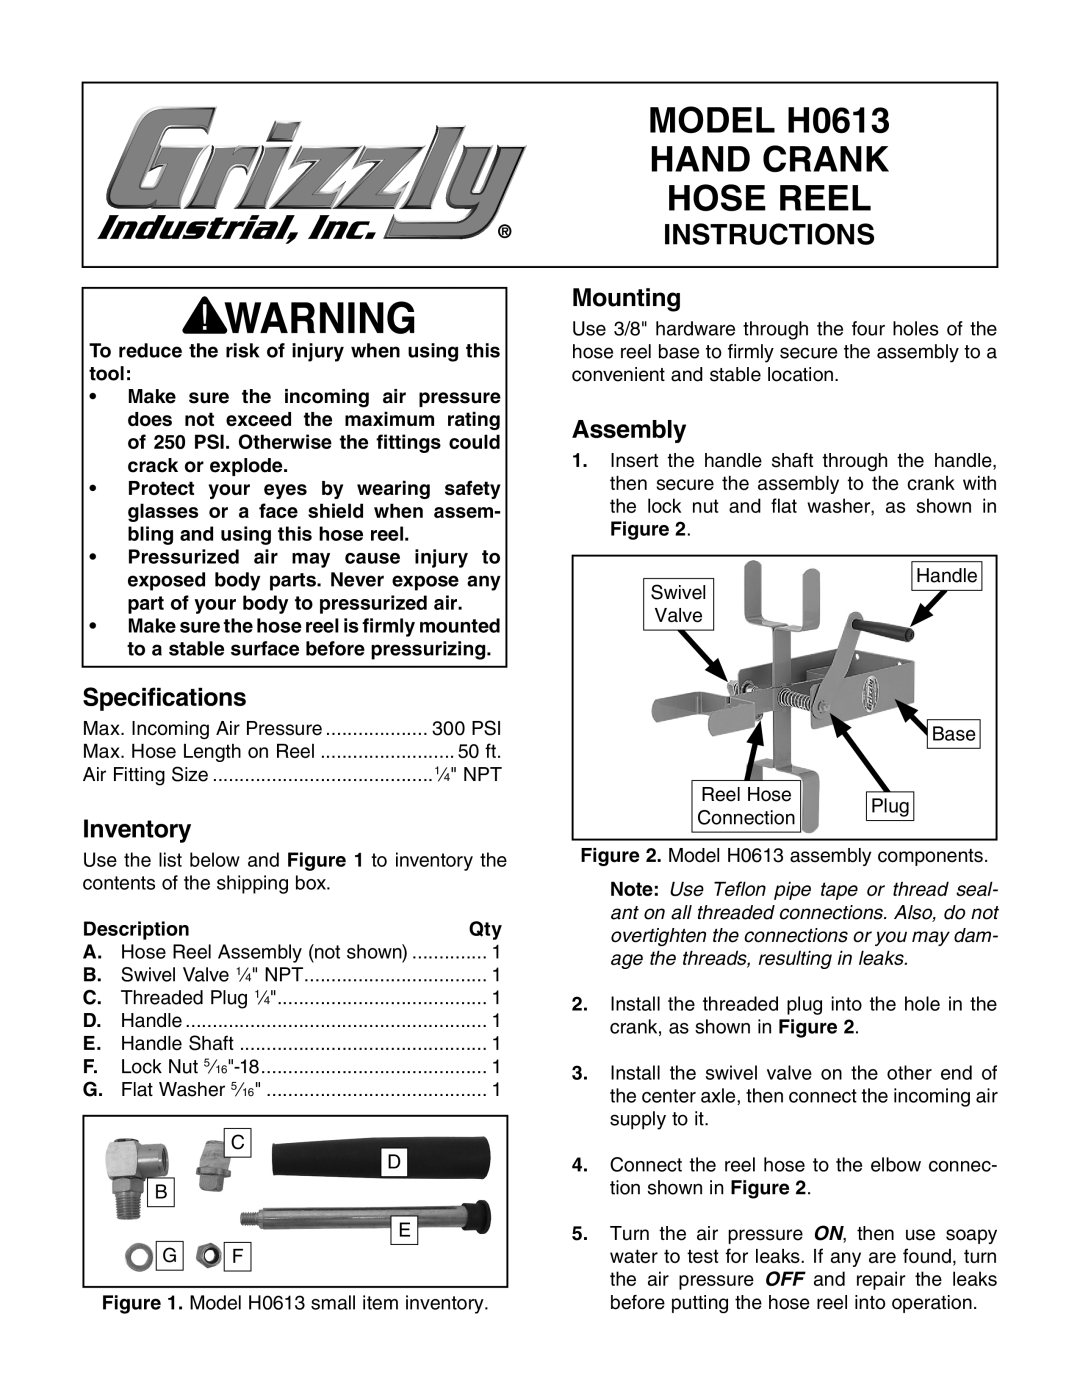
| 1. Insert the handle shaft through the handle, | |||||||||||
crack or explode. |
|
| ||||||||||
• Protect your eyes by wearing safety |
| then secure the assembly to the crank with | ||||||||||
glasses or a face shield when assem- |
| the lock nut and flat washer, as shown in | ||||||||||
bling and using this hose reel. |
|
| Figure 2. |
|
|
|
|
|
| |||
• Pressurized air may cause injury to |
|
|
|
|
|
|
|
|
|
|
| |
exposed body parts. Never expose any |
|
|
|
|
|
|
| Handle |
| |||
|
| Swivel |
| |||||||||
part of your body to pressurized air. |
|
|
|
|
|
|
|
|
| |||
|
| Valve |
|
|
|
|
|
|
| |||
• Make sure the hose reel is firmly mounted |
|
|
|
|
|
|
|
|
| |||
|
|
|
|
|
|
|
|
|
|
| ||
|
|
|
|
|
|
|
|
|
|
| ||
to a stable surface before pressurizing. |
|
|
|
|
|
|
|
|
|
|
| |
|
|
|
|
|
|
|
|
|
|
|
|
|
Specifications |
|
|
|
|
|
|
|
|
|
|
|
|
Max. Incoming Air Pressure | 300 PSI |
|
|
|
|
|
|
|
|
|
| |
|
|
|
|
|
|
|
| Base |
|
| ||
Max. Hose Length on Reel | 50 ft. |
|
|
|
|
|
|
|
|
|
|
|
|
|
|
|
|
|
|
|
|
|
| ||
Air Fitting Size | 1⁄4" NPT |
|
|
|
|
|
|
|
|
|
|
|
|
|
|
|
| Reel Hose |
|
|
|
|
|
| |
|
|
|
|
|
| Plug |
|
|
|
| ||
Inventory |
|
|
|
| Connection |
|
|
|
| |||
|
|
|
|
|
|
|
|
|
| |||
|
|
|
|
|
|
|
|
|
| |||
|
|
|
|
|
|
|
|
|
|
|
| |
|
|
|
|
|
|
|
|
|
|
|
| |
Use the list below and Figure 1 to inventory the contents of the shipping box.
Description |
| Qty | |
A. | Hose Reel Assembly (not shown) | 1 | |
B. | Swivel Valve 1⁄4" NPT | 1 | |
C. | Threaded Plug 1⁄4" | 1 | |
D. | Handle | 1 | |
E. | Handle Shaft | 1 | |
F. | Lock Nut | 1 | |
G. | Flat Washer 5⁄16" | 1 | |
|
| C |
|
|
| D |
|
| B |
|
|
|
| E |
|
| G | F |
|
Figure 1. Model H0613 small item inventory.
Figure 2. Model H0613 assembly components.
Note: Use Teflon pipe tape or thread seal- ant on all threaded connections. Also, do not overtighten the connections or you may dam- age the threads, resulting in leaks.