Guide Bar | Work Support Plate |
Adjustment | Adjustment |
In this procedure you will adjust the guide bar so there is minimal play between the miter slot and guide bar. The jig must slide in the miter slot with- out
To adjust the guide bar:
1.Unplug the table saw!
2.Set the guide bar in the left hand miter slot and slide it back and forth to see if there is any play.
In this procedure you will adjust the work sup- port plate so it is perpendicular to the table. Then you will set the positive stop so the plate can be quickly returned to the perpendicular position after angle cutting.
To adjust the work support plate:
1.Unplug the table saw!
2.Insert the jig and guide bar into the
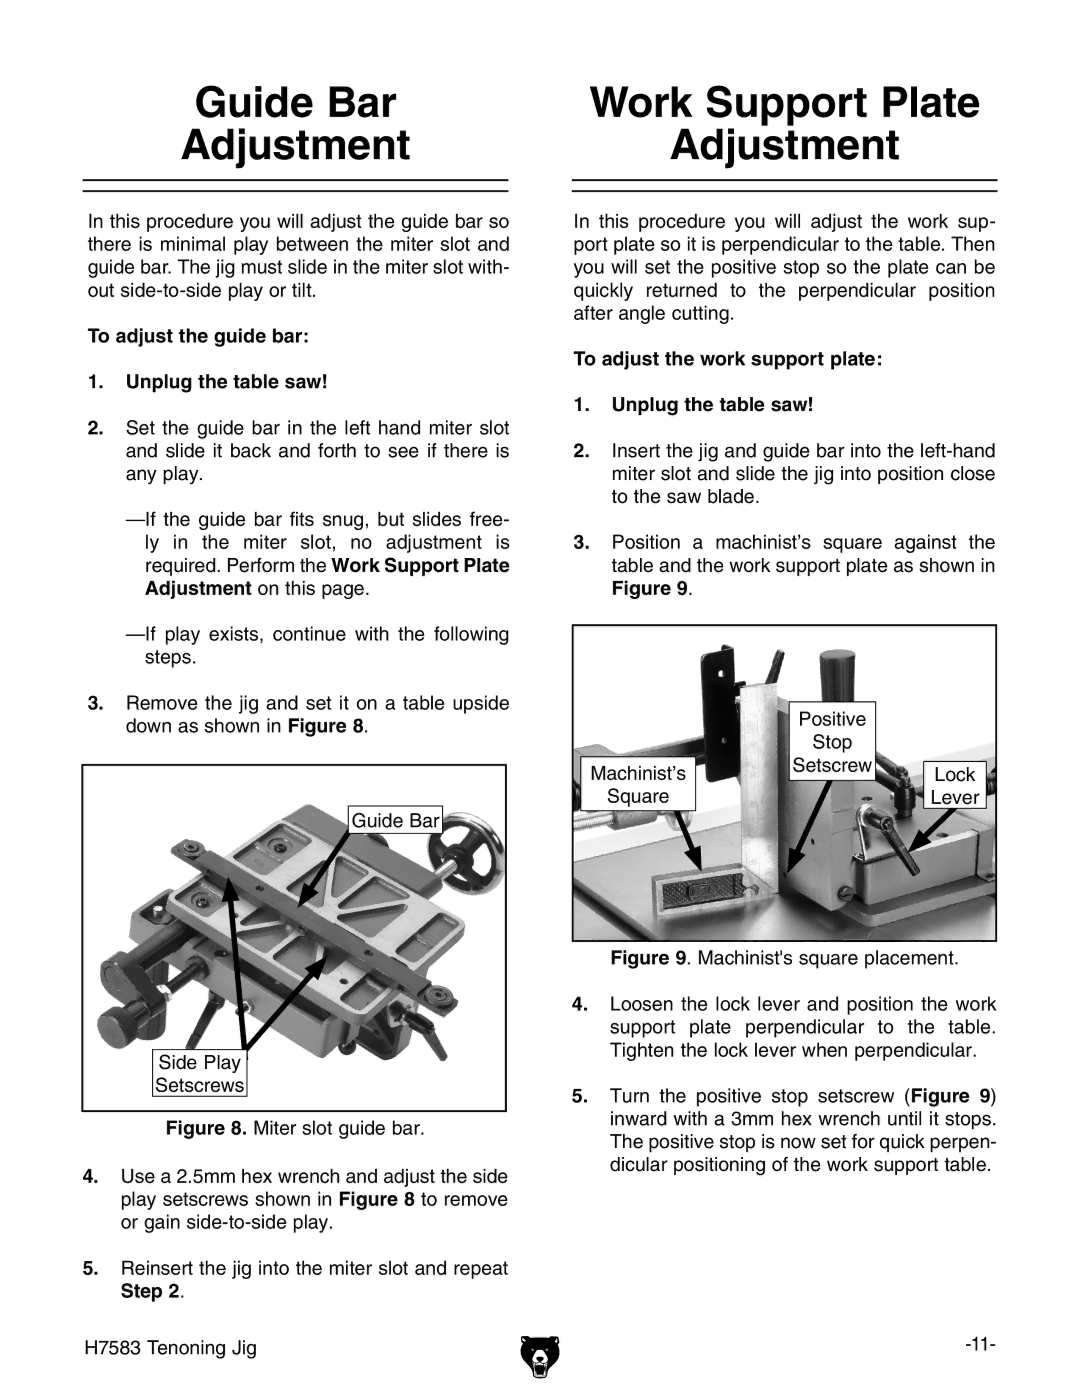
3.Position a machinist’s square against the table and the work support plate as shown in Figure 9.
|
|
|
|
| |
| steps. |
|
|
|
|
3. | Remove the jig and set it on a table upside |
|
| Positive |
|
| down as shown in Figure 8. |
|
|
| |
|
|
| Stop |
| |
|
|
|
|
| |
|
|
| Machinist’s | Setscrew | Lock |
|
|
|
| ||
|
|
| Square |
| Lever |
| Guide Bar |
|
|
|
|
|
|
| Figure 9. Machinist's square placement. | ||
|
| 4. | Loosen the lock lever and position the work | ||
|
|
| support plate perpendicular to the table. | ||
| Side Play |
| Tighten the lock lever when perpendicular. | ||
|
|
|
|
| |
| Setscrews | 5. | Turn the positive stop setscrew | (Figure 9) | |
|
| ||||
| Figure 8. Miter slot guide bar. |
| inward with a 3mm hex wrench until it stops. | ||
|
| The positive stop is now set for quick perpen- | |||
|
|
| |||
4. | Use a 2.5mm hex wrench and adjust the side |
| dicular positioning of the work support table. | ||
|
|
|
| ||
| play setscrews shown in Figure 8 to remove |
|
|
|
|
| or gain |
|
|
|
|
5.Reinsert the jig into the miter slot and repeat Step 2.
H7583 Tenoning Jig |