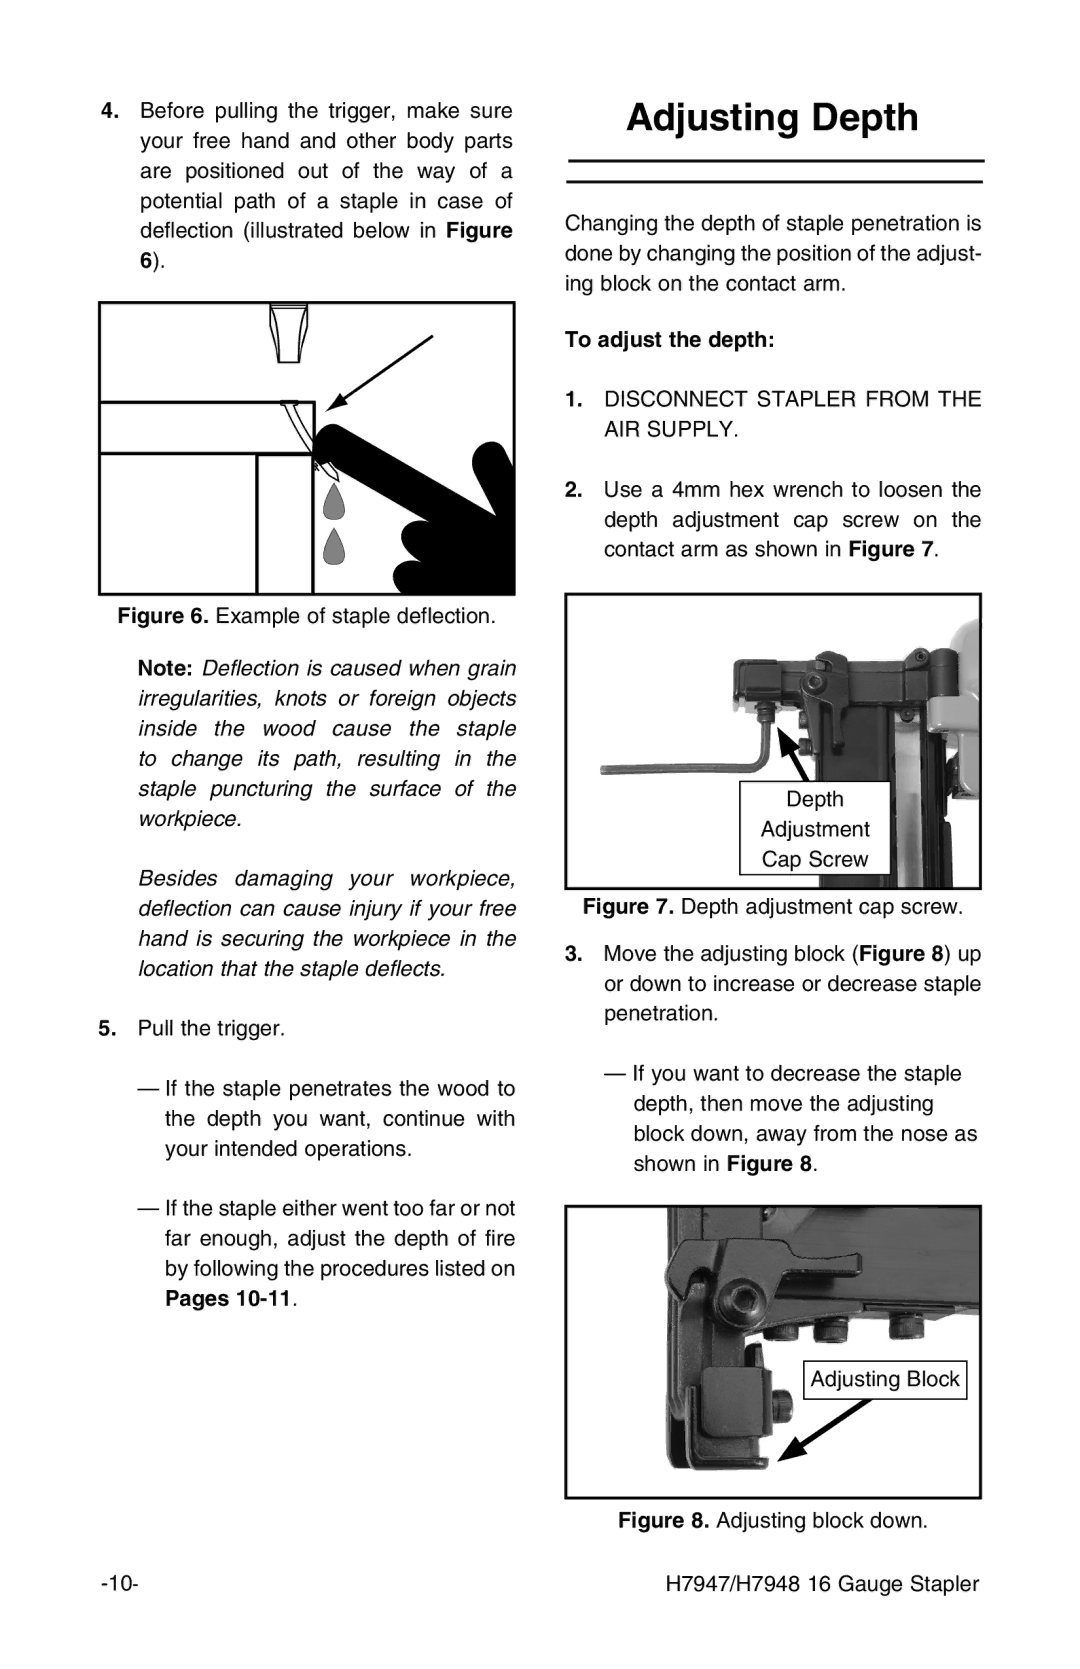
4.Before pulling the trigger, make sure your free hand and other body parts are positioned out of the way of a potential path of a staple in case of deflection (illustrated below in Figure 6).
Figure 6. Example of staple deflection.
Note: Deflection is caused when grain irregularities, knots or foreign objects inside the wood cause the staple to change its path, resulting in the staple puncturing the surface of the workpiece.
Besides damaging your workpiece, deflection can cause injury if your free hand is securing the workpiece in the location that the staple deflects.
5.Pull the trigger.
—If the staple penetrates the wood to the depth you want, continue with your intended operations.
—If the staple either went too far or not far enough, adjust the depth of fire by following the procedures listed on Pages
Adjusting Depth
Changing the depth of staple penetration is done by changing the position of the adjust- ing block on the contact arm.
To adjust the depth:
1.DISCONNECT STAPLER FROM THE AIR SUPPLY.
2.Use a 4mm hex wrench to loosen the depth adjustment cap screw on the contact arm as shown in Figure 7.
Depth
Adjustment
Cap Screw
