14.Insert the bolts through the
15.Align the
16.Place a flat washer (E2) onto each of the four 2" wood screws (E8). From the table underside, insert the screws in the
17.Using a standard screwdriver, attach the right (SR) and left (SL) drawer sides to the drawer backs (SB). Then slide the drawer bottoms (BP) into the drawer side grooves (Figure 17) until they are fully seated in the grooves.
BP |
|
SL |
|
SB | Rotate |
SR | with |
| |
Screwdriver | |
| to Lock |
Figure 17. Initial drawer assembly.
18.Install the drawer fronts (SF) (Figure 18), the handles (E5), the screws (E1), and insert the drawers into the work bench drawer slides.
E5
E1
SF
Figure 18. Final drawer assembly.
Model H8110 (Mfg. since 7/09)
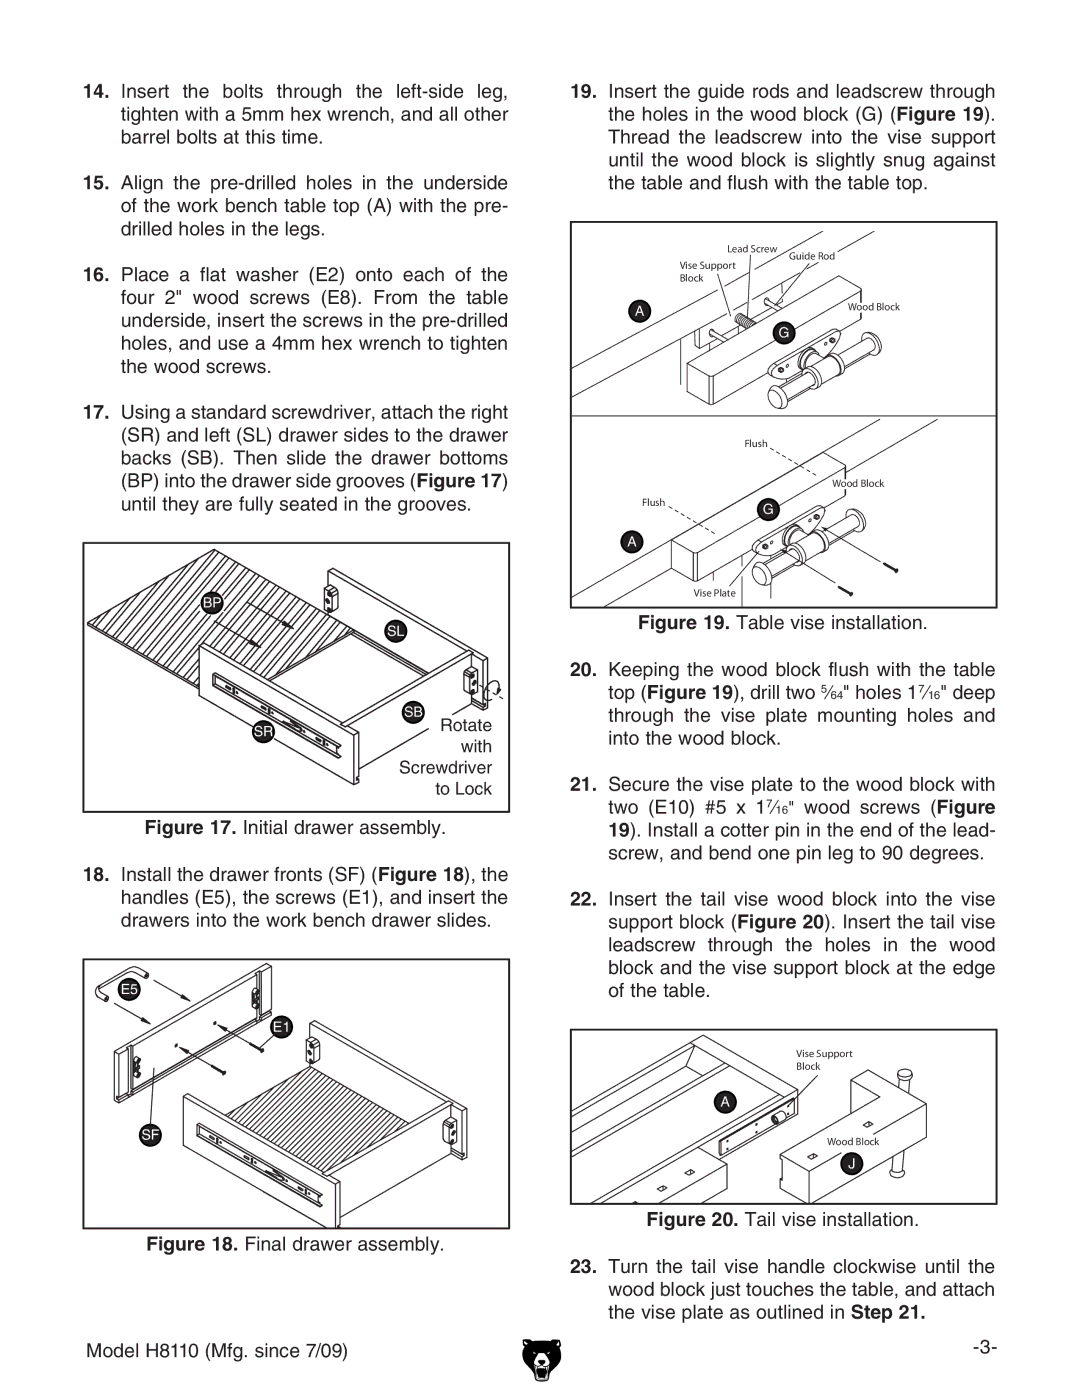
19.Insert the guide rods and leadscrew through the holes in the wood block (G) (Figure 19). Thread the leadscrew into the vise support until the wood block is slightly snug against the table and flush with the table top.
| Lead Screw | Guide Rod |
| Vise Support | |
|
| |
| Block |
|
A |
| Wood Block |
G
Flush
Wood Block
FlushG
A
Vise Plate
Figure 19. Table vise installation.
20.Keeping the wood block flush with the table top (Figure 19), drill two 5⁄64" holes 1 7⁄16" deep through the vise plate mounting holes and into the wood block.
21.Secure the vise plate to the wood block with two (E10) #5 x 17⁄16" wood screws (Figure 19). Install a cotter pin in the end of the lead- screw, and bend one pin leg to 90 degrees.
22.Insert the tail vise wood block into the vise support block (Figure 20). Insert the tail vise leadscrew through the holes in the wood block and the vise support block at the edge of the table.
Vise Support
Block
A
Wood Block
![]()
![]()
![]() J
J
