4.Cut an outline of the spindle and cutter from the center of the stock selected in Step 3, as illustrated in Figure 25.

Note: Make the outline as close as possible to the cutter and spindle without interfering with rotation.

Mounting

Fastener

Zero-Clearance Fence

Table

Cutter

Figure 25. Example of a zero-clearance fence.

5.Create countersunk mounting holes in the zero-clearance fence so that the screws and T-nuts removed from the split fence can be used to secure the new fence to the fence assembly in the same manner.

ALWAYS use hold-downs or featherboards and push sticks when shaping small or nar- row stock. These devices keep your hands away from the spinning cutter and suffi- ciently support the stock to allow a safe and effective cut, reducing the risk of personal injury.

6.Secure the zero-clearance fence to the fence assembly, check for proper clearance, con- nect the router to power, then run a test piece by the cutter to verify the results.

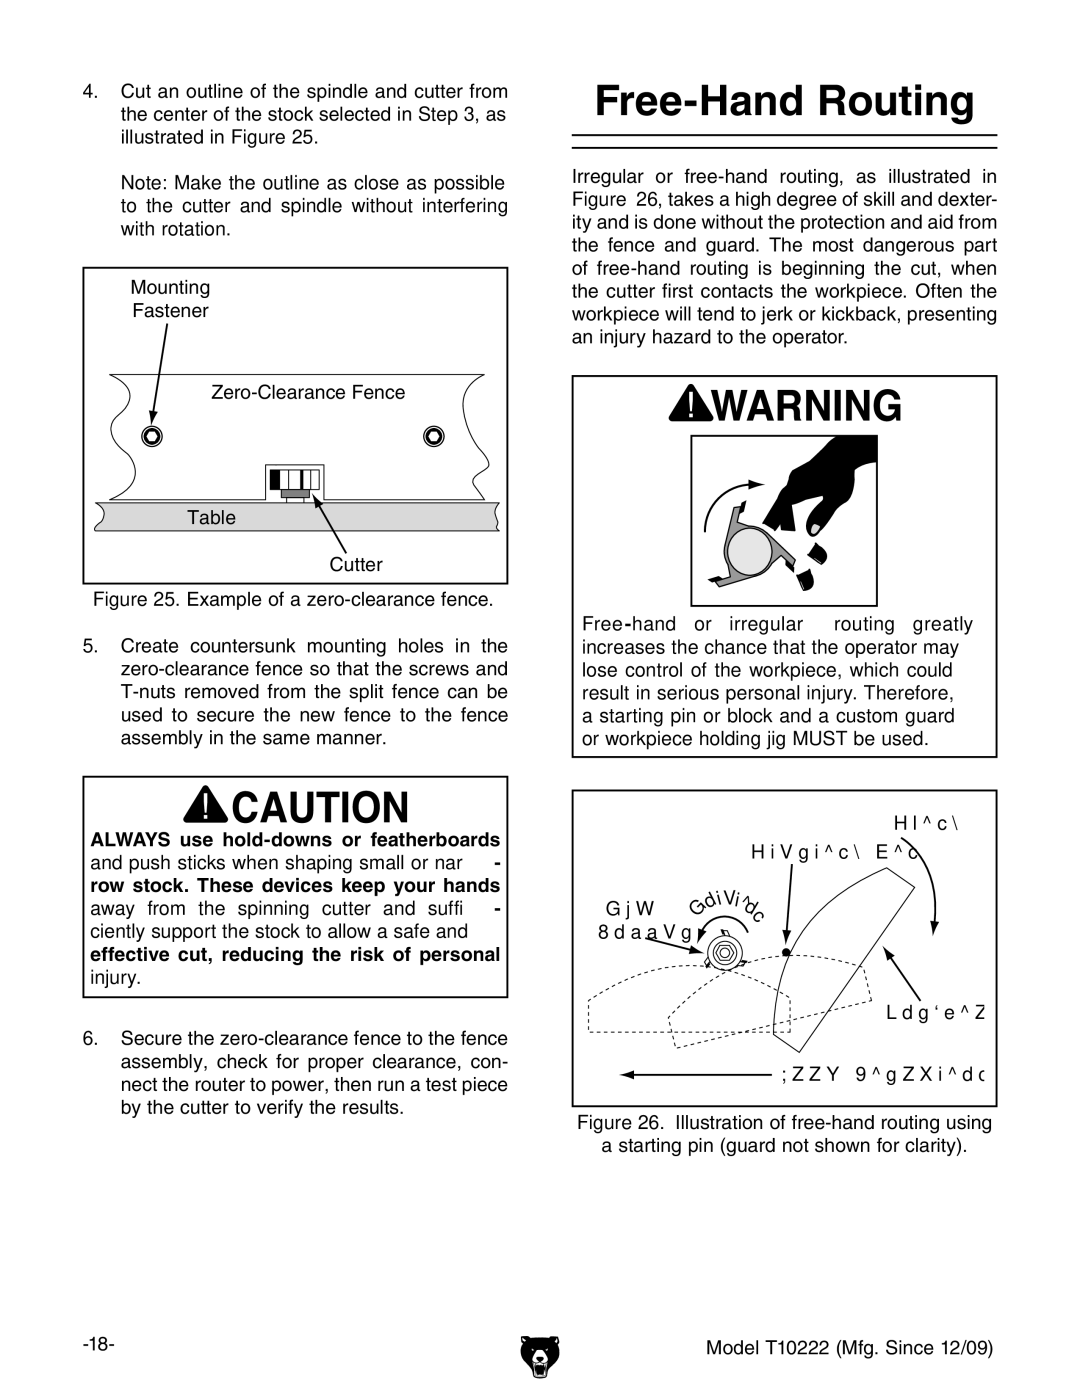
Free-Hand Routing

Irregular or free-hand routing, as illustrated in Figure 26, takes a high degree of skill and dexter- ity and is done without the protection and aid from the fence and guard. The most dangerous part of free-hand routing is beginning the cut, when the cutter first contacts the workpiece. Often the workpiece will tend to jerk or kickback, presenting an injury hazard to the operator.

Free-hand or irregular routing greatly increases the chance that the operator may lose control of the workpiece, which could result in serious personal injury. Therefore, a starting pin or block and a custom guard or workpiece holding jig MUST be used.


Swing


Starting Pin


t

a


ti


Rub

o


o

R


n

Collar


Workpiece


Feed Direction

Figure 26. Illustration of free-hand routing using

a starting pin (guard not shown for clarity).

-18-

Model T10222 (Mfg. Since 12/09)

Page 20
Image 20
Grizzly T10222 owner manual Free-Hand Routing