Profile Routing
To cut a profile into the workpiece:
1.DISCONNECT ROUTER FROM POWER!
2.Secure the bit into the router according to the router manufacturer's instructions.
3.Install the smallest table insert into the table that still allows the bit to freely rotate.
4.Raise the bit to the desired height, then adjust the fence assembly so the fence boards are behind the bit the same distance as the desired
Figures 18–19).
Top View |
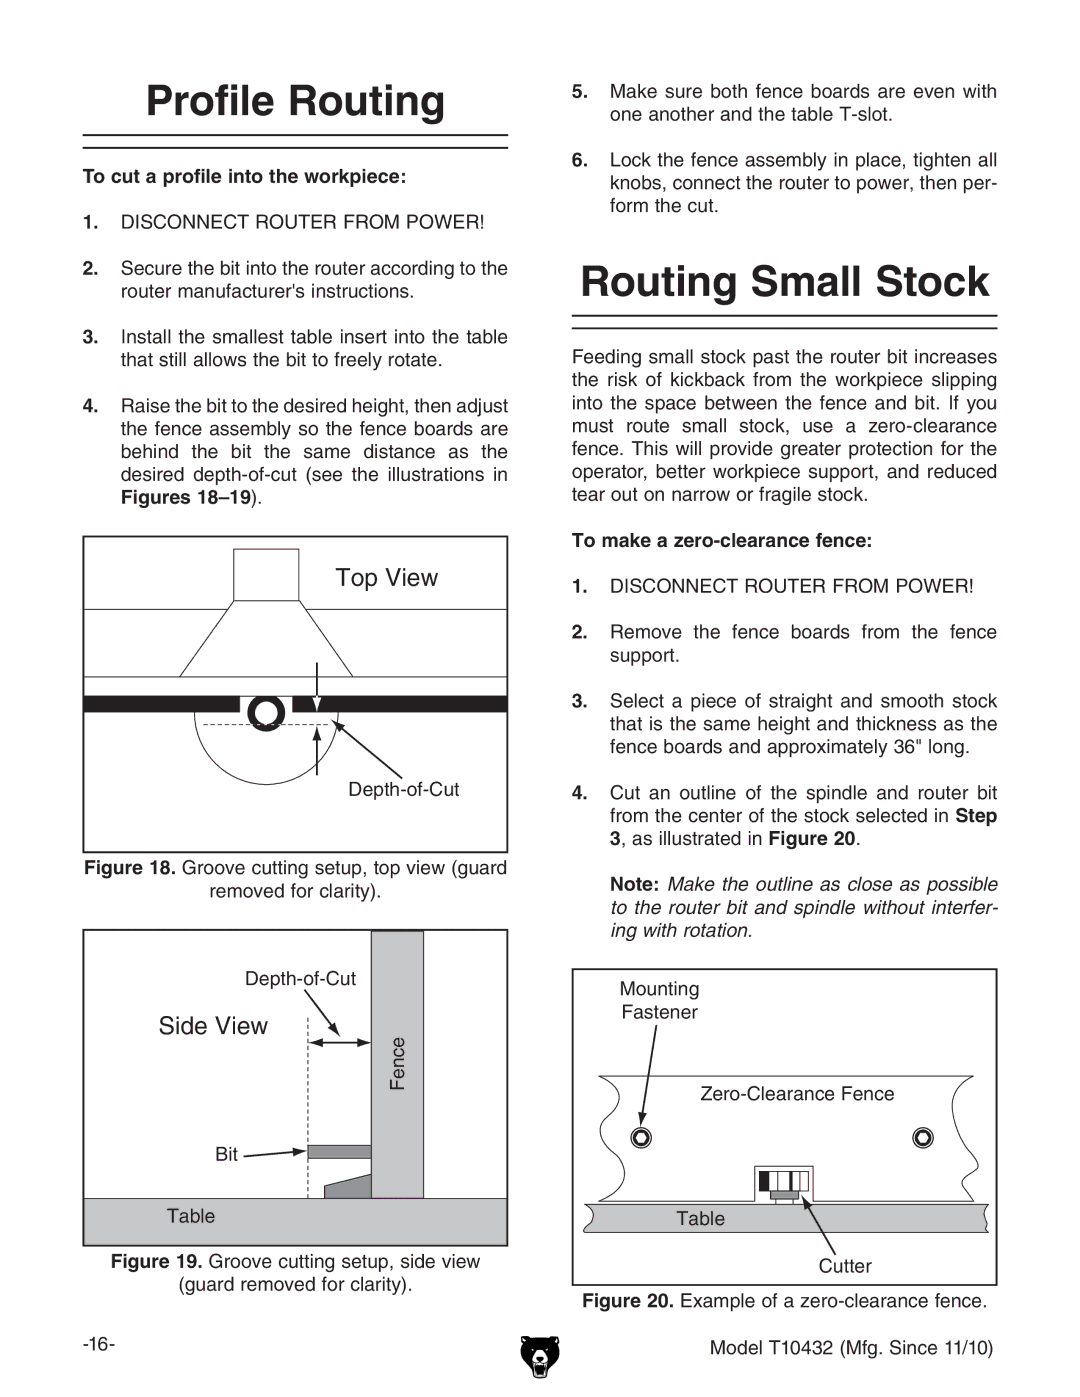
Figure 18. Groove cutting setup, top view (guard
removed for clarity).
Depth-of-Cut
Side View
Fence
Bit ![]()
Table
Figure 19. Groove cutting setup, side view
(guard removed for clarity).
5.Make sure both fence boards are even with one another and the table T-slot.
6.Lock the fence assembly in place, tighten all knobs, connect the router to power, then per- form the cut.
Routing Small Stock
Feeding small stock past the router bit increases the risk of kickback from the workpiece slipping into the space between the fence and bit. If you must route small stock, use a
To make a zero-clearance fence:
1.DISCONNECT ROUTER FROM POWER!
2.Remove the fence boards from the fence support.
3.Select a piece of straight and smooth stock that is the same height and thickness as the fence boards and approximately 36" long.
4.Cut an outline of the spindle and router bit from the center of the stock selected in Step 3, as illustrated in Figure 20.
Note: Make the outline as close as possible to the router bit and spindle without interfer- ing with rotation.
Mounting |
Fastener |
Table |
Cutter |