PC Setup
You can adjust horizontal/vertical position, clock, phase, and
Press the ![]() button and then use D / E button to select the Installation menu.
button and then use D / E button to select the Installation menu.
Press the OK button and then use D / E button to select
PC Control.
Press the OK button and then D / E button to select the desired picture item.
Press the F / G button to make appropriate adjustments.
This function is to adjust picture to left/right and up/down as you prefer.
Clock
This function is to minimize any vertical bars or stripes vis- ible on the screen background. And the horizontal screen size will also change.
Phase
This function allows you to remove any horizontal noise and clear or sharpen the image of characters.
Auto-configure
This function is for the automatic adjustment of the screen position, clock and phase. The displayed image will disap- pear for a few seconds while the
Reset
This function allows you to return to the good picture repro- duction programmed at the factory and cannot be changed.
Note : Some signal from some graphics boards may not function properly. If the results are unsatisfactory, adjust your monitor’s position, clock and phase manually.
Press the OK button to store it for the PC monitor picture.
Press the ![]() button to return to PC mode.
button to return to PC mode.
Connection of PC
EN
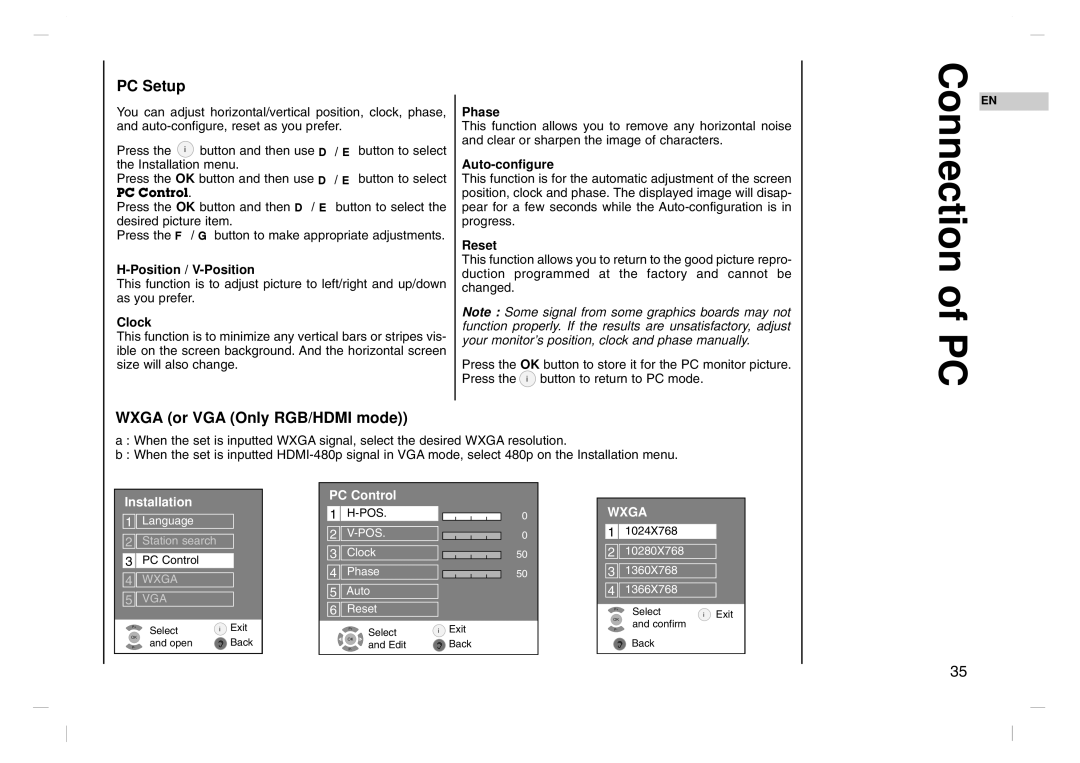
WXGA (or VGA (Only RGB/HDMI mode))
a : When the set is inputted WXGA signal, select the desired WXGA resolution.
b : When the set is inputted
Installation
1 ![]()
![]() Language
Language
2 ![]()
![]() Station search
Station search
3 ![]()
![]() PC Control
PC Control
4 ![]()
![]() WXGA
WXGA
5 ![]()
![]() VGA
VGA
OKP- Select | Exit |
and open | Back |
PC Control |
| |
1 | 0 | |
2 | 0 | |
3 | Clock | 50 |
4 | Phase | 50 |
5 | Auto |
|
6 | Reset |
|
- | OKP- + Select | Exit |
| and Edit | Back |
WXGA
1 ![]()
![]() 1024X768
1024X768
2 ![]()
![]() 10280X768
10280X768
3 ![]()
![]() 1360X768
1360X768
4 ![]()
![]() 1366X768
1366X768
![]() OKP Selectand confirm
OKP Selectand confirm ![]() Exit
Exit
Back
35