|
|
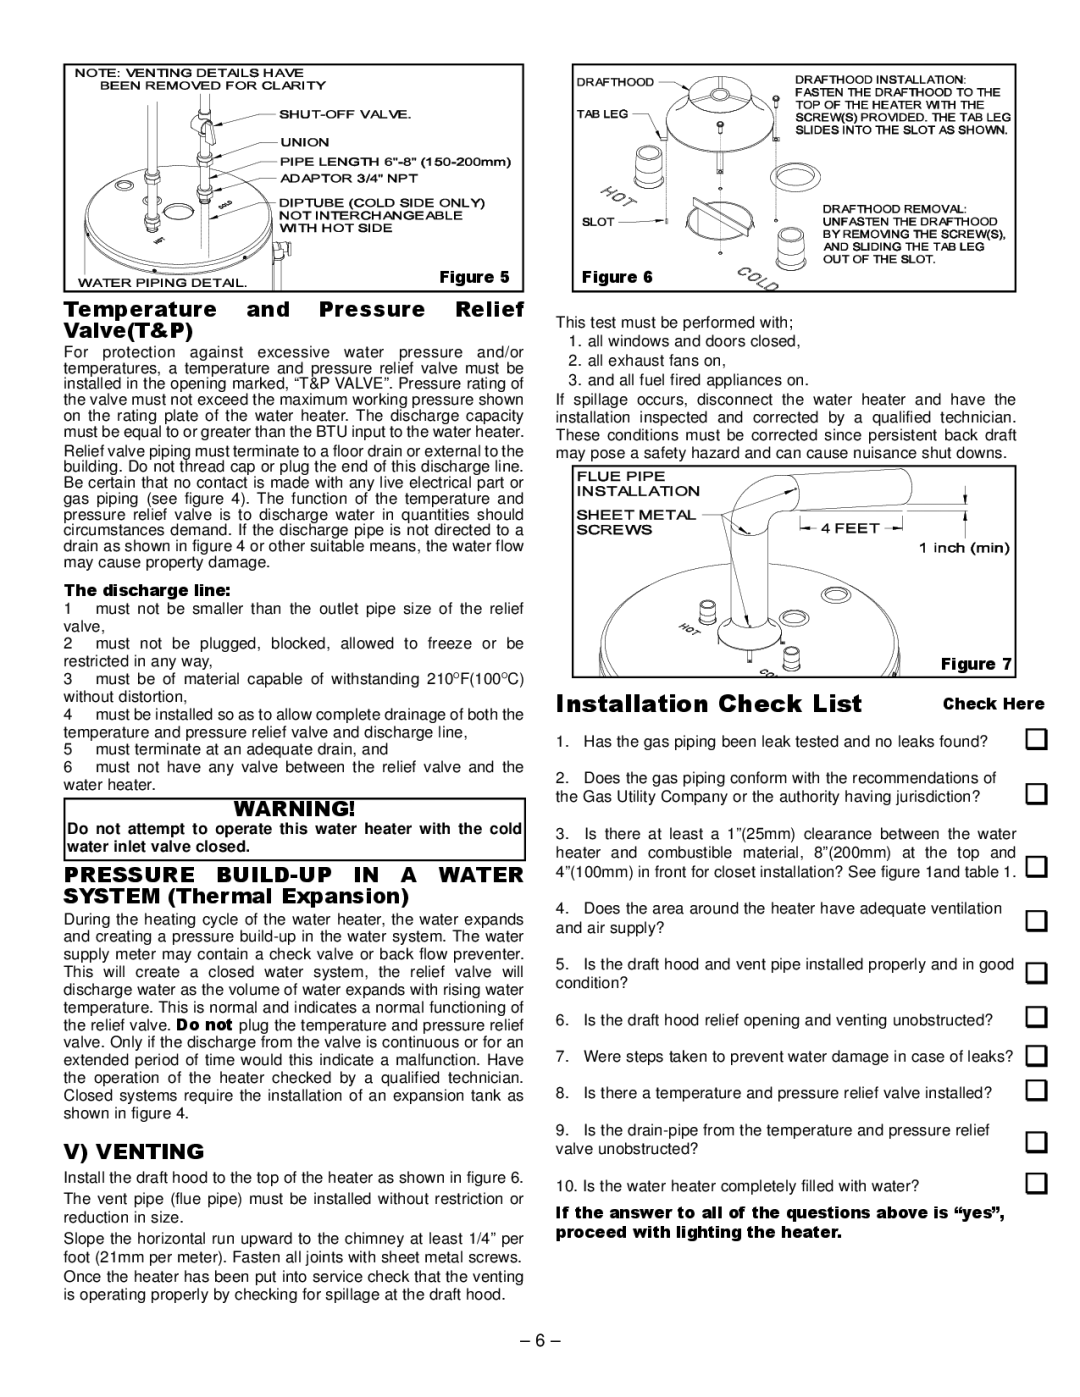
| Figure 5 |
Temperature | and | Pressure | Relief |
Valve(T&P) |
|
|
|
For protection against excessive water pressure and/or temperatures, a temperature and pressure relief valve must be installed in the opening marked, “T&P VALVE”. Pressure rating of the valve must not exceed the maximum working pressure shown on the rating plate of the water heater. The discharge capacity must be equal to or greater than the BTU input to the water heater. Relief valve piping must terminate to a floor drain or external to the building. Do not thread cap or plug the end of this discharge line. Be certain that no contact is made with any live electrical part or gas piping (see figure 4). The function of the temperature and pressure relief valve is to discharge water in quantities should circumstances demand. If the discharge pipe is not directed to a drain as shown in figure 4 or other suitable means, the water flow may cause property damage.
The discharge line:
1must not be smaller than the outlet pipe size of the relief valve,
2 must not be plugged, blocked, allowed to freeze or be restricted in any way,
3 must be of material capable of withstanding 210OF(100OC) without distortion,
4 must be installed so as to allow complete drainage of both the temperature and pressure relief valve and discharge line,
5 must terminate at an adequate drain, and
6 must not have any valve between the relief valve and the water heater.
WARNING!
Do not attempt to operate this water heater with the cold water inlet valve closed.
PRESSURE BUILD-UP IN A WATER SYSTEM (Thermal Expansion)
During the heating cycle of the water heater, the water expands and creating a pressure
V) VENTING
Install the draft hood to the top of the heater as shown in figure 6. The vent pipe (flue pipe) must be installed without restriction or reduction in size.
Slope the horizontal run upward to the chimney at least 1/4” per foot (21mm per meter). Fasten all joints with sheet metal screws. Once the heater has been put into service check that the venting is operating properly by checking for spillage at the draft hood.
Figure 6 |
This test must be performed with;
1.all windows and doors closed,
2.all exhaust fans on,
3.and all fuel fired appliances on.
If spillage occurs, disconnect the water heater and have the installation inspected and corrected by a qualified technician. These conditions must be corrected since persistent back draft may pose a safety hazard and can cause nuisance shut downs.
Figure 7 |
Installation Check List | Check Here |
1. Has the gas piping been leak tested and no leaks found?
2. Does the gas piping conform with the recommendations of the Gas Utility Company or the authority having jurisdiction?
3.Is there at least a 1”(25mm) clearance between the water heater and combustible material, 8”(200mm) at the top and 4”(100mm) in front for closet installation? See figure 1and table 1.
4.Does the area around the heater have adequate ventilation
and air supply?
5.Is the draft hood and vent pipe installed properly and in good condition?
6. Is the draft hood relief opening and venting unobstructed?
7. Were steps taken to prevent water damage in case of leaks?
8. Is there a temperature and pressure relief valve installed?
9. Is the
10. Is the water heater completely filled with water?
If the answer to all of the questions above is “yes”, proceed with lighting the heater.
– 6 –
