Install the water inlet hose Before Usingi
Confirm the water faucet
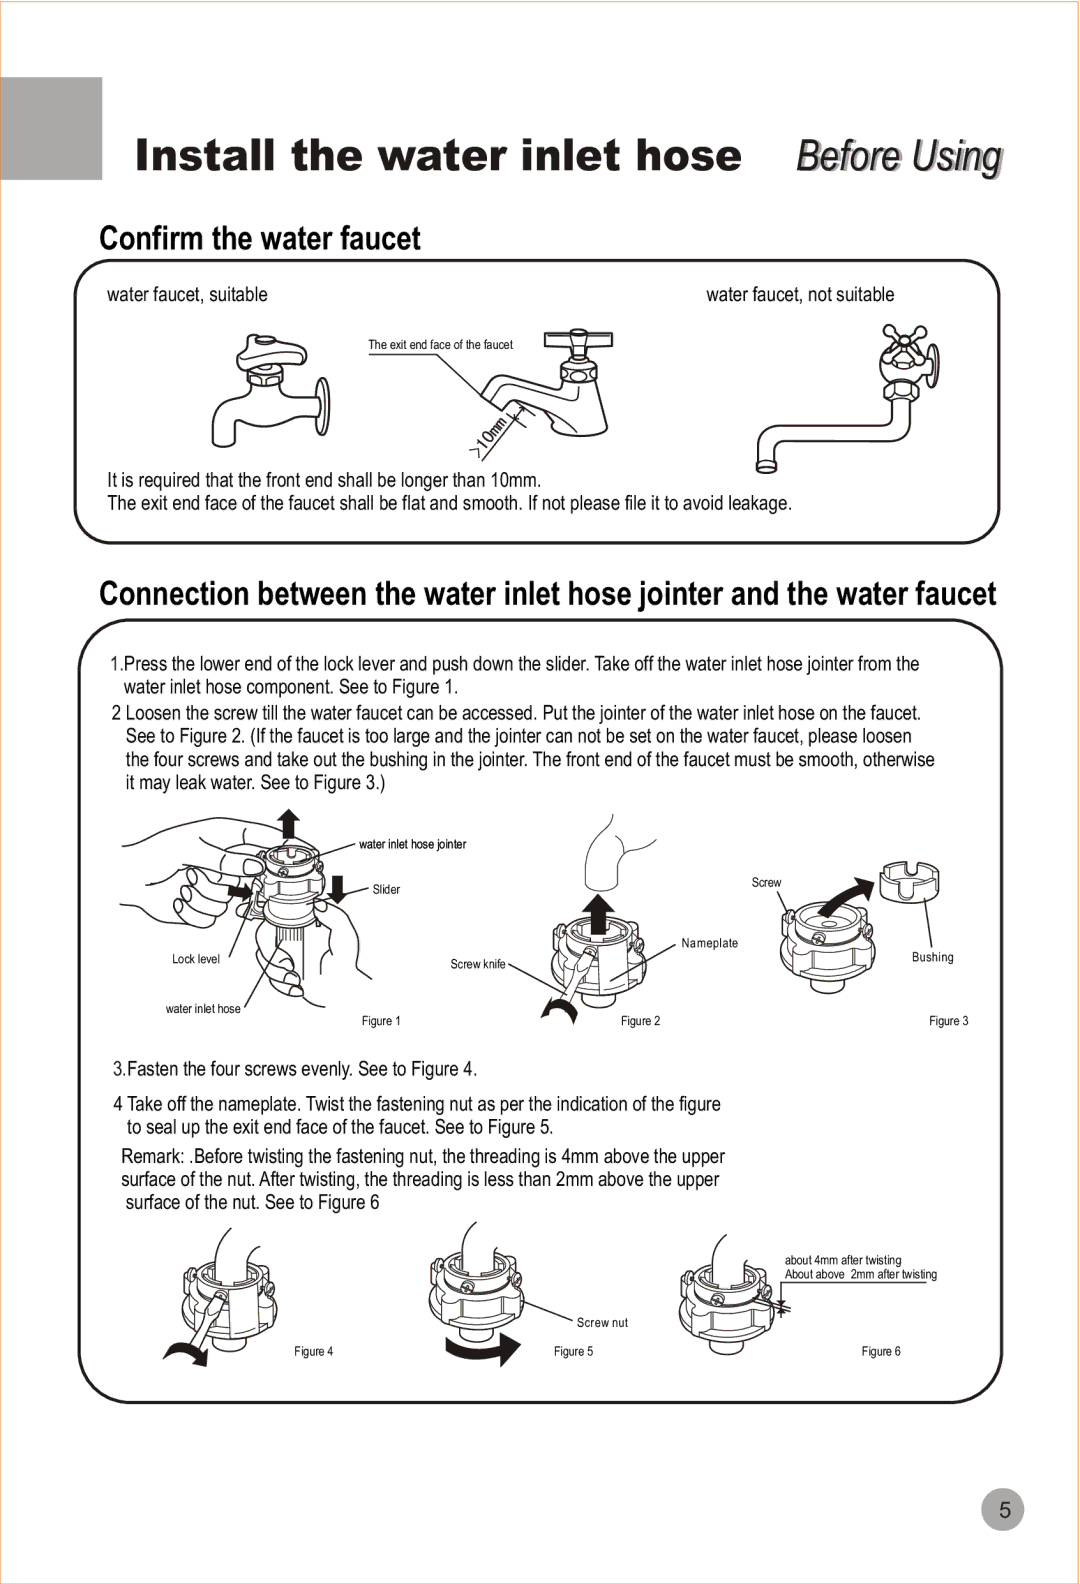
water faucet, suitable |
|
|
|
| water faucet, not suitable |
| The exit end face of the faucet |
|
|
| |
|
|
| |||
|
|
|
|
|
|
It is required that the front end shall be longer than 10mm.
The exit end face of the faucet shall be flat and smooth. If not please file it to avoid leakage.
Connection between the water inlet hose jointer and the water faucet
1.Press the lower end of the lock lever and push down the slider. Take off the water inlet hose jointer from the water inlet hose component. See to Figure 1.
2 Loosen the screw till the water faucet can be accessed. Put the jointer of the water inlet hose on the faucet. See to Figure 2. (If the faucet is too large and the jointer can not be set on the water faucet, please loosen the four screws and take out the bushing in the jointer. The front end of the faucet must be smooth, otherwise it may leak water. See to Figure 3.)
![]()
![]()
![]() water inlet hose jointer
water inlet hose jointer
![]()
![]()
![]()
![]()
![]()
![]()
![]() Slider
Slider
Lock level | Screw knife |
|
water inlet hose
Figure 1
Screw
Nameplate
Figure 2
Bushing
Figure 3
3.Fasten the four screws evenly. See to Figure 4.
4 Take off the nameplate. Twist the fastening nut as per the indication of the figure to seal up the exit end face of the faucet. See to Figure 5.
Remark: .Before twisting the fastening nut, the threading is 4mm above the upper surface of the nut. After twisting, the threading is less than 2mm above the upper surface of the nut. See to Figure 6
about 4mm after twisting
About above 2mm after twisting
![]()
![]() Screw nut
Screw nut
Figure 4 | Figure 5 | Figure 6 |
5