ASSEMBLY
You will need an assortment of small hand tools to com- plete assembly of this Masking Station.
1.Find a suitable assembly area, and arrange the parts for the masking station where they can be easily worked with.
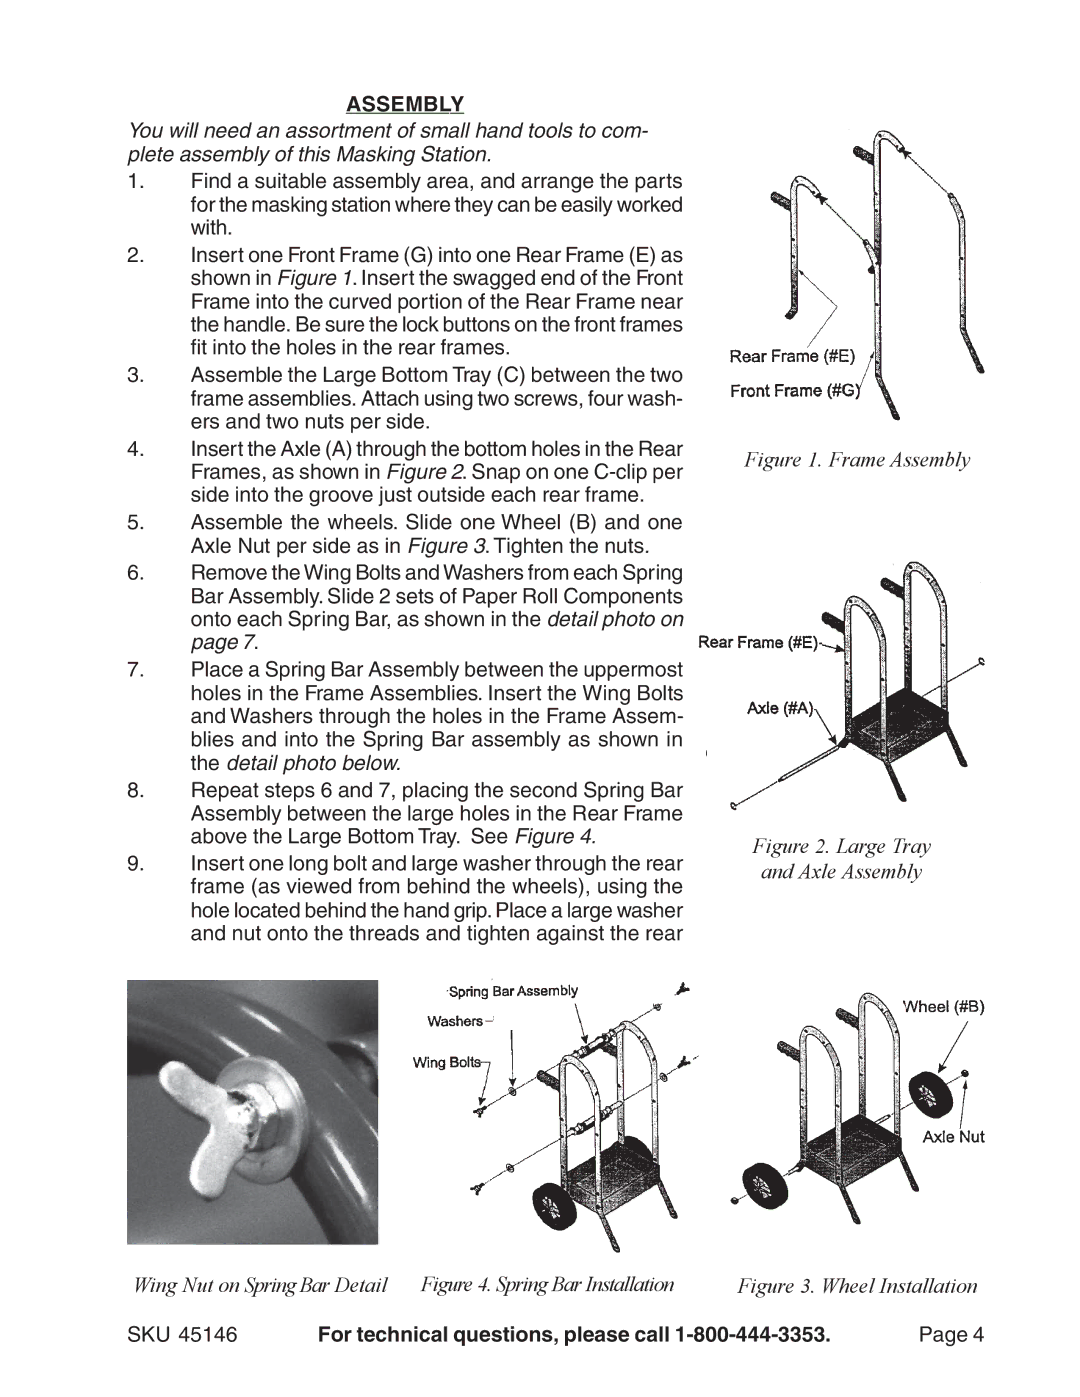
2.Insert one Front Frame (G) into one Rear Frame (E) as shown in Figure 1. Insert the swagged end of the Front Frame into the curved portion of the Rear Frame near the handle. Be sure the lock buttons on the front frames fit into the holes in the rear frames.
3.Assemble the Large Bottom Tray (C) between the two frame assemblies. Attach using two screws, four wash- ers and two nuts per side.
4.Insert the Axle (A) through the bottom holes in the Rear Frames, as shown in Figure 2. Snap on one
5.Assemble the wheels. Slide one Wheel (B) and one Axle Nut per side as in Figure 3. Tighten the nuts.
6.Remove the Wing Bolts and Washers from each Spring Bar Assembly. Slide 2 sets of Paper Roll Components onto each Spring Bar, as shown in the detail photo on page 7.
7.Place a Spring Bar Assembly between the uppermost holes in the Frame Assemblies. Insert the Wing Bolts and Washers through the holes in the Frame Assem- blies and into the Spring Bar assembly as shown in the detail photo below.
8.Repeat steps 6 and 7, placing the second Spring Bar Assembly between the large holes in the Rear Frame above the Large Bottom Tray. See Figure 4.
9.Insert one long bolt and large washer through the rear frame (as viewed from behind the wheels), using the hole located behind the hand grip. Place a large washer and nut onto the threads and tighten against the rear
Figure 1. Frame Assembly
Figure 2. Large Tray and Axle Assembly
Wing Nut on Spring Bar Detail Figure 4. Spring Bar Installation | Figure 3. Wheel Installation | ||
SKU 45146 | For technical questions, please call | Page 4 | |