Operation
Note: Prior to operation, go through the following checklist:
1.Make sure power is off before plugging in the Sander/ Grinder.
2.Check Sander / Grinder for damaged parts.
3.Make sure all clamps, locks, and bolts are tight.
4.Remove any adjusting keys or wrenches.
5.Make sure guards are in place and in proper working order.
Warning! Make sure table is securely locked into place following adjustments. Table should be secured to a flat, level surface capable of supporting weight of the Sander/Grinder as well as workpiece material being used.
6.Give Sander / Grinder a test run. If the tool vibrates irregularly or makes unfamiliar noises, turn it off, unplug it, and refer to an authorized service technician.
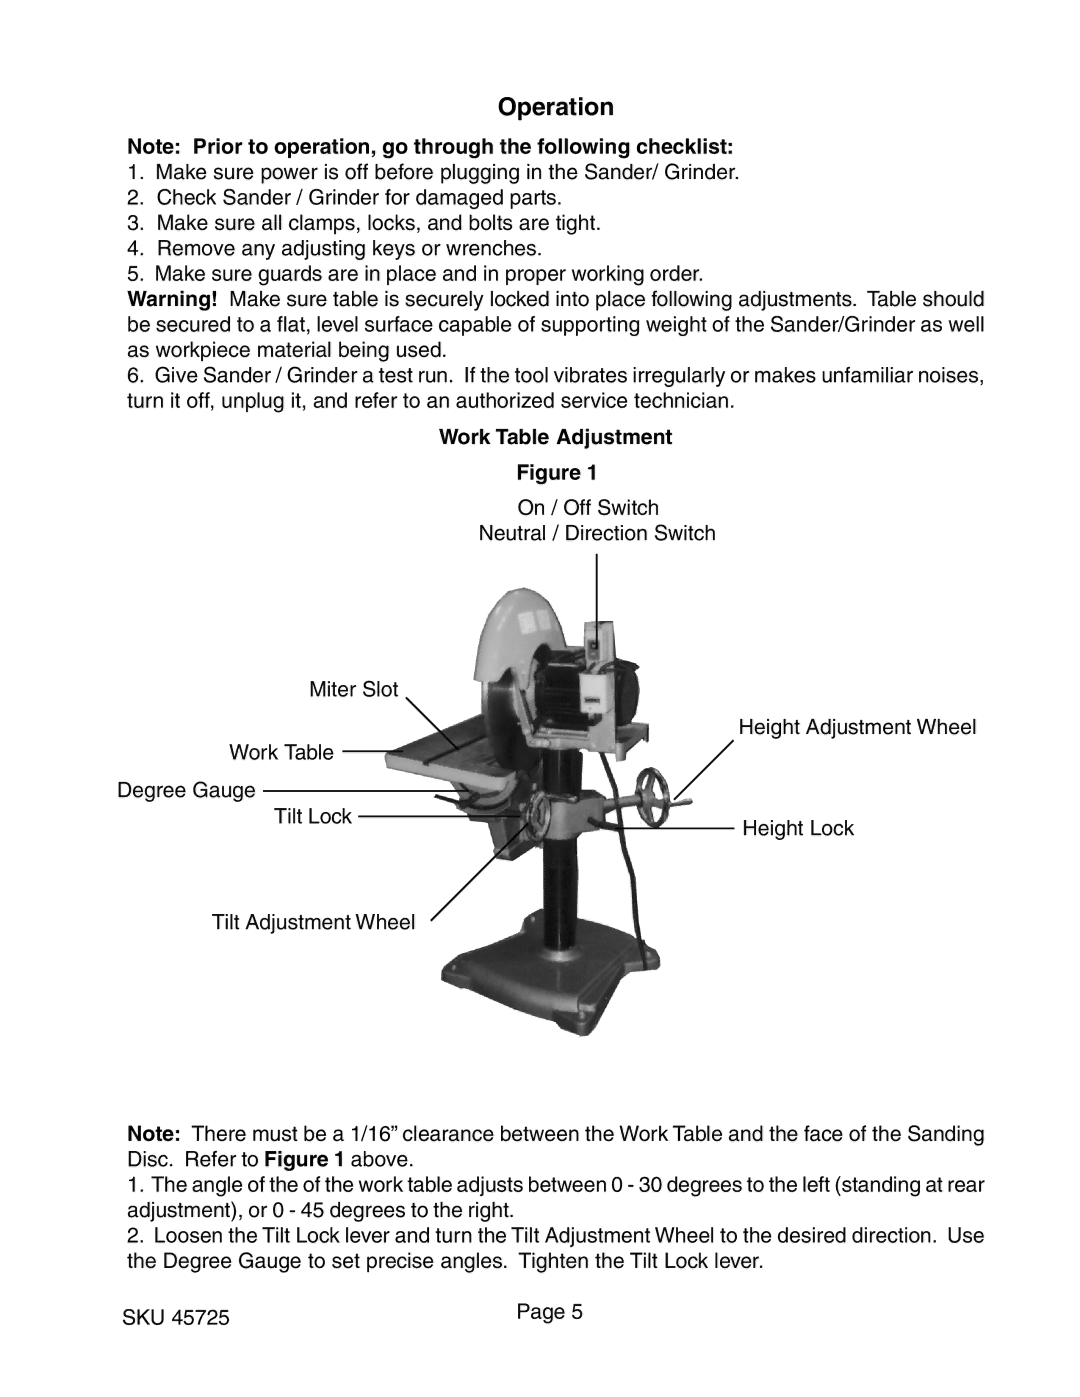
Work Table Adjustment
Figure 1
On / Off Switch
Neutral / Direction Switch
Miter Slot
Height Adjustment Wheel
Work Table
Degree Gauge
Tilt Lock
Height Lock
Tilt Adjustment Wheel
Note: There must be a 1/16” clearance between the Work Table and the face of the Sanding Disc. Refer to Figure 1 above.
1.The angle of the of the work table adjusts between 0 - 30 degrees to the left (standing at rear adjustment), or 0 - 45 degrees to the right.
2.Loosen the Tilt Lock lever and turn the Tilt Adjustment Wheel to the desired direction. Use the Degree Gauge to set precise angles. Tighten the Tilt Lock lever.
SKU 45725 | Page 5 |
