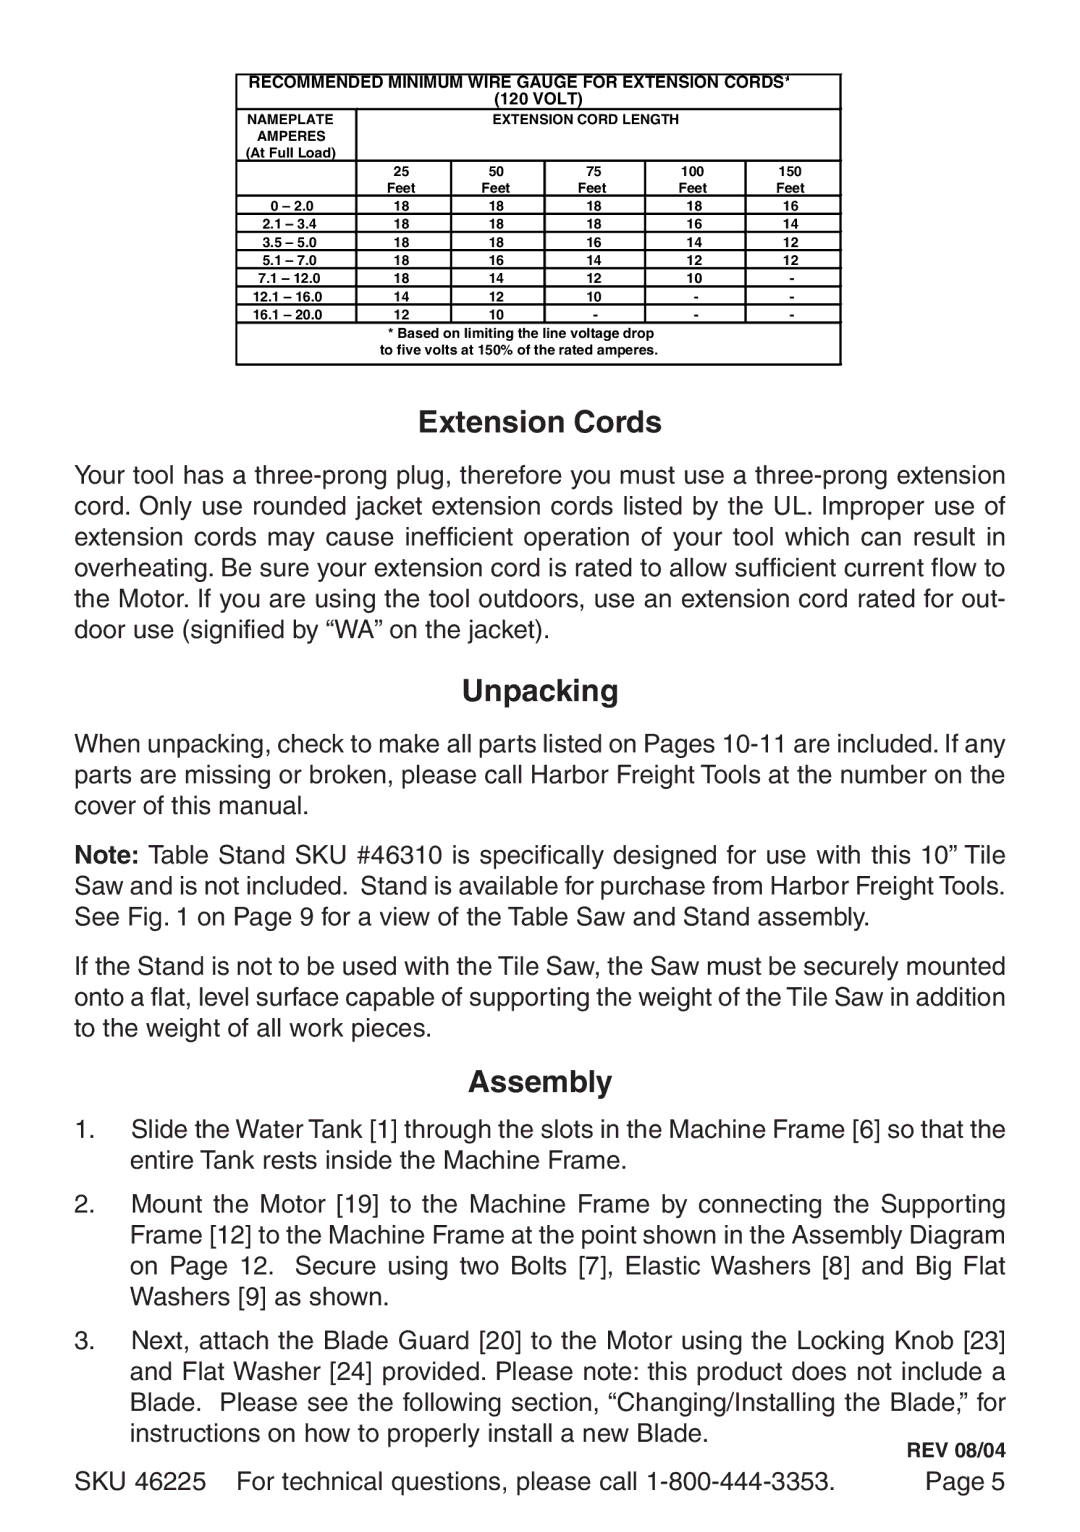
RECOMMENDED MINIMUM WIRE GAUGE FOR EXTENSION CORDS* (120 VOLT)
NAMEPLATE |
| EXTENSION CORD LENGTH |
| ||
AMPERES |
|
|
|
|
|
(At Full Load) |
|
|
|
|
|
| 25 | 50 | 75 | 100 | 150 |
| Feet | Feet | Feet | Feet | Feet |
0 – 2.0 | 18 | 18 | 18 | 18 | 16 |
2.1 – 3.4 | 18 | 18 | 18 | 16 | 14 |
3.5 – 5.0 | 18 | 18 | 16 | 14 | 12 |
5.1 – 7.0 | 18 | 16 | 14 | 12 | 12 |
7.1 – 12.0 | 18 | 14 | 12 | 10 | - |
12.1 – 16.0 | 14 | 12 | 10 | - | - |
16.1 – 20.0 | 12 | 10 | - | - | - |
*Based on limiting the line voltage drop to five volts at 150% of the rated amperes.
Extension Cords
Your tool has a
Unpacking
When unpacking, check to make all parts listed on Pages
Note: Table Stand SKU #46310 is specifically designed for use with this 10” Tile Saw and is not included. Stand is available for purchase from Harbor Freight Tools. See Fig. 1 on Page 9 for a view of the Table Saw and Stand assembly.
If the Stand is not to be used with the Tile Saw, the Saw must be securely mounted onto a flat, level surface capable of supporting the weight of the Tile Saw in addition to the weight of all work pieces.
Assembly
1.Slide the Water Tank [1] through the slots in the Machine Frame [6] so that the entire Tank rests inside the Machine Frame.
2.Mount the Motor [19] to the Machine Frame by connecting the Supporting Frame [12] to the Machine Frame at the point shown in the Assembly Diagram on Page 12. Secure using two Bolts [7], Elastic Washers [8] and Big Flat Washers [9] as shown.
3.Next, attach the Blade Guard [20] to the Motor using the Locking Knob [23] and Flat Washer [24] provided. Please note: this product does not include a Blade. Please see the following section, “Changing/Installing the Blade,” for instructions on how to properly install a new Blade.
REV 08/04
SKU 46225 For technical questions, please call | Page 5 |