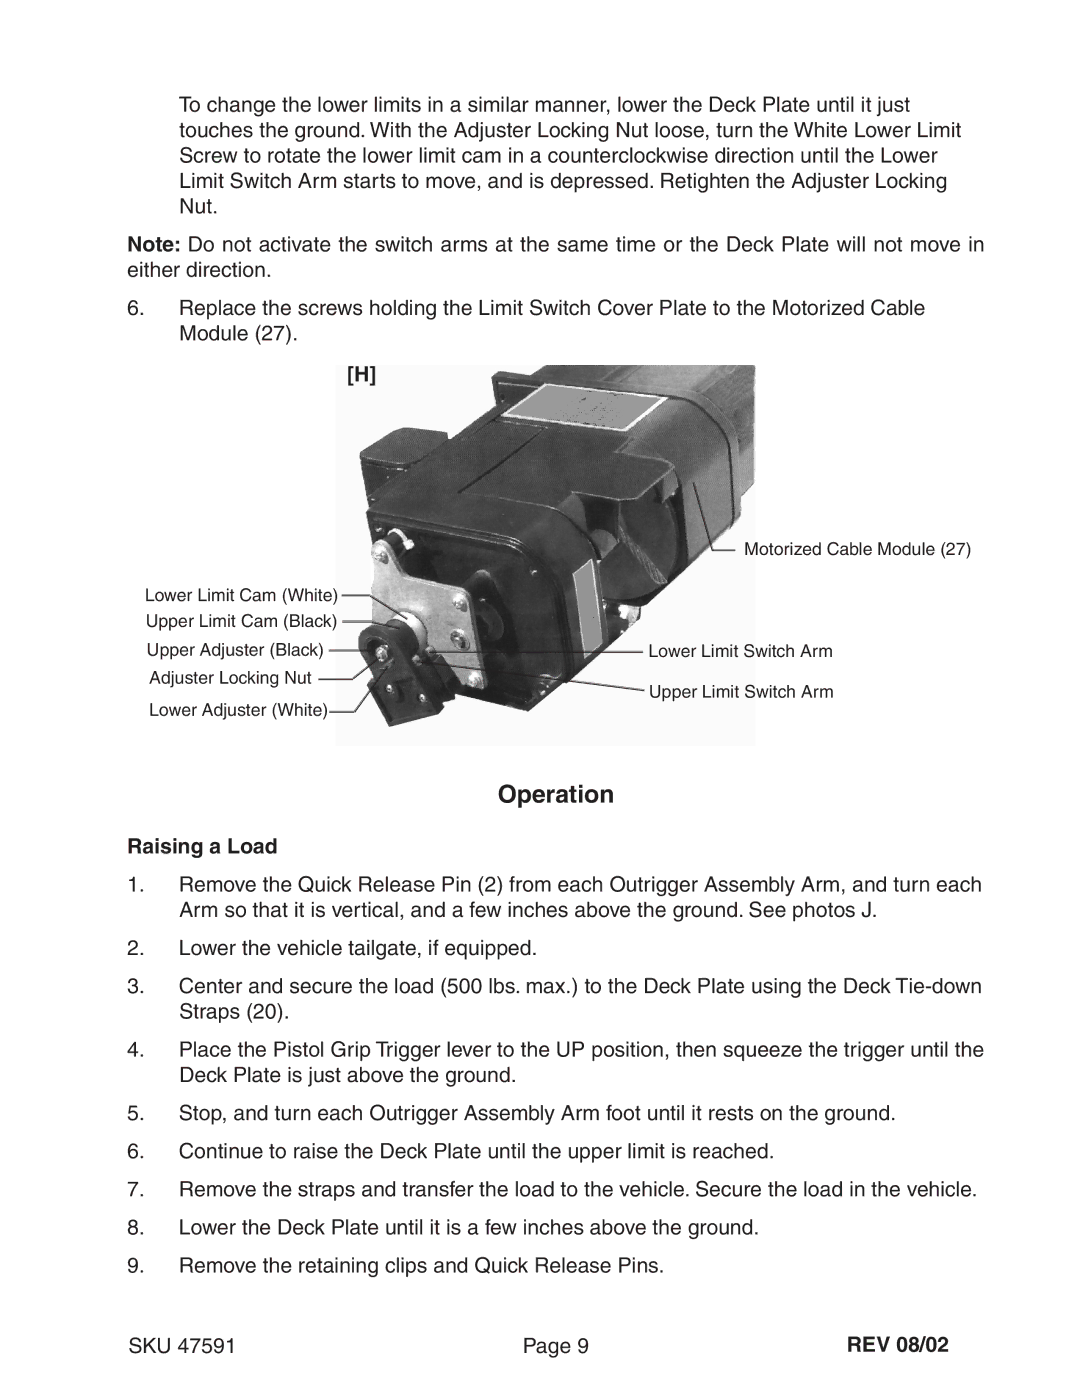
To change the lower limits in a similar manner, lower the Deck Plate until it just touches the ground. With the Adjuster Locking Nut loose, turn the White Lower Limit Screw to rotate the lower limit cam in a counterclockwise direction until the Lower Limit Switch Arm starts to move, and is depressed. Retighten the Adjuster Locking Nut.
Note: Do not activate the switch arms at the same time or the Deck Plate will not move in either direction.
6.Replace the screws holding the Limit Switch Cover Plate to the Motorized Cable Module (27).
[H]
Motorized Cable Module (27)
Lower Limit Cam (White)
Upper Limit Cam (Black) ![]()
![]()
Upper Adjuster (Black)Lower Limit Switch Arm
Adjuster Locking Nut ![]()
![]() Lower Adjuster (White)
Lower Adjuster (White)
Upper Limit Switch Arm
Operation
Raising a Load
1.Remove the Quick Release Pin (2) from each Outrigger Assembly Arm, and turn each Arm so that it is vertical, and a few inches above the ground. See photos J.
2.Lower the vehicle tailgate, if equipped.
3.Center and secure the load (500 lbs. max.) to the Deck Plate using the Deck
4.Place the Pistol Grip Trigger lever to the UP position, then squeeze the trigger until the Deck Plate is just above the ground.
5.Stop, and turn each Outrigger Assembly Arm foot until it rests on the ground.
6.Continue to raise the Deck Plate until the upper limit is reached.
7.Remove the straps and transfer the load to the vehicle. Secure the load in the vehicle.
8.Lower the Deck Plate until it is a few inches above the ground.
9.Remove the retaining clips and Quick Release Pins.
SKU 47591 | Page 9 | REV 08/02 |