Assembly
Ground Staked Installation
See the Assembly Drawing on page 7.
Note: Ground Stake parts assemble by simply
1.Assemble the Ground Stake by fitting a Stake Connector (3) into the Pointed Ground Stake (4), then add, a Ground Stake Tube (2) to the Stake Connector (3). Then, add another Stake Connector (3) and another Ground Stake Tube (2). Lastly, insert the top Ground Stake Tube (2) into the Light Fixture (1).
2.Choose a location away from other night time light sources and dig a hole approximately 6 inches in the ground. If the ground is hard, soak it with water prior to digging.
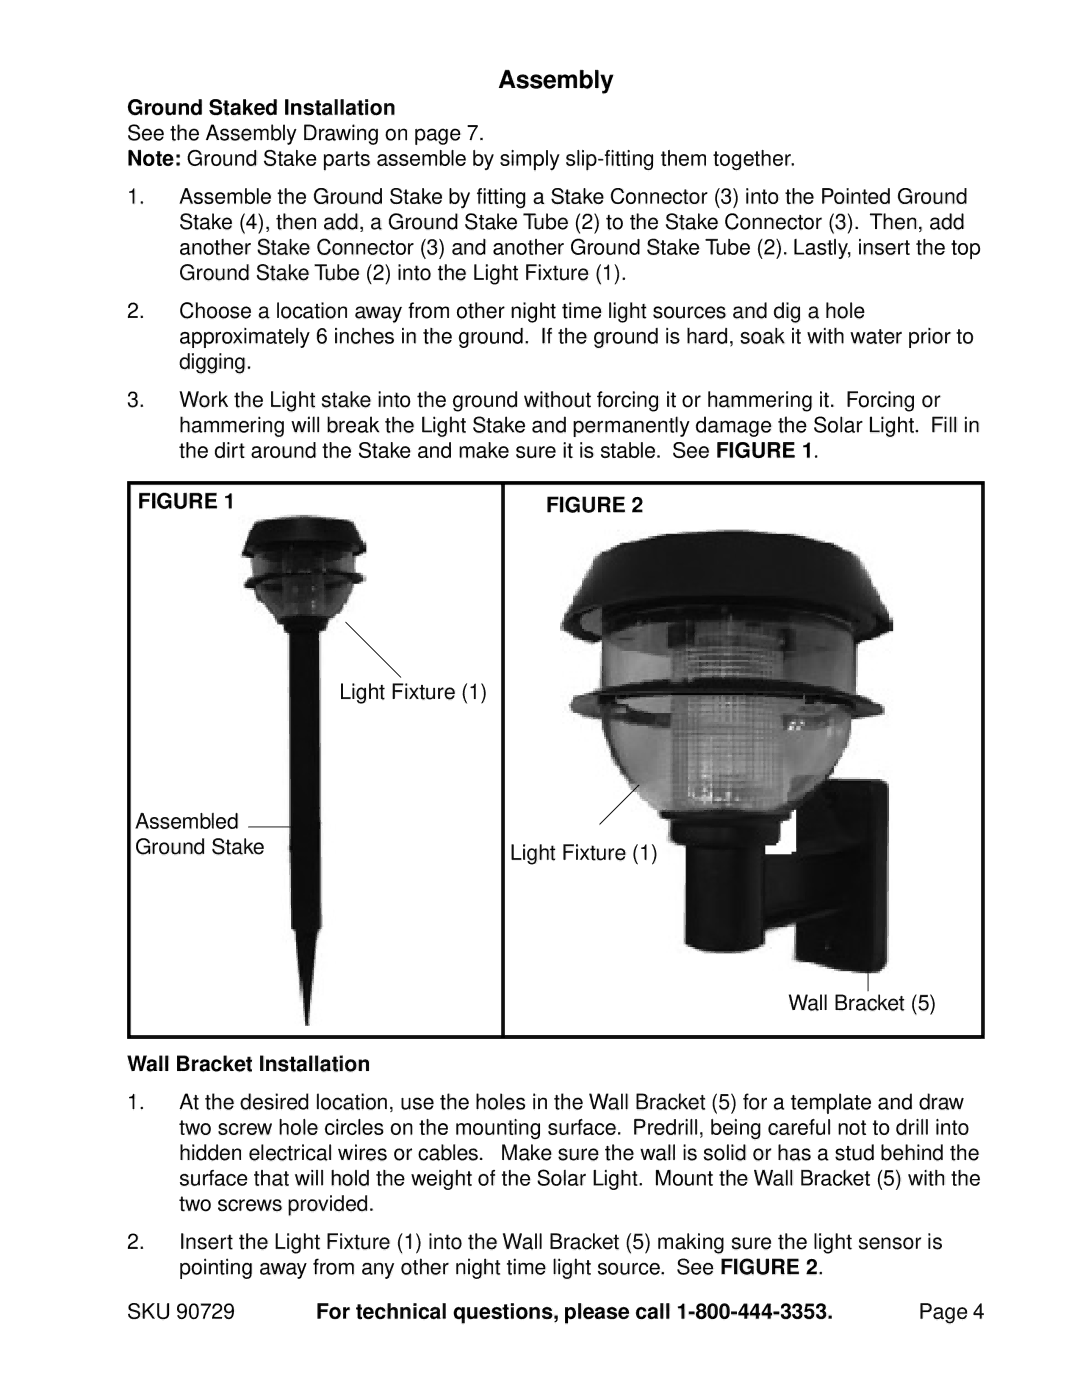
3.Work the Light stake into the ground without forcing it or hammering it. Forcing or hammering will break the Light Stake and permanently damage the Solar Light. Fill in the dirt around the Stake and make sure it is stable. See FIGURE 1.
FIGURE 1
FIGURE 2
Light Fixture (1)
Assembled Ground Stake
Light Fixture (1)
Wall Bracket (5)
Wall Bracket Installation
1.At the desired location, use the holes in the Wall Bracket (5) for a template and draw two screw hole circles on the mounting surface. Predrill, being careful not to drill into hidden electrical wires or cables. Make sure the wall is solid or has a stud behind the surface that will hold the weight of the Solar Light. Mount the Wall Bracket (5) with the two screws provided.
2.Insert the Light Fixture (1) into the Wall Bracket (5) making sure the light sensor is pointing away from any other night time light source. See FIGURE 2.
SKU 90729 | For technical questions, please call | Page 4 |