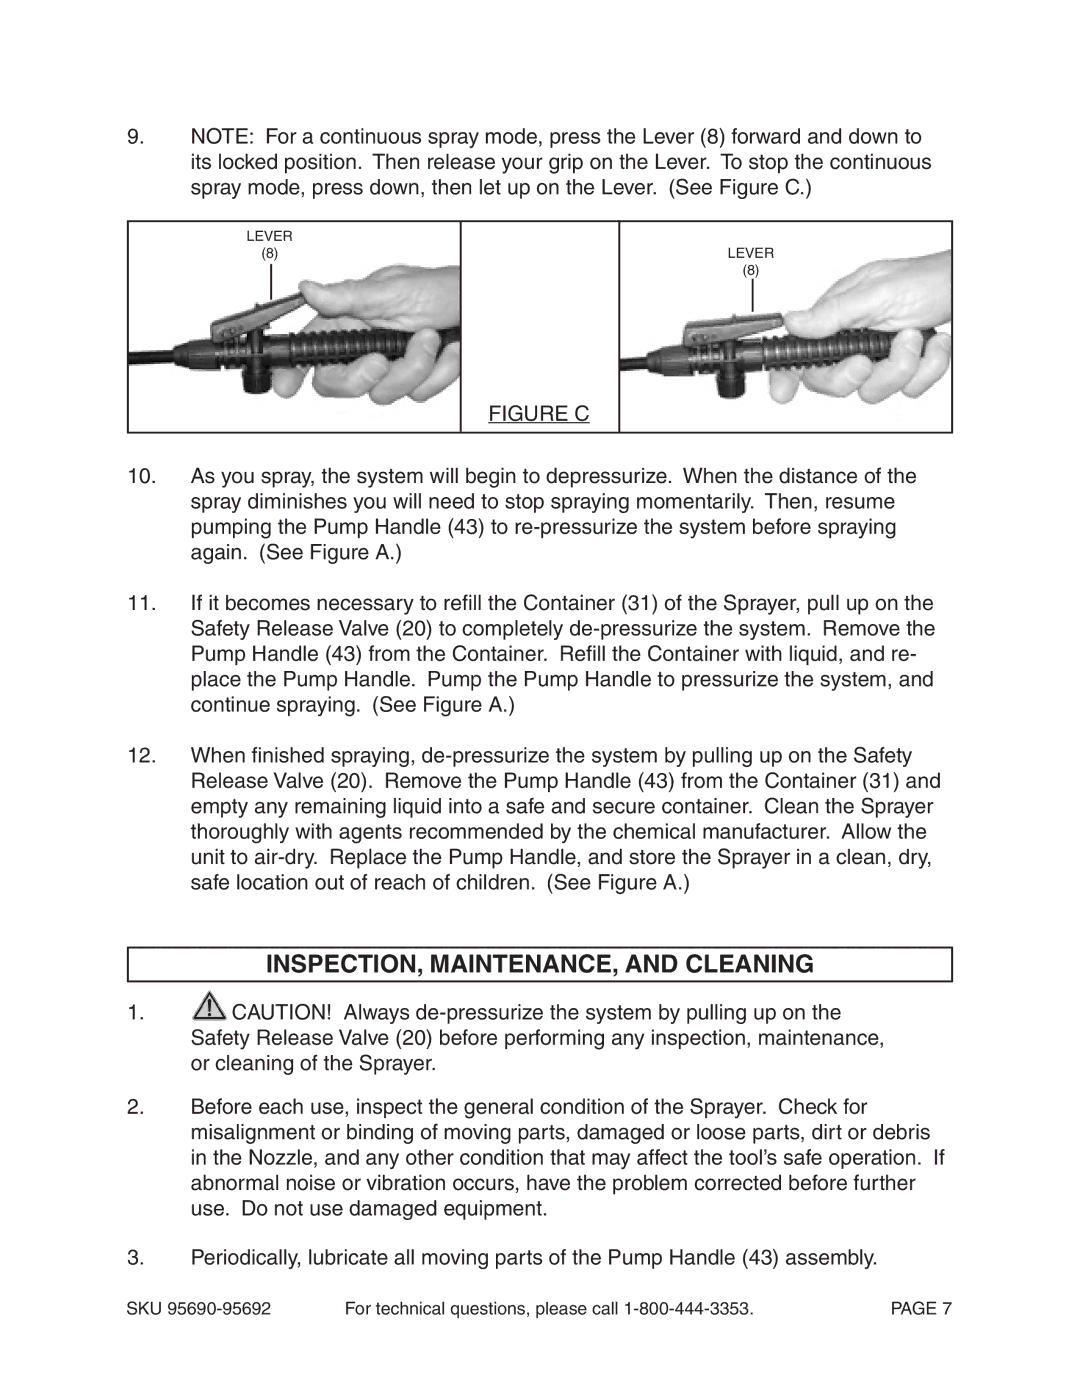
9.NOTE: For a continuous spray mode, press the Lever (8) forward and down to its locked position. Then release your grip on the Lever. To stop the continuous spray mode, press down, then let up on the Lever. (See Figure C.)
LEVER
(8)
LEVER
(8)
FIGURE C
10.As you spray, the system will begin to depressurize. When the distance of the spray diminishes you will need to stop spraying momentarily. Then, resume pumping the Pump Handle (43) to
11.If it becomes necessary to refill the Container (31) of the Sprayer, pull up on the Safety Release Valve (20) to completely
12.When finished spraying,
INSPECTION, MAINTENANCE, AND CLEANING
1.![]() CAUTION! Always
CAUTION! Always
2.Before each use, inspect the general condition of the Sprayer. Check for misalignment or binding of moving parts, damaged or loose parts, dirt or debris in the Nozzle, and any other condition that may affect the tool’s safe operation. If abnormal noise or vibration occurs, have the problem corrected before further use. Do not use damaged equipment.
3.Periodically, lubricate all moving parts of the Pump Handle (43) assembly.
SKU | For technical questions, please call | PAGE 7 |
