To make this process as quick and as easy as pos- sible, we suggest that you use the full-OSD sys- tem with the on-screen menus, and step through each input.
Input Setup
The first step in configuring the AVR is to select an input, i.e. to associate an analog or digital input with each input source in use, e.g. CD or DVD. Note that once an input is selected, all settings for the Digital Input, Speaker Configura- tion and Surround Mode will ”attach” themselves to that input and be stored in a non-volatile memory. This means that once made, the selection of an input will automatically recall those settings. For that reason, the procedures described below must be repeated for each input source so that you have the opportunity to custom tailor each source to your specific listening requirements. However, once made they need not be changed again unless you need to alter a setting.
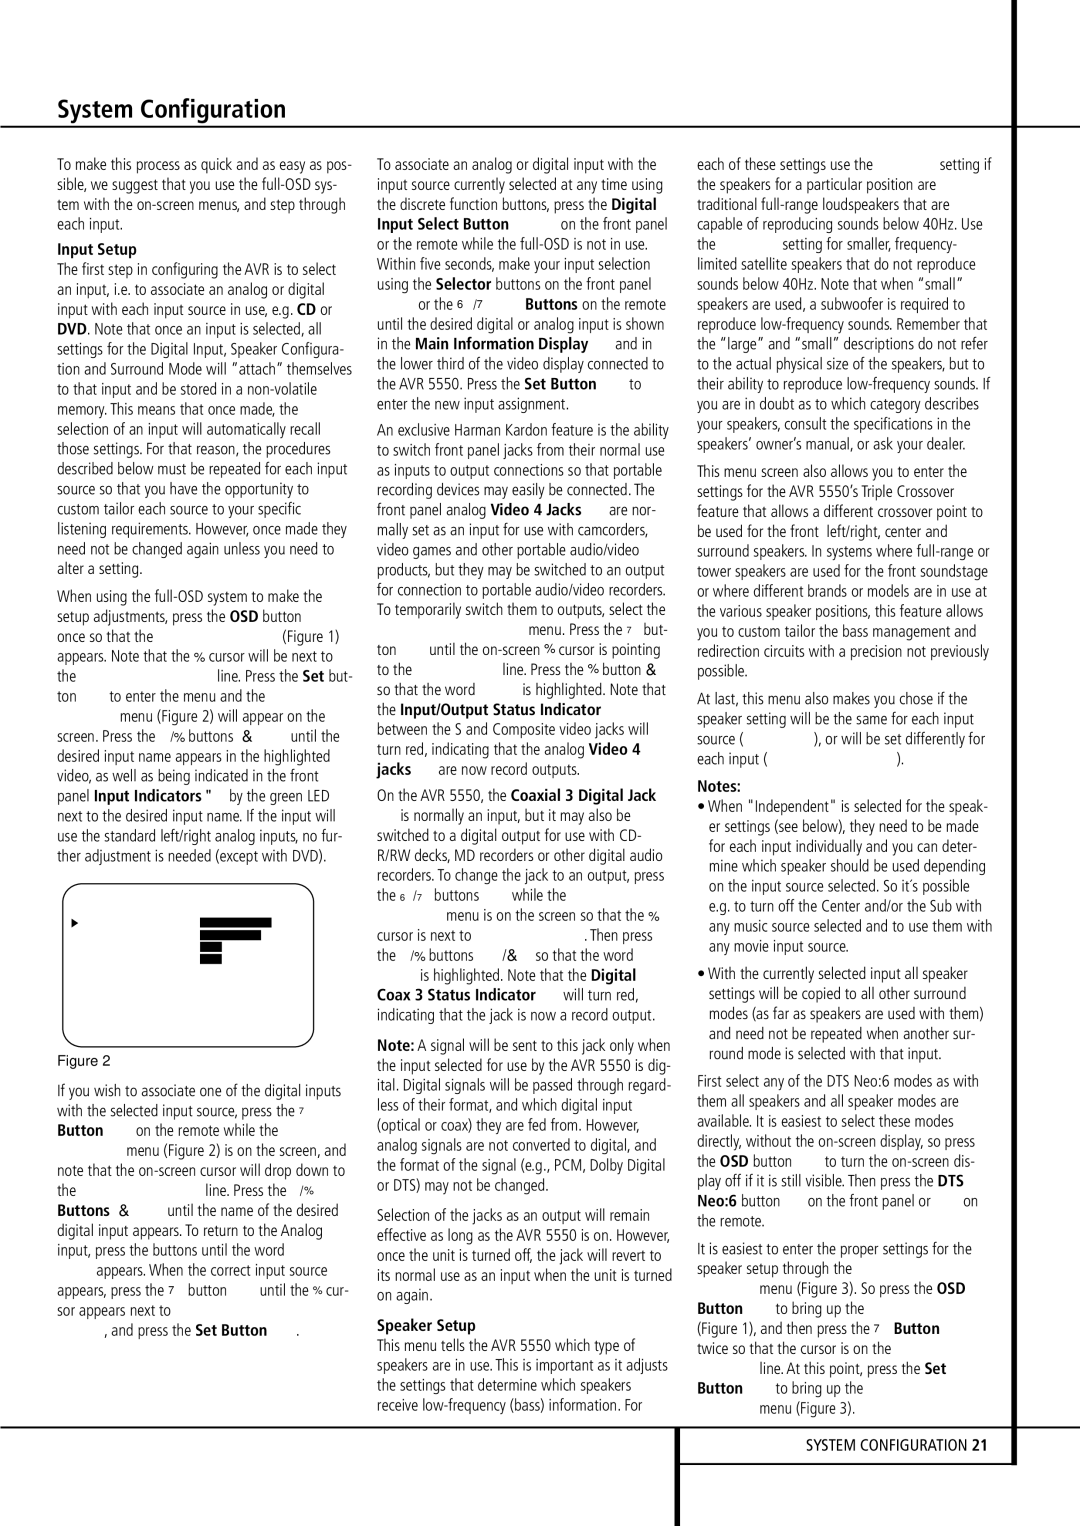
When using the full-OSD system to make the setup adjustments, press the OSD button L once so that the MASTER MENU (Figure 1) appears. Note that the › cursor will be next to the IN/OUT SETUP line. Press the Set but- ton Fto enter the menu and the IN/OUT SETUP menu (Figure 2) will appear on the screen. Press the ‹/› buttons E until the desired input name appears in the highlighted video, as well as being indicated in the front panel Input Indicators ˆ by the green LED next to the desired input name. If the input will use the standard left/right analog inputs, no fur- ther adjustment is needed (except with DVD).
* I N / O U T S E T U P *
I N P U T | | : | V I D E O 1 | |
| | | |
D I G I T A L | I N : | A N A L O G | |
C O A X I A L | 3 | : | I N | O U T |
| | | | | | |
V I D E O 4 | | : | I N | O U T |
B A C K T O | M A S T E R M E N U |
Figure 2
If you wish to associate one of the digital inputs with the selected input source, press the ¤ Button Don the remote while the IN/OUT SETUP menu (Figure 2) is on the screen, and note that the on-screen cursor will drop down to the DIGITAL I N line. Press the ‹/› Buttons E until the name of the desired digital input appears. To return to the Analog input, press the buttons until the word ANA- LOG appears. When the correct input source appears, press the ¤ button Duntil the › cur- sor appears next to BACK TO MASTER MENU, and press the Set Button F.
To associate an analog or digital input with the input source currently selected at any time using the discrete function buttons, press the Digital Input Select Button ÚGon the front panel or the remote while the full-OSD is not in use. Within five seconds, make your input selection using the Selector buttons on the front panel 7$ or the ⁄/¤ DButtons on the remote until the desired digital or analog input is shown in the Main Information Display ˜ and in the lower third of the video display connected to the AVR 5550. Press the Set Button Fto enter the new input assignment.
An exclusive Harman Kardon feature is the ability to switch front panel jacks from their normal use as inputs to output connections so that portable recording devices may easily be connected. The front panel analog Video 4 Jacks Ô are nor- mally set as an input for use with camcorders, video games and other portable audio/video products, but they may be switched to an output for connection to portable audio/video recorders. To temporarily switch them to outputs, select the IN/OUT SETUP menu. Press the ¤ but- ton Duntil the on-screen › cursor is pointing to the VIDEO 4 line. Press the › button
so that the word OUT is highlighted. Note that the Input/Output Status Indicator ( between the S and Composite video jacks will turn red, indicating that the analog Video 4 jacks Ô are now record outputs.
On the AVR 5550, the Coaxial 3 Digital Jack
Óis normally an input, but it may also be switched to a digital output for use with CD- R/RW decks, MD recorders or other digital audio recorders. To change the jack to an output, press the ⁄/¤ buttons Dwhile the IN/OUT SETUP menu is on the screen so that the › cursor is next to COAXIAL 3. Then press
the ‹/› buttons E/ so that the word OUT is highlighted. Note that the Digital Coax 3 Status Indicator ( will turn red, indicating that the jack is now a record output.
Note: A signal will be sent to this jack only when the input selected for use by the AVR 5550 is dig- ital. Digital signals will be passed through regard- less of their format, and which digital input (optical or coax) they are fed from. However, analog signals are not converted to digital, and the format of the signal (e.g., PCM, Dolby Digital or DTS) may not be changed.
Selection of the jacks as an output will remain effective as long as the AVR 5550 is on. However, once the unit is turned off, the jack will revert to its normal use as an input when the unit is turned on again.
Speaker Setup
This menu tells the AVR 5550 which type of speakers are in use. This is important as it adjusts the settings that determine which speakers receive low-frequency (bass) information. For
each of these settings use the LARGE setting if the speakers for a particular position are traditional full-range loudspeakers that are capable of reproducing sounds below 40Hz. Use the SMALL setting for smaller, frequency- limited satellite speakers that do not reproduce sounds below 40Hz. Note that when “small” speakers are used, a subwoofer is required to reproduce low-frequency sounds. Remember that the “large” and “small” descriptions do not refer to the actual physical size of the speakers, but to their ability to reproduce low-frequency sounds. If you are in doubt as to which category describes your speakers, consult the specifications in the speakers’ owner’s manual, or ask your dealer.
This menu screen also allows you to enter the settings for the AVR 5550’s Triple Crossover feature that allows a different crossover point to be used for the front left/right, center and surround speakers. In systems where full-range or tower speakers are used for the front soundstage or where different brands or models are in use at the various speaker positions, this feature allows you to custom tailor the bass management and redirection circuits with a precision not previously possible.
At last, this menu also makes you chose if the speaker setting will be the same for each input source (GLOBAL), or will be set differently for each input (INDEPENDENT).
Notes:
•When "Independent" is selected for the speak- er settings (see below), they need to be made for each input individually and you can deter- mine which speaker should be used depending on the input source selected. So it´s possible e.g. to turn off the Center and/or the Sub with any music source selected and to use them with any movie input source.
•With the currently selected input all speaker settings will be copied to all other surround modes (as far as speakers are used with them) and need not be repeated when another sur- round mode is selected with that input.
First select any of the DTS Neo:6 modes as with them all speakers and all speaker modes are available. It is easiest to select these modes directly, without the on-screen display, so press the OSD button Lto turn the on-screen dis- play off if it is still visible. Then press the DTS
Neo:6 button & on the front panel or on the remote.
It is easiest to enter the proper settings for the speaker setup through the SPEAKER SETUP menu (Figure 3). So press the OSD Button Lto bring up the MASTER MENU (Figure 1), and then press the ¤ Button D twice so that the cursor is on the SPEAKER SETUP line. At this point, press the Set Button Fto bring up the SPEAKER SETUP menu (Figure 3).