Maintenance - Burn Pot
Fig. 38
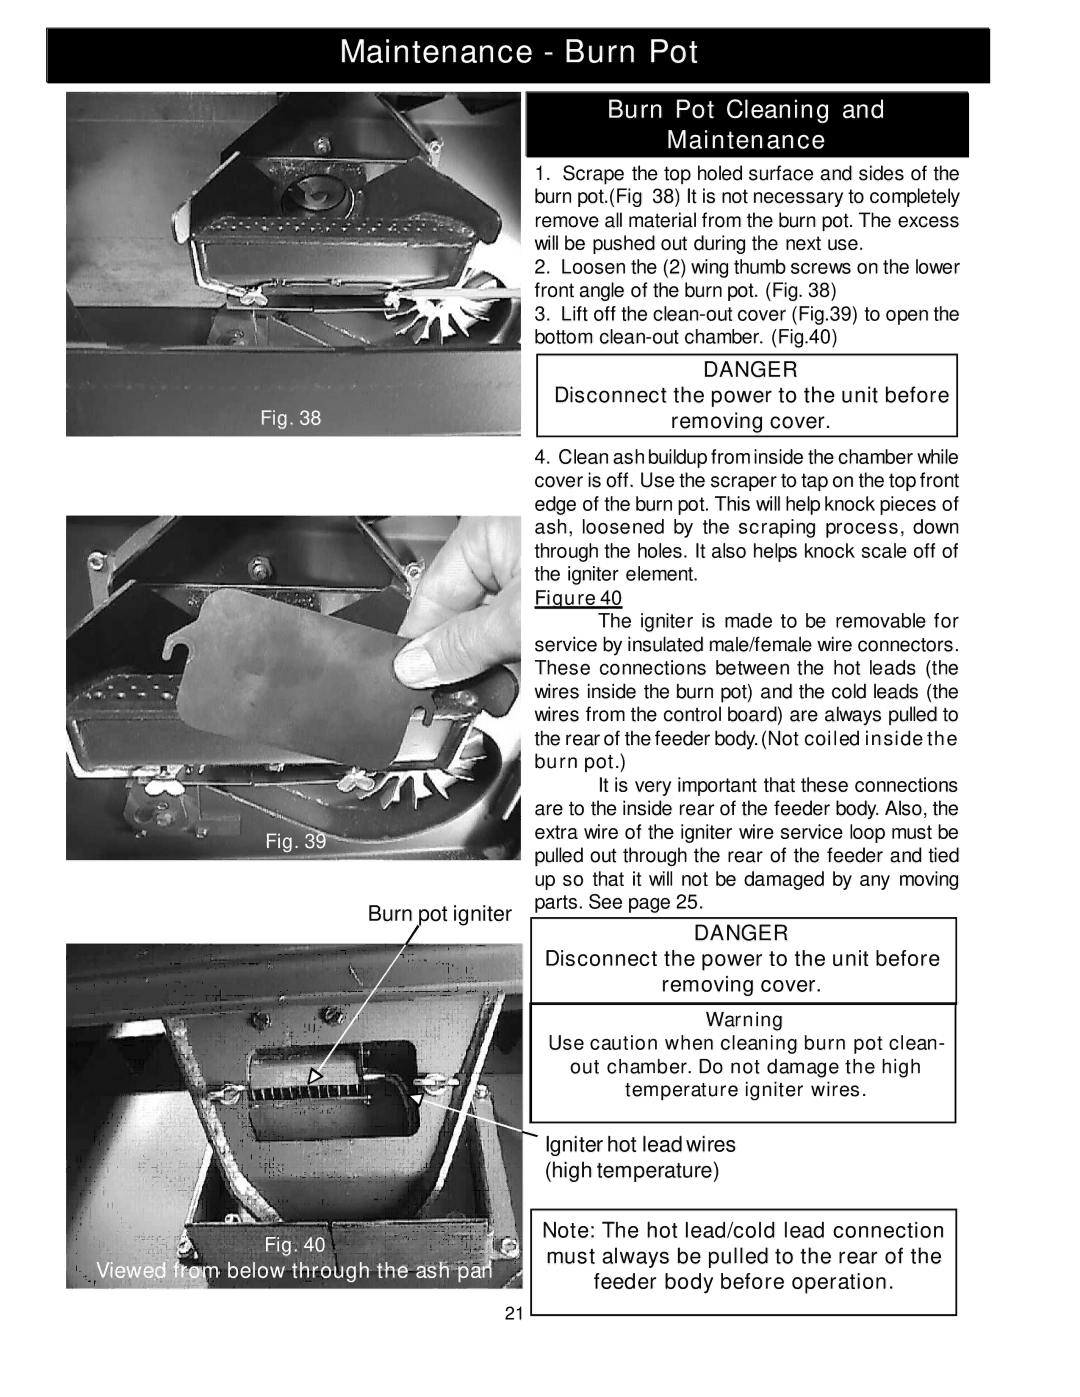
Fig. 39
Burn Pot Cleaning and
Maintenance
1.Scrape the top holed surface and sides of the burn pot.(Fig 38) It is not necessary to completely remove all material from the burn pot. The excess will be pushed out during the next use.
2.Loosen the (2) wing thumb screws on the lower front angle of the burn pot. (Fig. 38)
3.Lift off the
DANGER
Disconnect the power to the unit before
removing cover.
4.Clean ash buildup from inside the chamber while cover is off. Use the scraper to tap on the top front edge of the burn pot. This will help knock pieces of ash, loosened by the scraping process, down through the holes. It also helps knock scale off of the igniter element.
Figure 40
The igniter is made to be removable for service by insulated male/female wire connectors. These connections between the hot leads (the wires inside the burn pot) and the cold leads (the wires from the control board) are always pulled to the rear of the feeder body.(Not coiled inside the burn pot.)
It is very important that these connections are to the inside rear of the feeder body. Also, the extra wire of the igniter wire service loop must be pulled out through the rear of the feeder and tied up so that it will not be damaged by any moving
Burn pot igniter parts. See page 25.
DANGER
Disconnect the power to the unit before
removing cover.
Warning
Use caution when cleaning burn pot clean-
out chamber. Do not damage the high
temperature igniter wires.
Igniter hot lead wires (high temperature)
Fig. 40 | Note: The hot lead/cold lead connection | |
must always be pulled to the rear of the | ||
Viewed from below through the ash pan | ||
feeder body before operation. | ||
|
21