MAINTENANCE SCHEDULE / MOWER MAINTENANCE
Maintenance Schedule
Follow the hourly or calendar intervals, whichever occurs first. More frequent service will be required if working for prolonged periods under dusty, dry conditions, when airborne debris is present or after extensive operation cutting tall, dry grass.
Daily
-Clean grass debris from the height of cut ratchet, air filter in the cowl and the underside of the deck housing.
-Check the condition of guards and safety devices.
-Check condition of cutterblade.
-Check condition of grassbag and ensure airways are clear (replace if damaged).
25 - 50 Hours Or Every Season
-Lubricate pivot points and linkages with oil.
-Check the cables / switch and connection.
-Sharpen the cutterblade.
-Flash test (Dealer) to ensure complete safety.
Grassbag
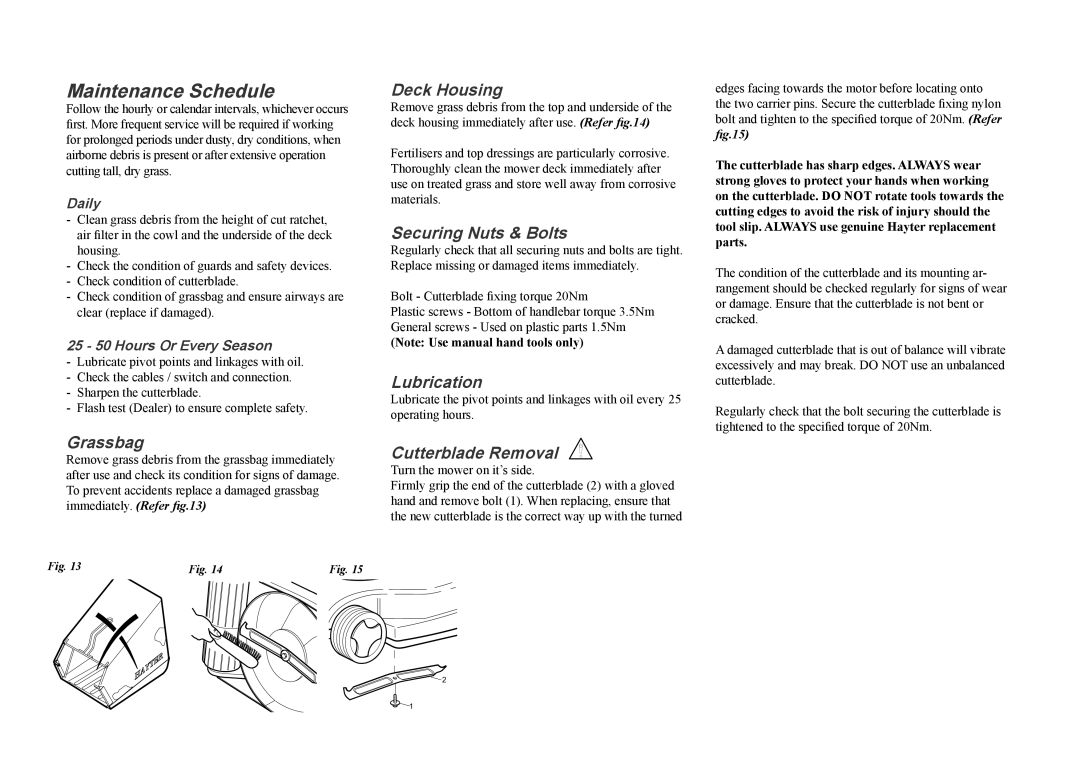
Remove grass debris from the grassbag immediately after use and check its condition for signs of damage. To prevent accidents replace a damaged grassbag immediately. (Refer fig.13)
Deck Housing
Remove grass debris from the top and underside of the deck housing immediately after use. (Refer fig.14)
Fertilisers and top dressings are particularly corrosive. Thoroughly clean the mower deck immediately after use on treated grass and store well away from corrosive materials.
Securing Nuts & Bolts
Regularly check that all securing nuts and bolts are tight. Replace missing or damaged items immediately.
Bolt - Cutterblade fixing torque 20Nm
Plastic screws - Bottom of handlebar torque 3.5Nm General screws - Used on plastic parts 1.5Nm
(Note: Use manual hand tools only)
Lubrication
Lubricate the pivot points and linkages with oil every 25 operating hours.
Cutterblade Removal
Turn the mower on it’s side.
Firmly grip the end of the cutterblade (2) with a gloved hand and remove bolt (1). When replacing, ensure that the new cutterblade is the correct way up with the turned
edges facing towards the motor before locating onto the two carrier pins. Secure the cutterblade fixing nylon bolt and tighten to the specified torque of 20Nm. (Refer fig.15)
The cutterblade has sharp edges. ALWAYS wear strong gloves to protect your hands when working on the cutterblade. DO NOT rotate tools towards the cutting edges to avoid the risk of injury should the tool slip. ALWAYS use genuine Hayter replacement parts.
The condition of the cutterblade and its mounting ar- rangement should be checked regularly for signs of wear or damage. Ensure that the cutterblade is not bent or cracked.
A damaged cutterblade that is out of balance will vibrate excessively and may break. DO NOT use an unbalanced cutterblade.
Regularly check that the bolt securing the cutterblade is tightened to the specified torque of 20Nm.
Fig. 13 | Fig. 14 | Fig. 15 |
2
1
10