
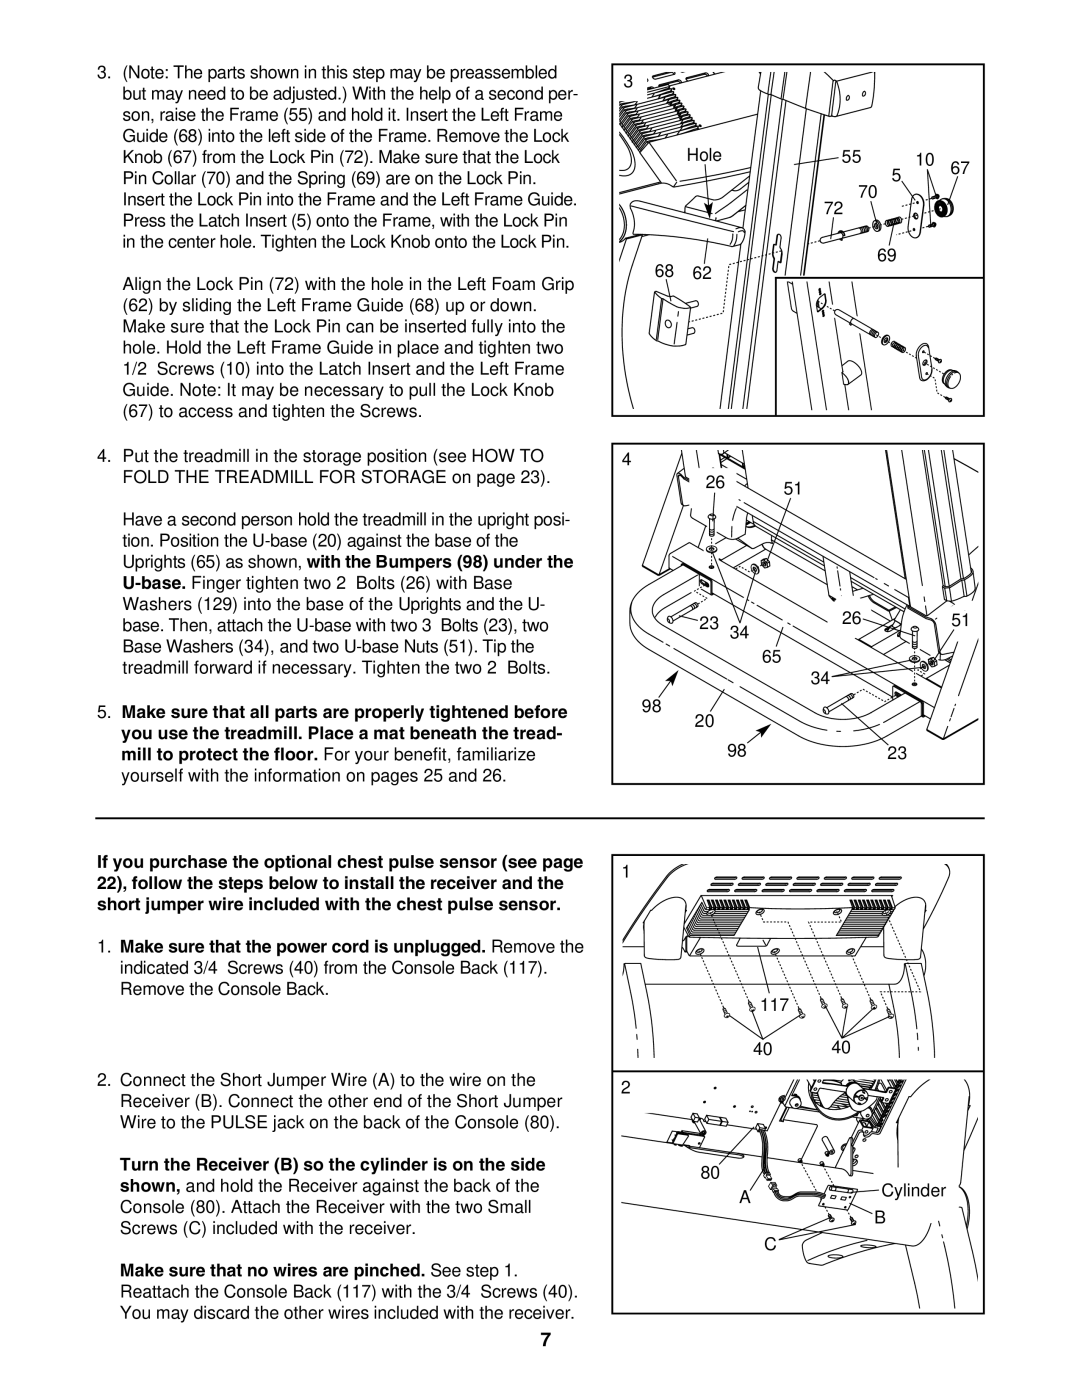
HRTL16940 specifications
The Healthrider HRTL16940 is an innovative piece of cardiovascular equipment designed for individuals seeking an effective and convenient way to engage in fitness. This model combines advanced technology with user-friendly features, ensuring a rewarding workout experience.One of the standout features of the HRTL16940 is its SpaceSaver design, which allows the elliptical to be easily folded and stored when not in use. This makes it ideal for those who may have limited space in their homes without compromising on workout quality. The machine's compact size does not detract from its sturdy construction, ensuring that it can handle intense workouts without wobbling or shaking.
The Healthrider HRTL16940 integrates a smooth, natural elliptical motion that is designed to reduce stress on your joints. With its 16 resistance levels, users can customize their workouts to fit their fitness level and goals, whether they're a beginner or a seasoned athlete. The adjustable incline feature allows for varying intensity, targeting different muscle groups and enhancing calorie burn.
Equipped with a built-in workout monitor, the elliptical provides real-time feedback on essential metrics, including time, distance, calories burned, and heart rate. The heart rate monitor is particularly beneficial for users aiming to maintain the right training zone for optimal fitness gains. The handlebars of the machine are ergonomically designed and come with integrated controls, allowing users to adjust their workout settings quickly and efficiently.
In terms of entertainment and motivation, the HRTL16940 features a built-in sound system that allows users to connect their music devices. This addition makes it easier to stay motivated during workouts. Furthermore, the machine is compatible with fitness apps, enabling users to track their progress and set long-term goals seamlessly.
Safety is another important aspect of the Healthrider HRTL16940. The machine includes safety features such as oversized pedals to ensure stability during workouts and prevent slipping. This attention to detail in design and technology makes the HRTL16940 a reliable choice for users looking to improve their fitness levels while prioritizing safety and comfort.
Overall, the Healthrider HRTL16940 offers a comprehensive combination of features, technology, and practical characteristics that cater to a wide range of users. Whether you're looking to lose weight, build strength, or improve cardiovascular health, this elliptical machine provides an effective and enjoyable workout solution.