HOW TO USE THE MANUAL MODE
1Insert the key into the console.
See HOW TO TURN ON THE POWER on page 9.
Note: When you are familiar with the console, you may go directly to step 5. While learning to use the console, please read all steps.
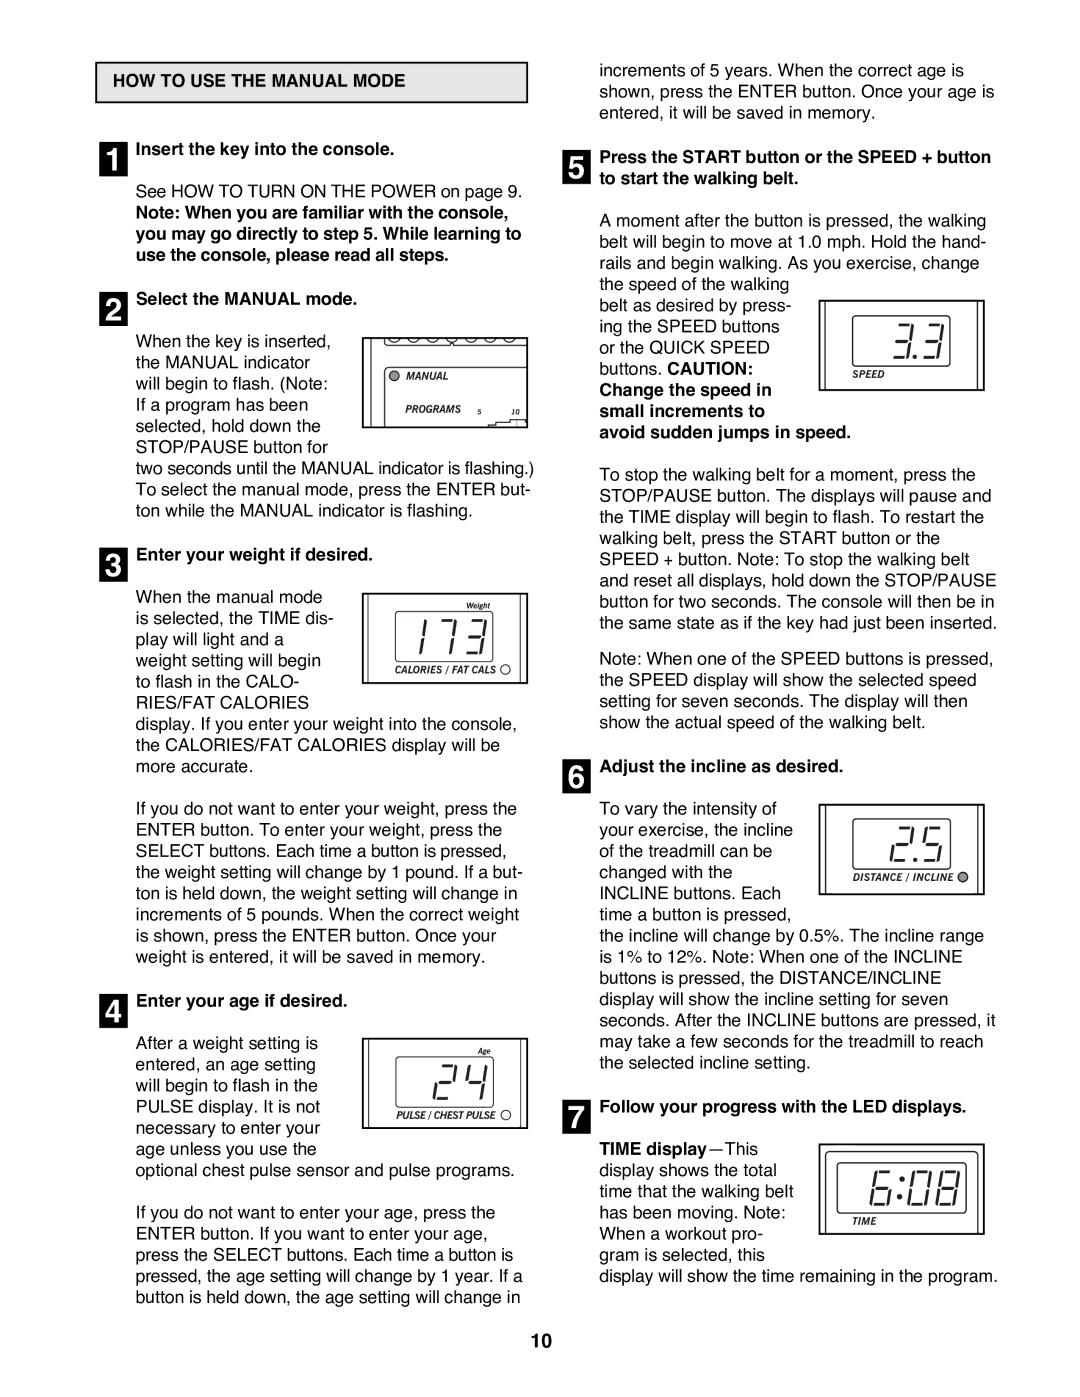
2Select the MANUAL mode.
When the key is inserted, the MANUAL indicator
will begin to flash. (Note:
If a program has been selected, hold down the STOP/PAUSE button for
two seconds until the MANUAL indicator is flashing.) To select the manual mode, press the ENTER but- ton while the MANUAL indicator is flashing.
3Enter your weight if desired.
When the manual mode
is selected, the TIME dis- play will light and a weight setting will begin
to flash in the CALO-
RIES/FAT CALORIES
display. If you enter your weight into the console, the CALORIES/FAT CALORIES display will be more accurate.
If you do not want to enter your weight, press the ENTER button. To enter your weight, press the SELECT buttons. Each time a button is pressed, the weight setting will change by 1 pound. If a but- ton is held down, the weight setting will change in increments of 5 pounds. When the correct weight is shown, press the ENTER button. Once your weight is entered, it will be saved in memory.
4Enter your age if desired.
After a weight setting is
entered, an age setting will begin to flash in the PULSE display. It is not
necessary to enter your age unless you use the
optional chest pulse sensor and pulse programs.
If you do not want to enter your age, press the ENTER button. If you want to enter your age, press the SELECT buttons. Each time a button is pressed, the age setting will change by 1 year. If a button is held down, the age setting will change in
increments of 5 years. When the correct age is shown, press the ENTER button. Once your age is entered, it will be saved in memory.
5 Press the START button or the SPEED + button to start the walking belt.
A moment after the button is pressed, the walking belt will begin to move at 1.0 mph. Hold the hand- rails and begin walking. As you exercise, change the speed of the walking
belt as desired by press- ing the SPEED buttons or the QUICK SPEED buttons. CAUTION:
Change the speed in small increments to
avoid sudden jumps in speed.
To stop the walking belt for a moment, press the STOP/PAUSE button. The displays will pause and the TIME display will begin to flash. To restart the walking belt, press the START button or the SPEED + button. Note: To stop the walking belt and reset all displays, hold down the STOP/PAUSE button for two seconds. The console will then be in the same state as if the key had just been inserted.
Note: When one of the SPEED buttons is pressed, the SPEED display will show the selected speed setting for seven seconds. The display will then show the actual speed of the walking belt.
6Adjust the incline as desired.
To vary the intensity of
your exercise, the incline of the treadmill can be changed with the INCLINE buttons. Each time a button is pressed,
the incline will change by 0.5%. The incline range is 1% to 12%. Note: When one of the INCLINE buttons is pressed, the DISTANCE/INCLINE display will show the incline setting for seven seconds. After the INCLINE buttons are pressed, it may take a few seconds for the treadmill to reach the selected incline setting.
7Follow your progress with the LED displays.
TIME displayÑThis
display shows the total time that the walking belt has been moving. Note:
When a workout pro- gram is selected, this
display will show the time remaining in the program.
10