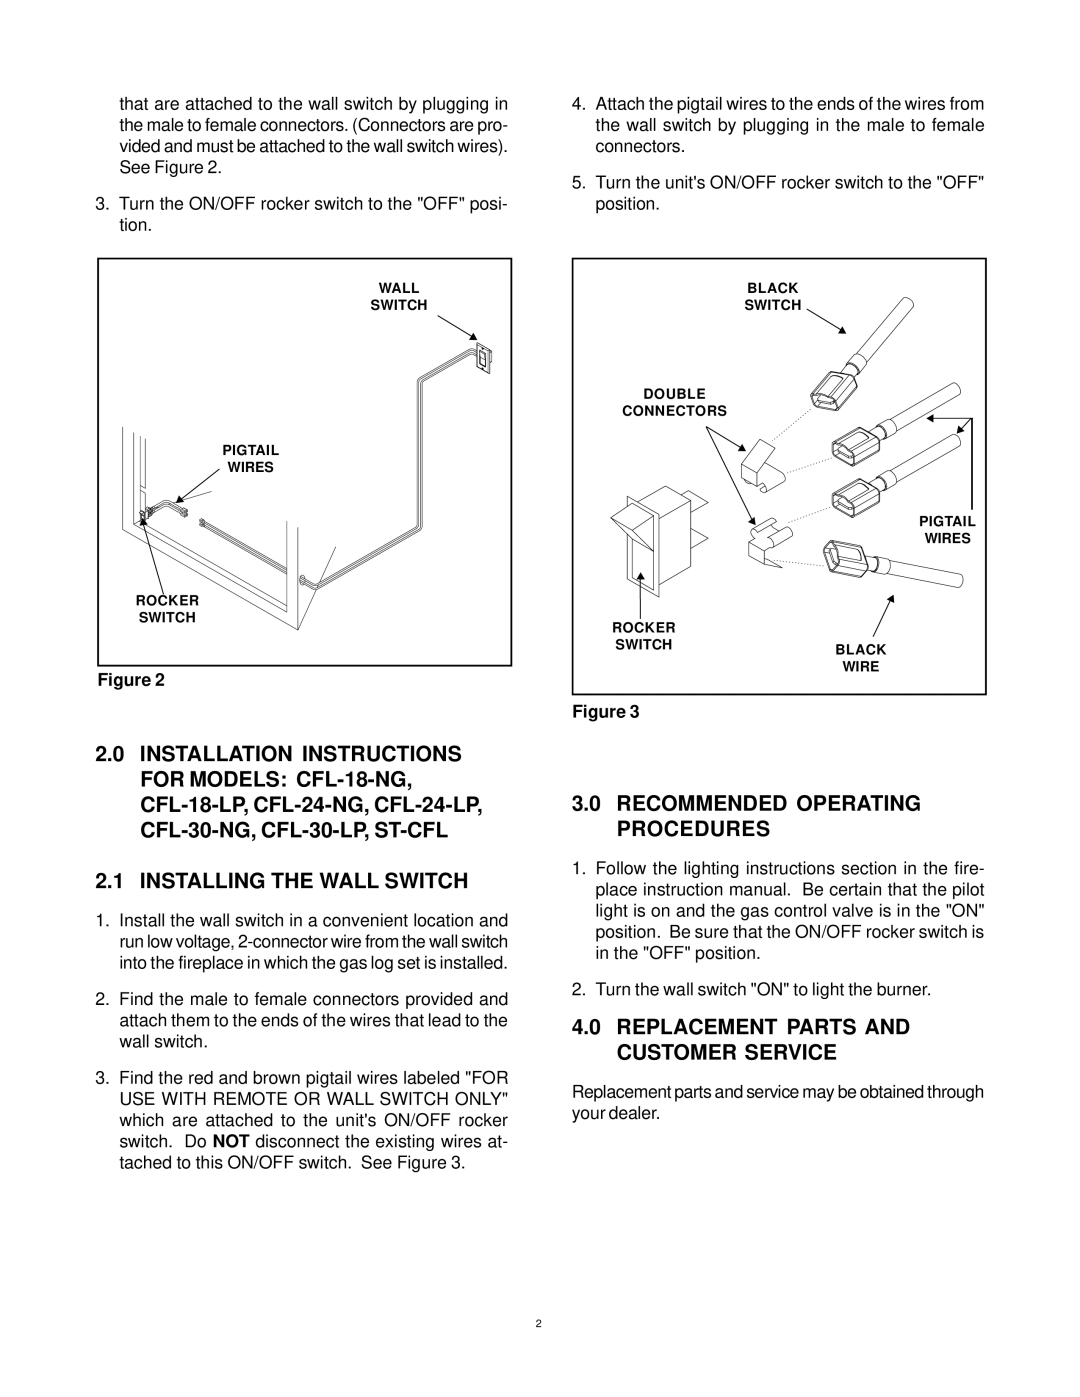
that are attached to the wall switch by plugging in the male to female connectors. (Connectors are pro- vided and must be attached to the wall switch wires). See Figure 2.
3.Turn the ON/OFF rocker switch to the "OFF" posi- tion.
WALL |
SWITCH |
PIGTAIL |
WIRES |
ROCKER |
SWITCH |
Figure 2
2.0INSTALLATION INSTRUCTIONS FOR MODELS:
2.1INSTALLING THE WALL SWITCH
1.Install the wall switch in a convenient location and run low voltage,
2.Find the male to female connectors provided and attach them to the ends of the wires that lead to the wall switch.
3.Find the red and brown pigtail wires labeled "FOR
USE WITH REMOTE OR WALL SWITCH ONLY" which are attached to the unit's ON/OFF rocker switch. Do NOT disconnect the existing wires at- tached to this ON/OFF switch. See Figure 3.
4.Attach the pigtail wires to the ends of the wires from the wall switch by plugging in the male to female connectors.
5.Turn the unit's ON/OFF rocker switch to the "OFF" position.
| BLACK |
| SWITCH |
DOUBLE |
|
CONNECTORS |
|
| PIGTAIL |
| WIRES |
ROCKER |
|
SWITCH | BLACK |
| |
| WIRE |
Figure 3
3.0RECOMMENDED OPERATING PROCEDURES
1.Follow the lighting instructions section in the fire- place instruction manual. Be certain that the pilot light is on and the gas control valve is in the "ON" position. Be sure that the ON/OFF rocker switch is in the "OFF" position.
2.Turn the wall switch "ON" to light the burner.
4.0REPLACEMENT PARTS AND CUSTOMER SERVICE
Replacement parts and service may be obtained through your dealer.
2
