CFL-24LP-B, CFL-30LP-B, CFL-18LP-B, ST-CFL-24LP specifications
Heat & Glo has established itself as a leader in the fireplace and heating solutions industry, and its LifeStyle series further solidifies this reputation. Within this innovative range, models such as the ST-CFL-24LP, CFL-18LP-B, CFL-24LP-B, and CFL-30LP-B stand out for their aesthetic appeal, efficient heating capabilities, and advanced technology.One of the main features of these models is their contemporary design. Each unit is crafted with a sleek finish, making them an ideal addition to modern living spaces. The large fire viewing area provides an enhanced visual experience, allowing users to enjoy the mesmerizing flames from multiple angles. The clean, linear lines and minimalist framing options enable these fireplaces to seamlessly integrate into various interior designs.
Efficiency and performance are at the forefront of the LifeStyle series. Each model is equipped with a powerful heating system that employs innovative technology to provide maximum heat output while optimizing energy use. This ensures that not only will the space be heated effectively, but it will also remain cost-efficient, making it a great choice for environmentally conscious consumers.
The LifeStyle ST-CFL-24LP and its counterparts feature advanced electronic ignition systems, enhancing reliability while simplifying operation. With the easy-to-use remote control, users can adjust the flame height, heat settings, and even set timers, providing convenience and customized comfort at the touch of a button.
Moreover, these models incorporate ventless technology that allows for versatile installation options. This feature means there is no need for extensive venting, making it easier for homeowners to find the perfect spot for their fireplace without the constraints of traditional models. Whether placed in a living room, bedroom, or even outdoors, the LifeStyle series offers flexibility while ensuring safe operation.
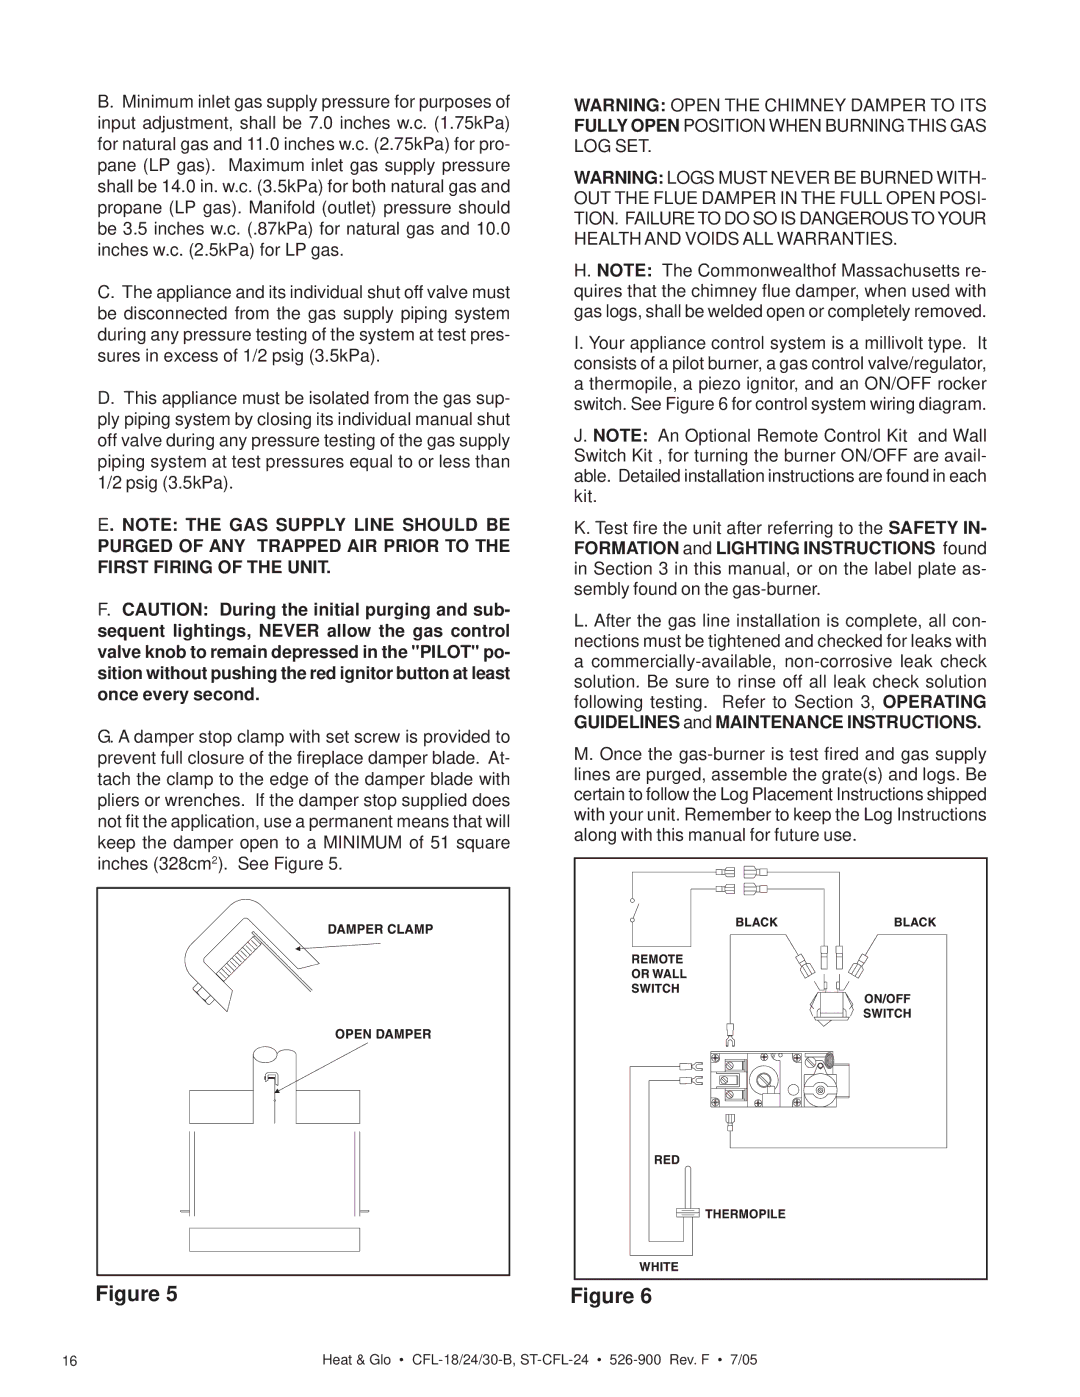
Safety is also a critical consideration with the LifeStyle fireplaces. Each unit comes with built-in safety features, including automatic shut-off systems and flame sensors, ensuring peace of mind while the fireplace is in use.
In summary, the Heat & Glo LifeStyle ST-CFL-24LP, CFL-18LP-B, CFL-24LP-B, and CFL-30LP-B models are designed for those seeking a combination of aesthetics, efficiency, and advanced technology. With their contemporary styling, efficient heating capabilities, and user-friendly features, these models stand out as premium choices for any modern home setting.