
SL-5330 specifications
The Heath Zenith SL-5330 is a versatile and innovative motion-sensing outdoor light designed to enhance security and convenience for residential and commercial properties. This model is particularly appealing due to its blend of advanced technologies and user-friendly features that address the needs of modern users.One of the standout features of the SL-5330 is its motion sensor capability. Equipped with a state-of-the-art PIR (Passive Infrared) sensor, the light is exceptionally responsive and can detect motion within a range of up to 30 feet, making it ideal for driveways, entrances, and yard perimeters. This feature not only conserves energy by ensuring the light only activates when needed but also provides peace of mind by illuminating dark areas when unexpected movement is detected.
The SL-5330 also boasts an adjustable time setting, allowing users to customize how long the light stays on after detecting motion. The timer can be set to intervals ranging from 30 seconds to 10 minutes, ensuring flexibility according to personal preferences and specific situational requirements. This adaptability makes it well-suited for various applications, from brief visits to extended stays.
In terms of design, the Heath Zenith SL-5330 features a sleek and unobtrusive aesthetic that can seamlessly blend into any architectural style. Its durable housing is weather-resistant, ensuring that it can withstand the elements, which is crucial for outdoor installations. The light emits a bright 1800-Lumen output, offering excellent illumination for both security purposes and visibility.
The SL-5330 also incorporates energy-efficient LED technology, which not only reduces energy consumption but also provides a long operational lifespan. The integration of LED lights means less frequent replacements, translating to lower maintenance costs and less environmental impact. Furthermore, users can enjoy the benefits of instant brightness, as LEDs provide immediate illumination upon activation.
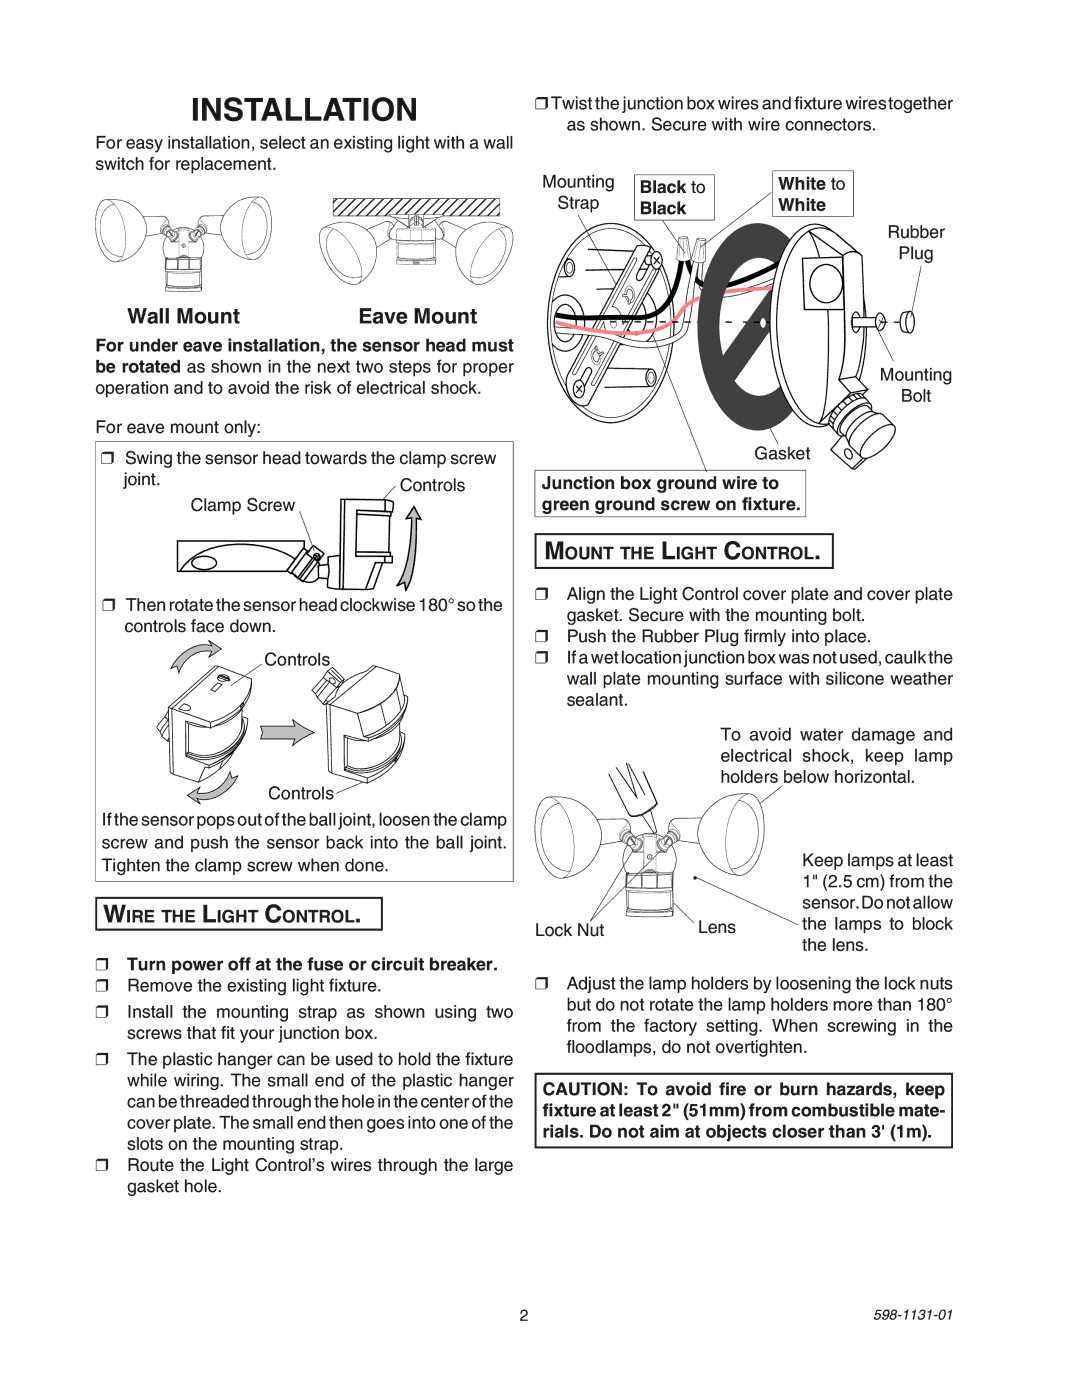
Another key characteristic is its easy installation process. The SL-5330 comes with clear instructions, allowing homeowners and professionals alike to set it up without any specialized tools or equipment. Its versatility allows for wall mounting or eave installation, giving users multiple placement options to maximize coverage and effectiveness.
Overall, the Heath Zenith SL-5330 stands out as a reliable and practical solution for outdoor lighting needs. With its advanced motion detection, customizable settings, energy-efficient design, and robust construction, it continues to be a popular choice for enhancing outdoor security while promoting safety and convenience in everyday life.