Estimated Installation Time: 30 minutes
Items needed for installation (not included):
• | Phillips and flathead screwdrivers | ||
• | Pliers | • | Wire strippers/cutters |
• | Safety glasses | • | Light bulbs |
• | Silicon caulk | • | Black tape |
outdoor Wireless Motion Sensor
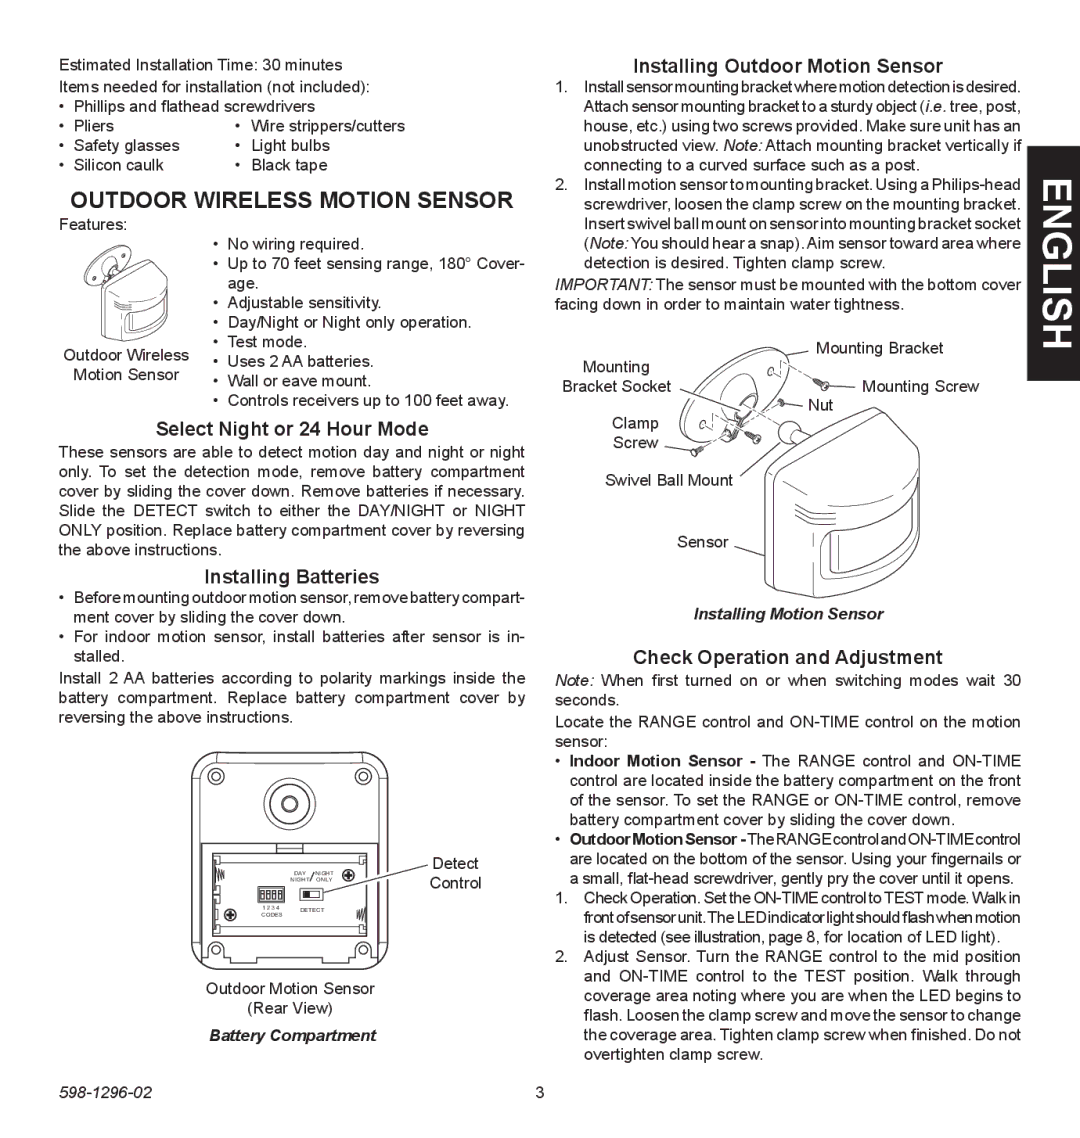
Installing Outdoor Motion Sensor
1. | Installsensormountingbracketwheremotiondetectionisdesired. |
| Attach sensor mounting bracket to a sturdy object (i.e. tree, post, |
| house, etc.) using two screws provided. Make sure unit has an |
| unobstructed view. Note: Attach mounting bracket vertically if |
| connecting to a curved surface such as a post. |
2. | Install motion sensor to mounting bracket. Using a |
| screwdriver, loosen the clamp screw on the mounting bracket. |
Features:
Outdoor Wireless
Motion Sensor
•No wiring required.
•Up to 70 feet sensing range, 180° Cover- age.
•Adjustable sensitivity.
•Day/Night or Night only operation.
•Test mode.
•Uses 2 AA batteries.
•Wall or eave mount.
•Controls receivers up to 100 feet away.
Insert swivel ball mount on sensor into mounting bracket socket | ENGLISH | |
(Note: You should hear a snap). Aim sensor toward area where | ||
detection is desired. Tighten clamp screw. | ||
IMPORTANT: The sensor must be mounted with the bottom cover | ||
facing down in order to maintain water tightness. | ||
| Mounting Bracket | |
Mounting |
|
|
Bracket Socket | Mounting Screw |
|
| Nut |
|
Select Night or 24 Hour Mode
These sensors are able to detect motion day and night or night only. To set the detection mode, remove battery compartment cover by sliding the cover down. Remove batteries if necessary. Slide the DETECT switch to either the DAY/NIGHT or NIGHT ONLY position. Replace battery compartment cover by reversing the above instructions.
Installing Batteries
•Before mounting outdoor motion sensor, remove battery compart- ment cover by sliding the cover down.
•For indoor motion sensor, install batteries after sensor is in- stalled.
Install 2 AA batteries according to polarity markings inside the battery compartment. Replace battery compartment cover by reversing the above instructions.
Detect
| DAY | NIGHT | Control |
| NIGHT | ONLY | |
1 2 3 4 | DETECT |
| |
CODES |
|
|
|
Outdoor Motion Sensor
(Rear View)
Battery Compartment
Clamp |
Screw |
Swivel Ball Mount |
Sensor |
Installing Motion Sensor
Check Operation and Adjustment
Note: When first turned on or when switching modes wait 30 seconds.
Locate the RANGE control and
•Indoor Motion Sensor - The RANGE control and
•OutdoorMotionSensor
1.Check Operation. Set the
2.Adjust Sensor. Turn the RANGE control to the mid position and