Z-Wave INSTALLATION
Aspire RF’s controllers (RFHDCSG and RFTDCSG) support the Helios
1.Set your primary controller to Install mode to add the thermostat as a node on your network (Refer to the Aspire RF User Guide for more detailed instructions).
2.In the Thermostat’s Main Menu, scroll down to the
3.Press the YES button in the
4.The controller will indicate that the thermostat was successfully added to the RF network.
5.For deleting the thermostat from an existing network set the Primary Controller to Uninstall mode.
6.In the Thermostat’s main menu, scroll down to the
Z-Wave APPLICATIONS
After the RFTSTAT01 has been installed in the
• Control the thermostat temperature from the Aspire RF controller
• Control the HVAC mode from the Aspire RF controller
• Add a specific thermostat setting or mode to a customized scene. This scene can be activated from a Aspire RF controller. NOTE: thermostat control is not included in scenes that are loaded into the Wallmount Scene Controller (RFWDC)
• Ability to easily set thermostat schedules with the Aspire RF controller.
NOTE – By using Aspire RF’s
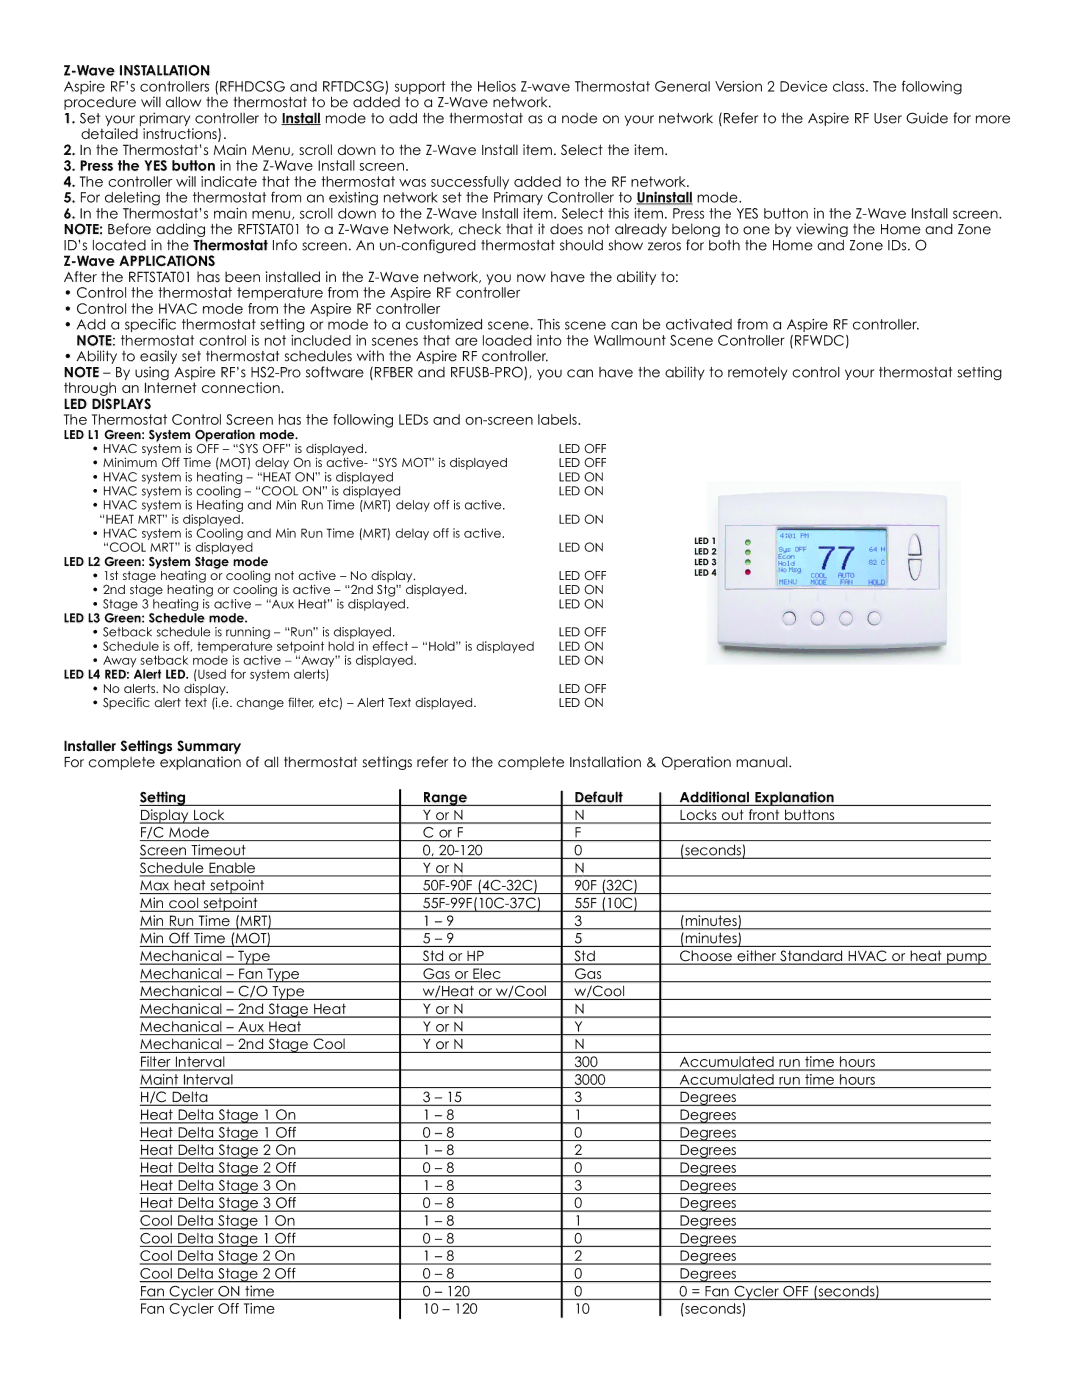
LED DISPLAYS
The Thermostat Control Screen has the following LEDs and
LED L1 Green: System Operation mode.
• HVAC system is OFF – “SYS OFF” is displayed. | LED OFF |
| |
• Minimum Off Time (MOT) delay On is active- “SYS MOT” is displayed | LED OFF |
| |
• HVAC system is heating – “HEAT ON” is displayed | LED ON |
| |
• HVAC system is cooling – “COOL ON” is displayed | LED ON |
| |
• HVAC system is Heating and Min Run Time (MRT) delay off is active. |
|
| |
“HEAT MRT” is displayed. | LED ON |
| |
• HVAC system is Cooling and Min Run Time (MRT) delay off is active. |
| LED 1 | |
“COOL MRT” is displayed | LED ON | ||
LED 2 | |||
LED L2 Green: System Stage mode |
| LED 3 | |
• 1st stage heating or cooling not active – No display. | LED OFF | LED 4 | |
• 2nd stage heating or cooling is active – “2nd Stg” displayed. | LED ON |
| |
• Stage 3 heating is active – “Aux Heat” is displayed. | LED ON |
| |
LED L3 Green: Schedule mode. |
|
| |
• Setback schedule is running – “Run” is displayed. | LED OFF |
| |
• Schedule is off, temperature setpoint hold in effect – “Hold” is displayed | LED ON |
| |
• Away setback mode is active – “Away” is displayed. | LED ON |
| |
LED L4 RED: Alert LED. (Used for system alerts) |
|
| |
• No alerts. No display. | LED OFF |
| |
• Specific alert text (i.e. change filter, etc) – Alert Text displayed. | LED ON |
|
Installer Settings Summary
For complete explanation of all thermostat settings refer to the complete Installation & Operation manual.
Setting | Range | Default | Additional Explanation | |
Display Lock | Y or N | N | Locks out front buttons | |
F/C Mode | C or F | F |
| |
Screen Timeout | 0, | 0 | (seconds) | |
Schedule Enable | Y or N | N |
| |
Max heat setpoint | 90F (32C) |
| ||
Min cool setpoint | 55F (10C) |
| ||
Min Run Time (MRT) | 1 | – 9 | 3 | (minutes) |
Min Off Time (MOT) | 5 | – 9 | 5 | (minutes) |
Mechanical – Type | Std or HP | Std | Choose either Standard HVAC or heat pump | |
Mechanical – Fan Type | Gas or Elec | Gas |
| |
Mechanical – C/O Type | w/Heat or w/Cool | w/Cool |
| |
Mechanical – 2nd Stage Heat | Y or N | N |
| |
Mechanical – Aux Heat | Y or N | Y |
| |
Mechanical – 2nd Stage Cool | Y or N | N |
| |
Filter Interval |
|
| 300 | Accumulated run time hours |
Maint Interval |
|
| 3000 | Accumulated run time hours |
H/C Delta | 3 | – 15 | 3 | Degrees |
Heat Delta Stage 1 On | 1 | – 8 | 1 | Degrees |
Heat Delta Stage 1 Off | 0 | – 8 | 0 | Degrees |
Heat Delta Stage 2 On | 1 | – 8 | 2 | Degrees |
Heat Delta Stage 2 Off | 0 | – 8 | 0 | Degrees |
Heat Delta Stage 3 On | 1 | – 8 | 3 | Degrees |
Heat Delta Stage 3 Off | 0 | – 8 | 0 | Degrees |
Cool Delta Stage 1 On | 1 | – 8 | 1 | Degrees |
Cool Delta Stage 1 Off | 0 | – 8 | 0 | Degrees |
Cool Delta Stage 2 On | 1 | – 8 | 2 | Degrees |
Cool Delta Stage 2 Off | 0 | – 8 | 0 | Degrees |
Fan Cycler ON time | 0 | – 120 | 0 | 0 = Fan Cycler OFF (seconds) |
Fan Cycler Off Time | 10 – 120 | 10 | (seconds) | |
|
|
|
|
|
