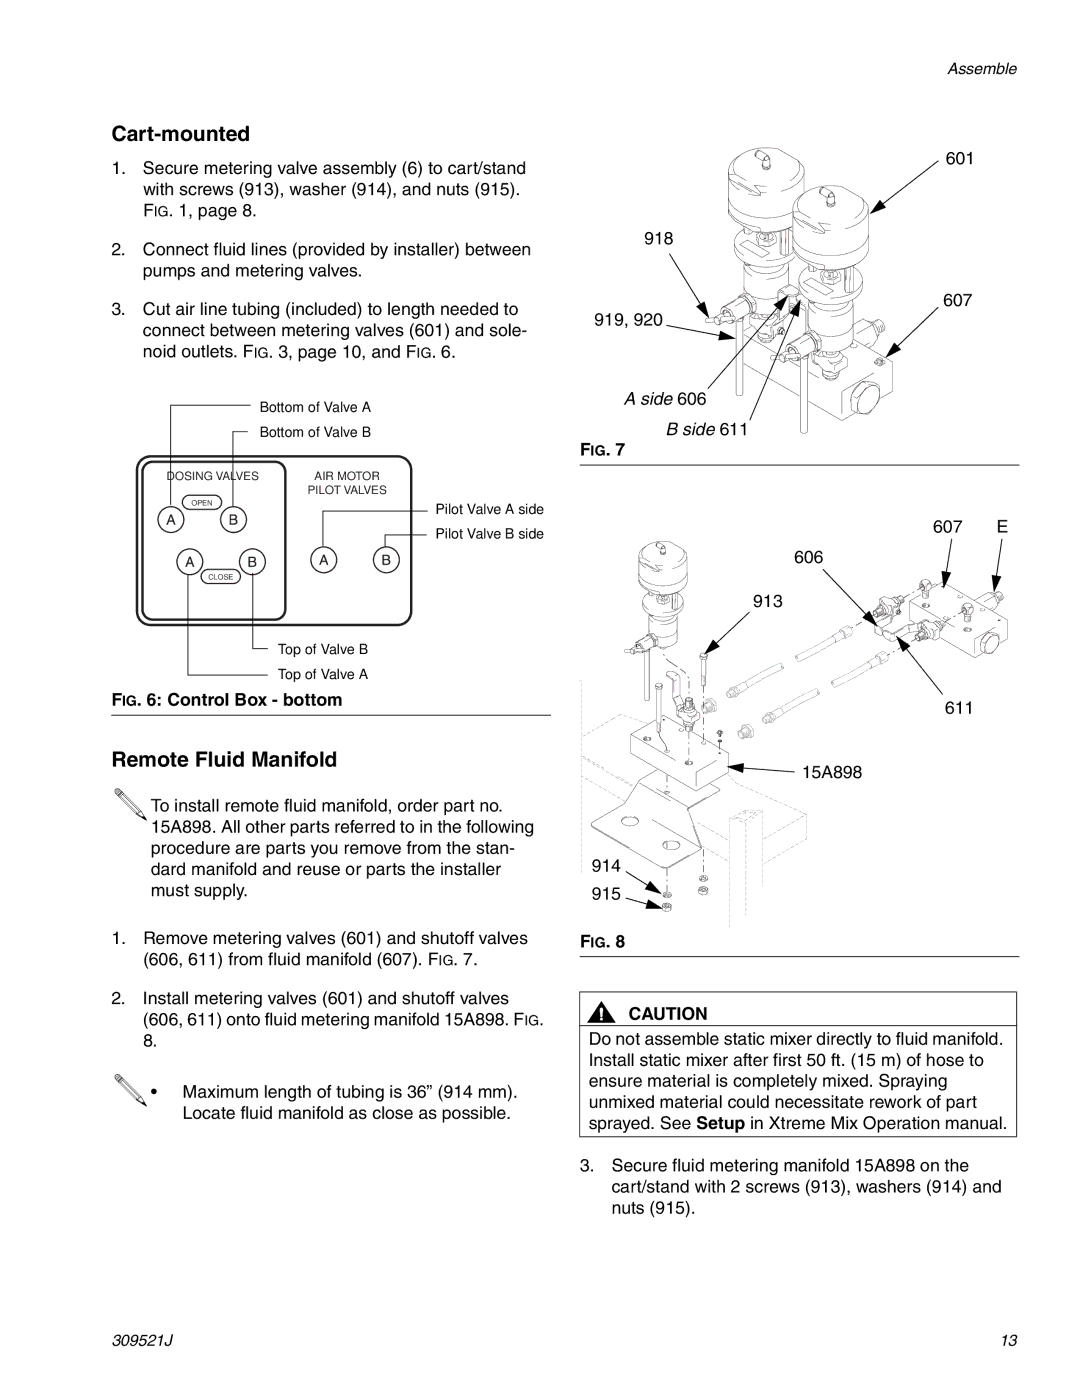
309521J specifications
The Hitachi 309521J is a remarkable piece of equipment designed to meet the demands of modern industrial applications. Known for its reliability and efficiency, this model has gained a strong reputation in various sectors including manufacturing, construction, and civil engineering.One of the standout features of the Hitachi 309521J is its powerful engine. Equipped with advanced technology, the engine provides robust performance while ensuring fuel efficiency. This translates to lower operational costs over time, making it an economical choice for businesses looking to optimize their budgets. The engine meets strict emission standards, emphasizing Hitachi's commitment to environmental sustainability.
The Hitachi 309521J also features an innovative hydraulic system that enhances productivity. The hydraulic components are designed for high performance and quick response times, allowing for seamless operation during various tasks. Whether lifting heavy loads, excavating, or performing complex maneuvers, the 309521J demonstrates efficiency and power, making it suitable for diverse applications.
In terms of design, the Hitachi 309521J prioritizes operator comfort and safety. The spacious cab is ergonomically designed, providing excellent visibility and easy access to controls. This user-friendly layout reduces operator fatigue, helping to improve overall safety and performance on the job site. Additionally, the machine is equipped with advanced safety features including automatic shut-off systems, ensuring maximum protection for the operator and personnel nearby.
Technologically, the Hitachi 309521J is packed with cutting-edge features. The model includes real-time monitoring capabilities, providing operators and managers with insights into operational efficiency, maintenance needs, and performance metrics. This helps in preventative maintenance and reduces downtime, ultimately enhancing productivity.
Durability is another key characteristic of the Hitachi 309521J. Built with high-quality materials, this machine withstands harsh working environments, maintaining optimal performance over extended periods. It is designed to endure common wear and tear, ensuring a long service life that justifies the investment.
In summary, the Hitachi 309521J stands out due to its powerful engine, efficient hydraulic system, operator-friendly design, advanced technology, and robust durability. It serves as a versatile tool in various industrial applications, helping businesses increase productivity while maintaining cost-efficiency and safety. As industries continue to evolve, the 309521J remains a solid choice for companies looking to enhance their machinery fleet with a reliable and sophisticated model.

