5-4. Replacing Liner O-Ring
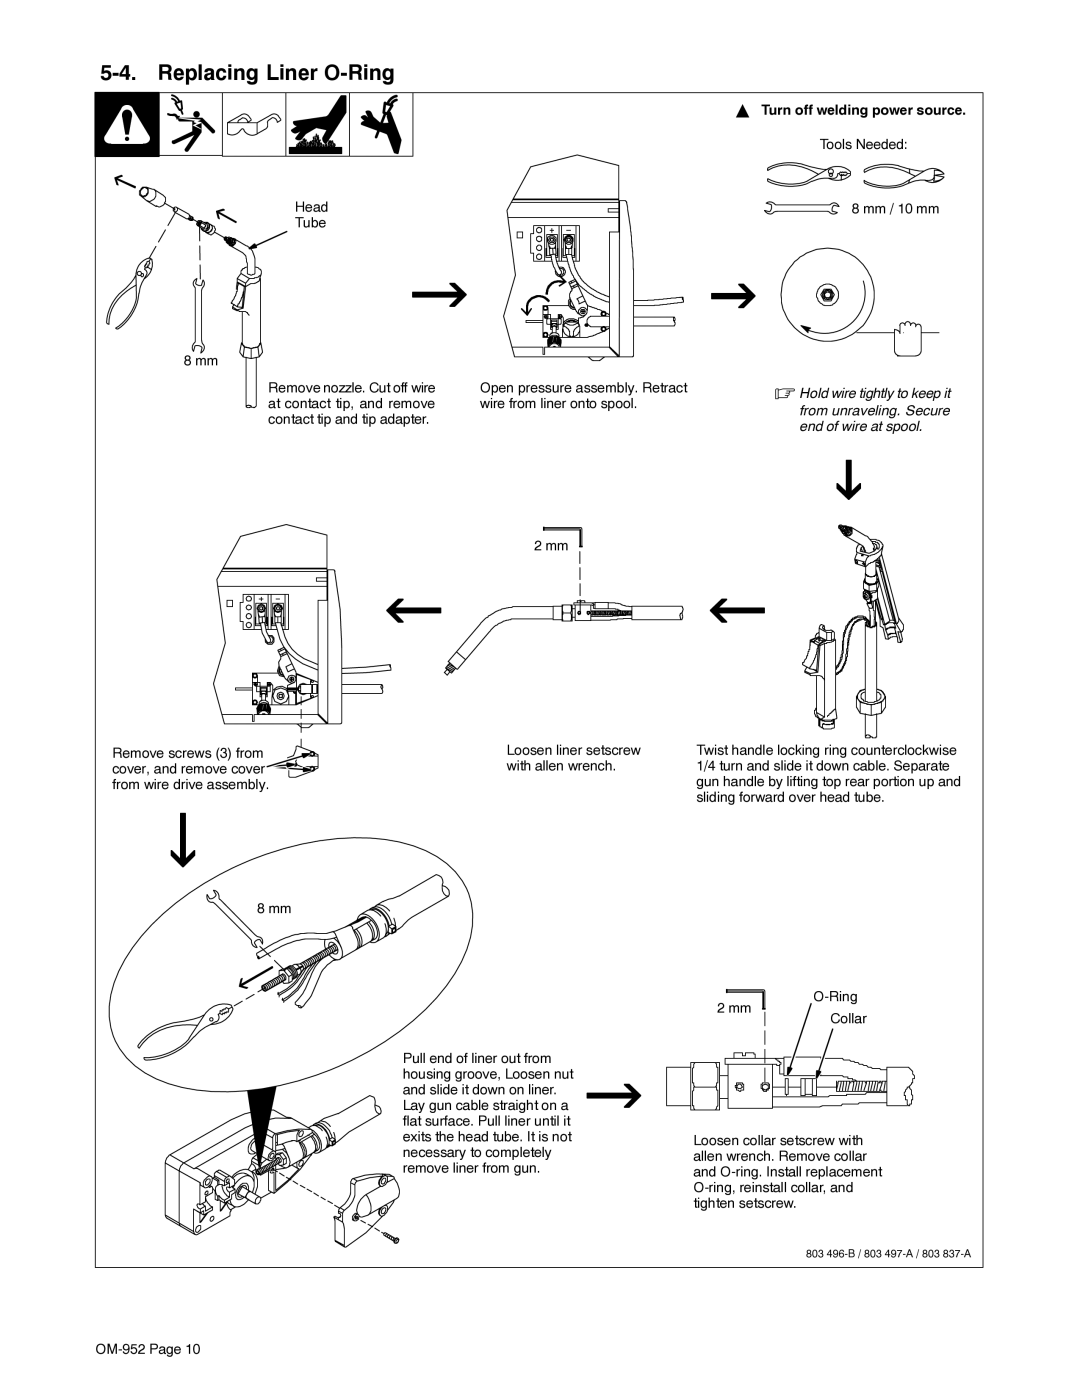
| Y Turn off welding power source. |
| Tools Needed: |
Head | 8 mm / 10 mm |
Tube |
|
8 mm
Remove nozzle. Cut off wire | Open pressure assembly. Retract | . Hold wire tightly to keep it | ||
at contact tip, and remove | wire from liner onto spool. | from unraveling. Secure | ||
contact tip and tip adapter. |
| |||
| end of wire at spool. | |||
|
| |||
|
|
|
|
|
|
|
|
|
|
2 mm
Remove screws (3) from ![]() cover, and remove cover
cover, and remove cover ![]()
![]() from wire drive assembly.
from wire drive assembly.
8 mm
Loosen liner setscrew | Twist handle locking ring counterclockwise |
with allen wrench. | 1/4 turn and slide it down cable. Separate |
| gun handle by lifting top rear portion up and |
| sliding forward over head tube. |
Pull end of liner out from housing groove, Loosen nut and slide it down on liner. Lay gun cable straight on a flat surface. Pull liner until it exits the head tube. It is not necessary to completely remove liner from gun.
![]()
Collar
Loosen collar setscrew with allen wrench. Remove collar and
803