5-3. Replacing Liner O-Ring (Continued)
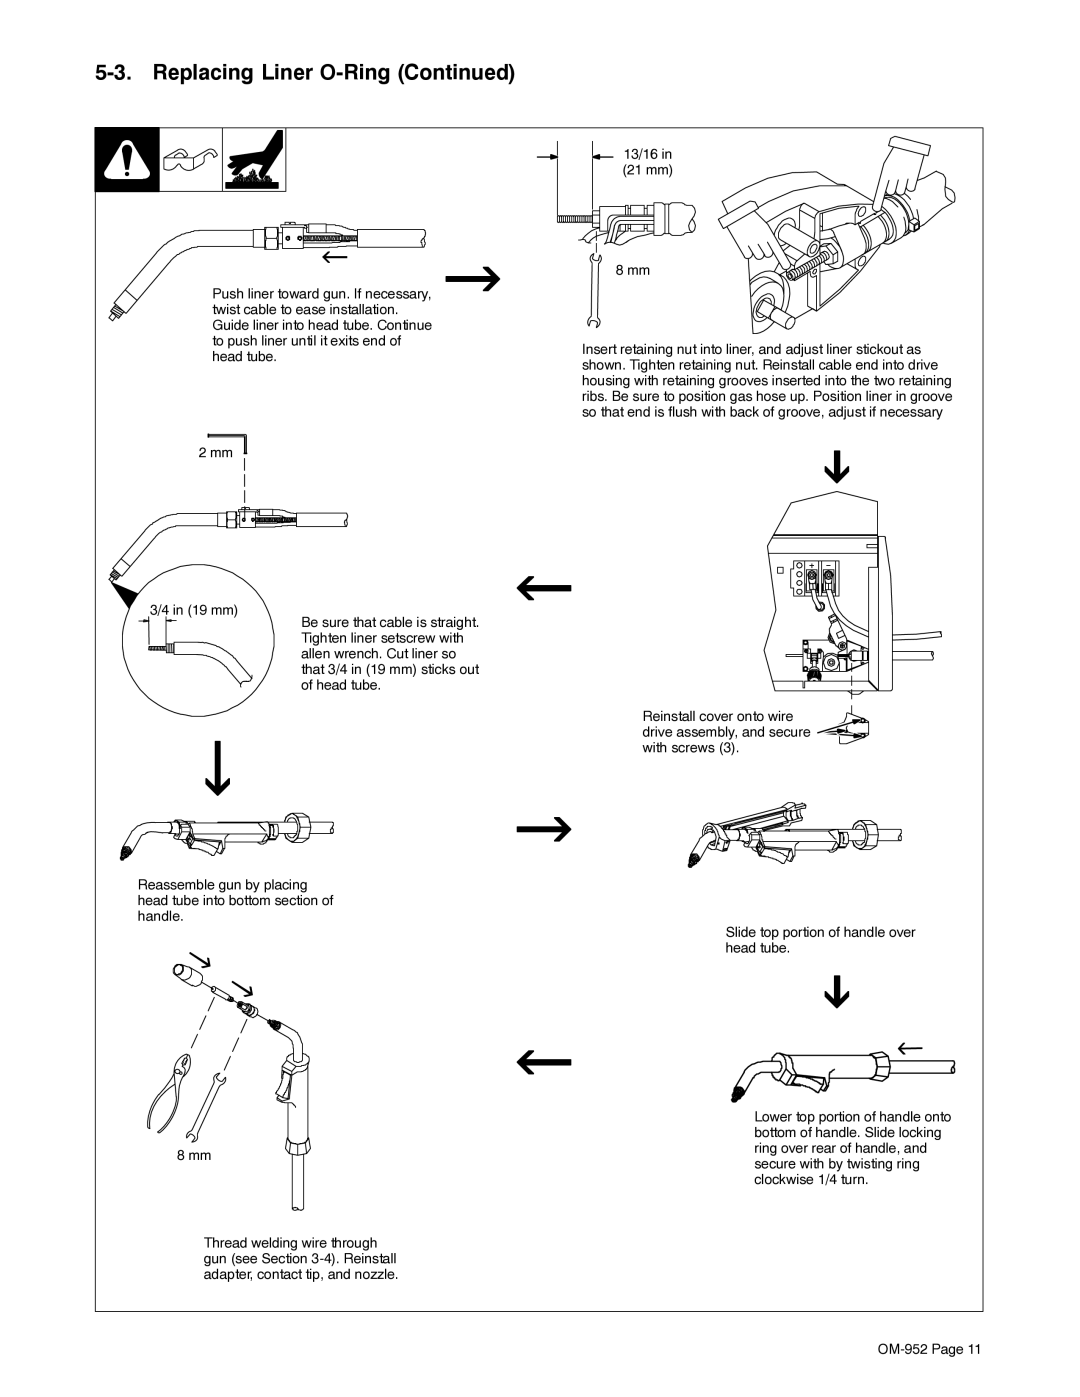
Push liner toward gun. If necessary, twist cable to ease installation. Guide liner into head tube. Continue to push liner until it exits end of head tube.
2 mm
13/16 in (21 mm)
8 mm
Insert retaining nut into liner, and adjust liner stickout as shown. Tighten retaining nut. Reinstall cable end into drive housing with retaining grooves inserted into the two retaining ribs. Be sure to position gas hose up. Position liner in groove so that end is flush with back of groove, adjust if necessary
3/4 in (19 mm)
Be sure that cable is straight. Tighten liner setscrew with allen wrench. Cut liner so that 3/4 in (19 mm) sticks out of head tube.
Reassemble gun by placing head tube into bottom section of handle.
8 mm
Thread welding wire through gun (see Section
Reinstall cover onto wire drive assembly, and secure ![]()
![]() with screws (3).
with screws (3).
Slide top portion of handle over head tube.
Lower top portion of handle onto bottom of handle. Slide locking ring over rear of handle, and secure with by twisting ring clockwise 1/4 turn.