5-5. Replacing Switch And/Or Head Tube
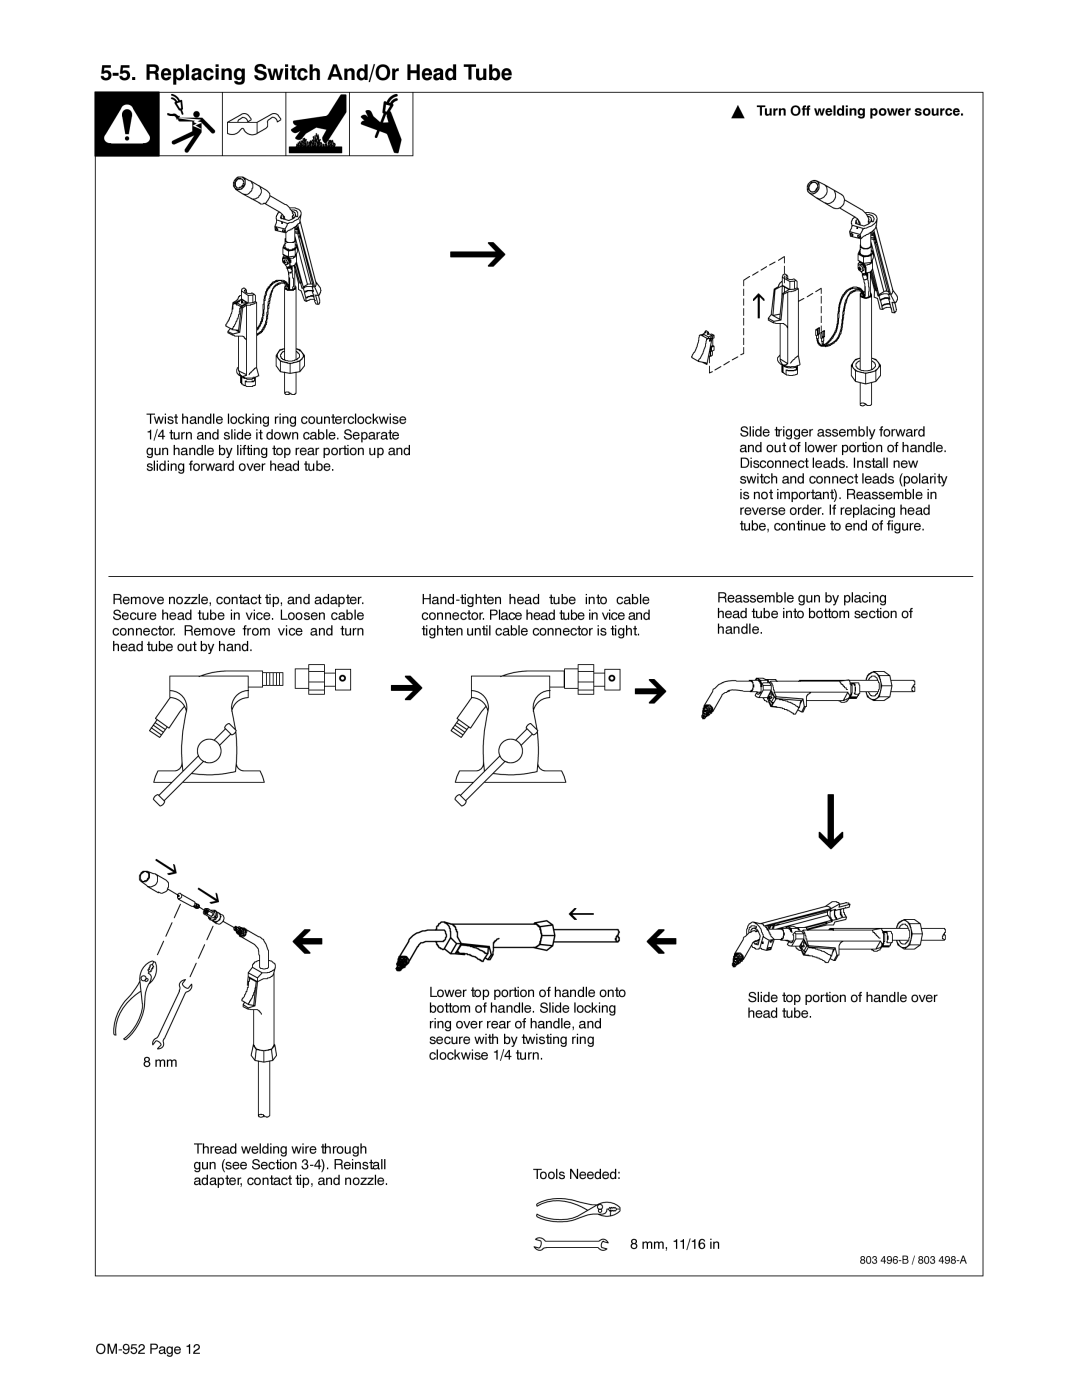
Twist handle locking ring counterclockwise 1/4 turn and slide it down cable. Separate gun handle by lifting top rear portion up and sliding forward over head tube.
YTurn Off welding power source.
Slide trigger assembly forward and out of lower portion of handle. Disconnect leads. Install new switch and connect leads (polarity is not important). Reassemble in reverse order. If replacing head tube, continue to end of figure.
Remove nozzle, contact tip, and adapter. Secure head tube in vice. Loosen cable connector. Remove from vice and turn head tube out by hand.
8 mm
Lower top portion of handle onto bottom of handle. Slide locking ring over rear of handle, and secure with by twisting ring clockwise 1/4 turn.
Reassemble gun by placing head tube into bottom section of handle.
Slide top portion of handle over head tube.
Thread welding wire through gun (see Section
Tools Needed:
8 mm, 11/16 in
803