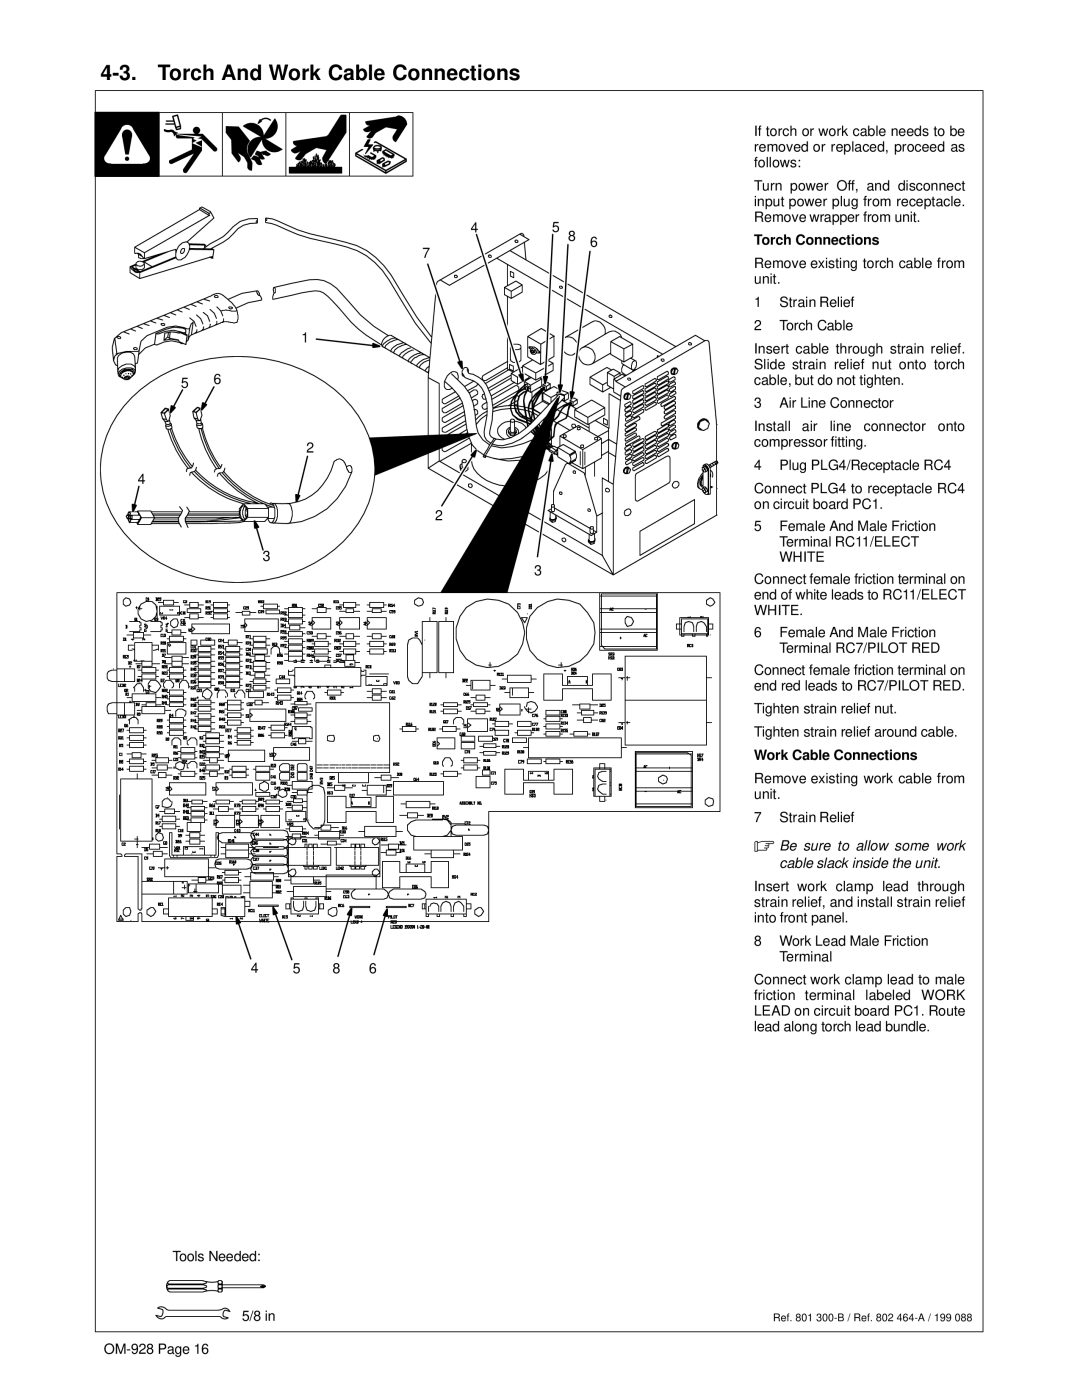
4-3. Torch And Work Cable Connections
4 | 5 | 8 | 6 |
|
|
|
7
1
5 6
2
4
2
3
3
4 | 5 | 8 | 6 |
Tools Needed:
5/8 in
If torch or work cable needs to be removed or replaced, proceed as follows:
Turn power Off, and disconnect input power plug from receptacle. Remove wrapper from unit.
Torch Connections
Remove existing torch cable from unit.
1Strain Relief
2Torch Cable
Insert cable through strain relief. Slide strain relief nut onto torch cable, but do not tighten.
3 Air Line Connector
Install air line connector onto compressor fitting.
4 Plug PLG4/Receptacle RC4
Connect PLG4 to receptacle RC4 on circuit board PC1.
5Female And Male Friction Terminal RC11/ELECT
WHITE
Connect female friction terminal on end of white leads to RC11/ELECT
WHITE.
6Female And Male Friction Terminal RC7/PILOT RED
Connect female friction terminal on end red leads to RC7/PILOT RED.
Tighten strain relief nut.
Tighten strain relief around cable.
Work Cable Connections
Remove existing work cable from unit.
7 Strain Relief
.Be sure to allow some work cable slack inside the unit.
Insert work clamp lead through strain relief, and install strain relief into front panel.
8Work Lead Male Friction Terminal
Connect work clamp lead to male friction terminal labeled WORK LEAD on circuit board PC1. Route lead along torch lead bundle.
Ref. 801