OWNER’S MANUAL

ASSEMBLY

Continued

INSTALLING AUTOMATIC CHAIN SHARPENER

(Fast Sharp Models Only)

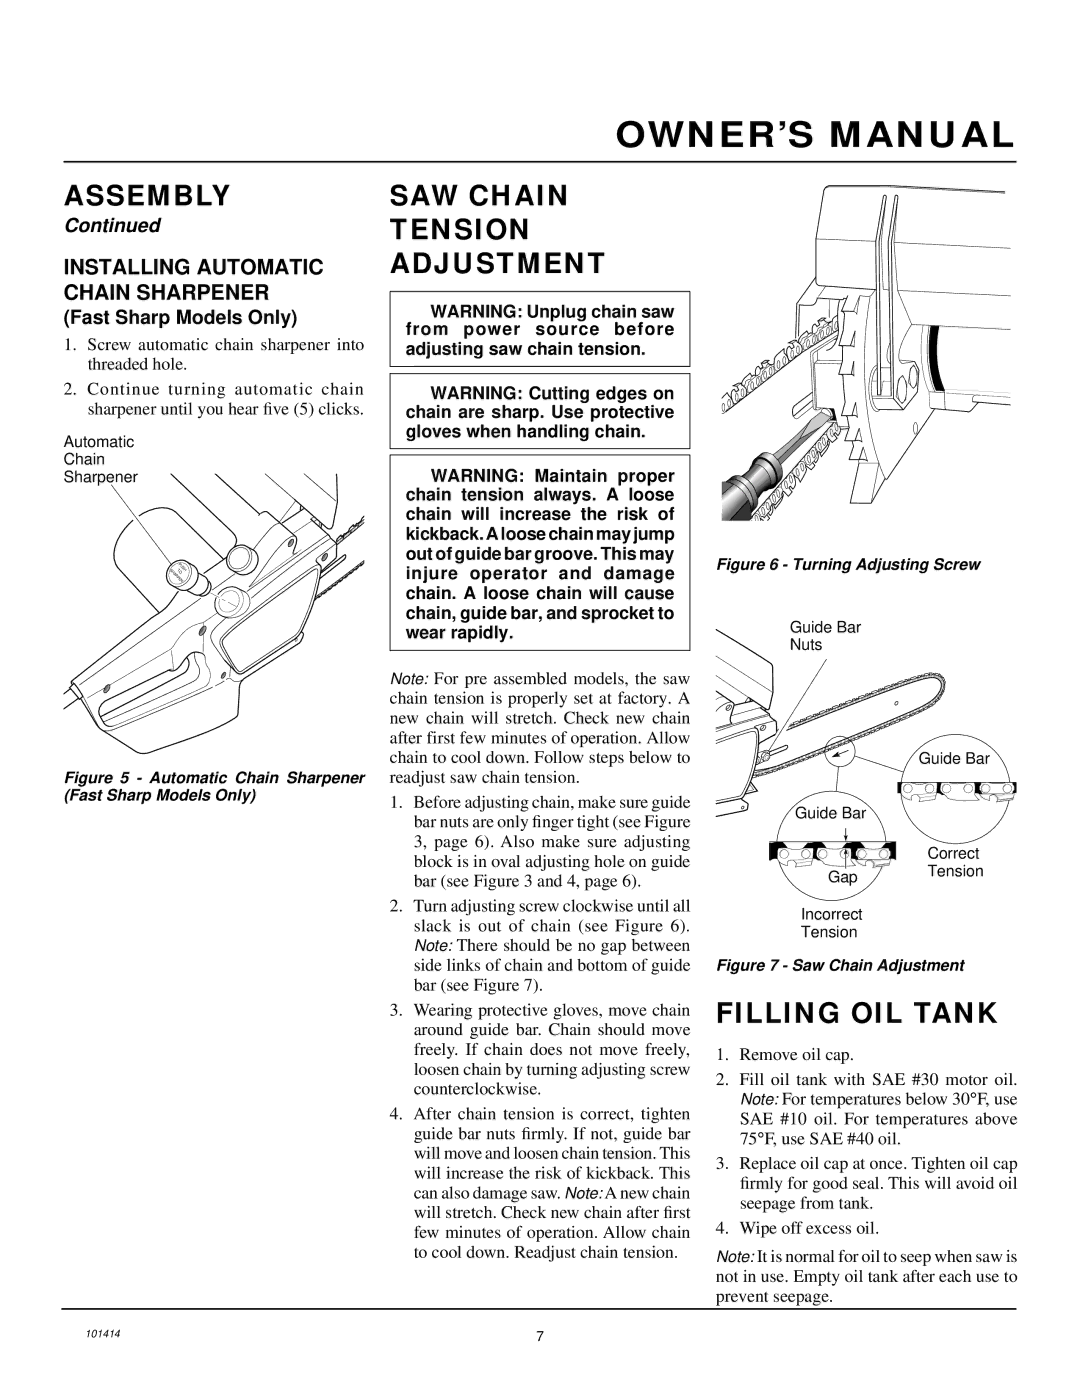
1.Screw automatic chain sharpener into threaded hole.

2.Continue turning automatic chain sharpener until you hear five (5) clicks.

Automatic

Chain

Sharpener

PUSH

SHARPENTO

Figure 5 - Automatic Chain Sharpener (Fast Sharp Models Only)

SAW CHAIN

TENSION

ADJUSTMENT

WARNING: Unplug chain saw from power source before adjusting saw chain tension.

WARNING: Cutting edges on chain are sharp. Use protective gloves when handling chain.

WARNING: Maintain proper chain tension always. A loose chain will increase the risk of kickback. A loose chain may jump out of guide bar groove. This may injure operator and damage chain. A loose chain will cause chain, guide bar, and sprocket to wear rapidly.

Note: For pre assembled models, the saw chain tension is properly set at factory. A new chain will stretch. Check new chain after first few minutes of operation. Allow chain to cool down. Follow steps below to readjust saw chain tension.

1.Before adjusting chain, make sure guide bar nuts are only finger tight (see Figure 3, page 6). Also make sure adjusting block is in oval adjusting hole on guide bar (see Figure 3 and 4, page 6).

2.Turn adjusting screw clockwise until all slack is out of chain (see Figure 6). Note: There should be no gap between side links of chain and bottom of guide bar (see Figure 7).

3.Wearing protective gloves, move chain around guide bar. Chain should move freely. If chain does not move freely, loosen chain by turning adjusting screw counterclockwise.

4.After chain tension is correct, tighten guide bar nuts firmly. If not, guide bar will move and loosen chain tension. This will increase the risk of kickback. This can also damage saw. Note: A new chain will stretch. Check new chain after first few minutes of operation. Allow chain to cool down. Readjust chain tension.

Figure 6 - Turning Adjusting Screw

Guide Bar

Nuts

Guide Bar

Guide Bar

Correct

Gap Tension

Incorrect

Tension

Figure 7 - Saw Chain Adjustment

FILLING OIL TANK

1.Remove oil cap.

2.Fill oil tank with SAE #30 motor oil. Note: For temperatures below 30°F, use

SAE #10 oil. For temperatures above 75°F, use SAE #40 oil.

3.Replace oil cap at once. Tighten oil cap firmly for good seal. This will avoid oil seepage from tank.

4.Wipe off excess oil.

Note: It is normal for oil to seep when saw is not in use. Empty oil tank after each use to prevent seepage.

101414

7

Page 7
Image 7
Homelite EL14 SAW Chain Tension Adjustment, Filling OIL Tank, Installing Automatic Chain Sharpener, Fast Sharp Models Only

EL14 specifications

The Homelite EL14 is a robust and innovative outdoor power tool that has garnered attention for its efficiency and versatility in lawn maintenance tasks. As part of Homelite's esteemed lineup, the EL14 showcases a combination of advanced technology and user-friendly features, making it a popular choice for homeowners and professional landscapers alike.

One of the standout features of the Homelite EL14 is its powerful 14-inch cutting deck, which allows for efficient trimming of grass and low-lying weeds. The cutting diameter offers users the advantage of covering larger areas in less time, making it an excellent option for those with expansive lawns. The adjustable cutting height further enhances its versatility, providing multiple settings to accommodate various grass types and give users complete control over the finish of their lawns.

The Homelite EL14 is designed with a lightweight and ergonomic frame, making it easy to maneuver. Its compact size helps users navigate through tight spaces, while the adjustable handle enhances comfort, reducing fatigue during prolonged use. This design prioritizes user experience, ensuring that anyone, regardless of their expertise level, can handle the equipment with ease.

Another notable characteristic of the EL14 is its electric-powered motor, which promotes quieter operation compared to traditional gas-powered models. This eco-friendly alternative eliminates the hassles associated with fuel mixing and emissions, allowing users to maintain their gardens without the noise and pollution typical of combustion engines. The electric operation also means lower maintenance costs and fewer breakdowns, translating into more time spent tending to lawns rather than repairing equipment.

The Homelite EL14 comes equipped with a safety switch feature, ensuring that the tool can only be operated when the user is ready to engage, minimizing the risk of accidents. Additionally, the easy-to-access cable management system prevents tangling during use, allowing for a seamless trimming experience.

In conclusion, the Homelite EL14 stands out with its user-friendly design, powerful motor, and thoughtful features aimed at enhancing user experience. With its impressive cutting capabilities and environmental considerations, it is well-suited for those looking to maintain their outdoor spaces efficiently and effectively. Whether for small gardens or larger lawns, the EL14 provides a reliable solution for achieving a manicured landscape.