ASSEMBLY
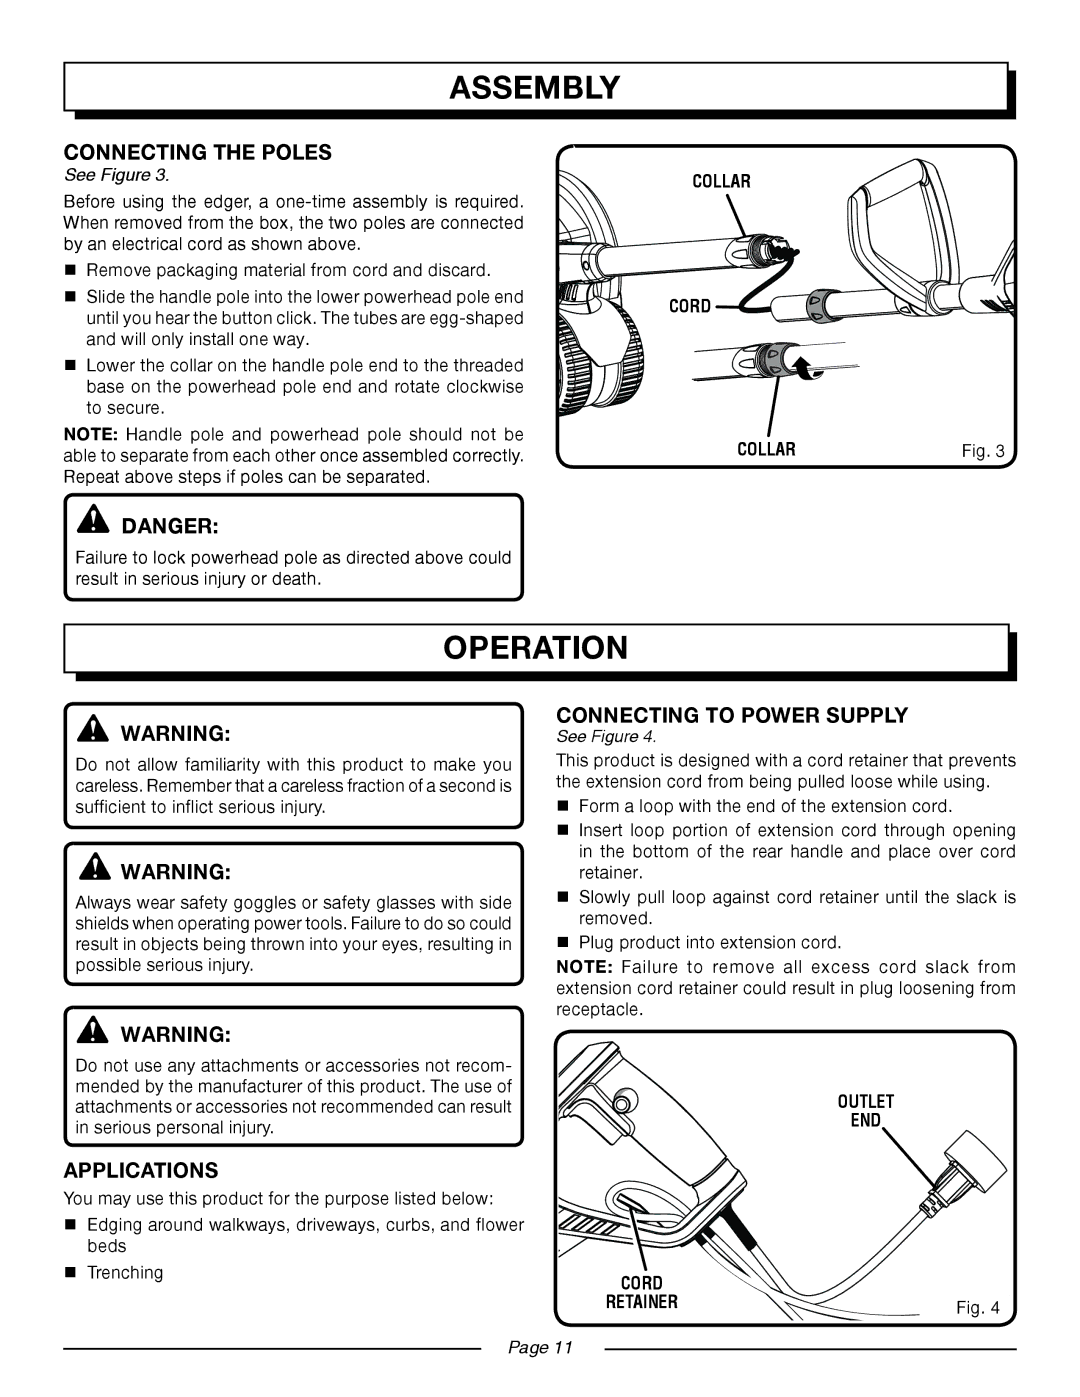
connecting the POLEs
See Figure 3.
Before using the edger, a
nRemove packaging material from cord and discard.
nSlide the handle pole into the lower powerhead pole end until you hear the button click. The tubes are
nLower the collar on the handle pole end to the threaded base on the powerhead pole end and rotate clockwise to secure.
NOTE: Handle pole and powerhead pole should not be able to separate from each other once assembled correctly. Repeat above steps if poles can be separated.
![]() DANGER:
DANGER:
Failure to lock powerhead pole as directed above could result in serious injury or death.
collar
CORD
collar | Fig. 3 |
OPERATION
WARNING: | CONNECTING TO POWER SUPPLY |
See Figure 4. |
Do not allow familiarity with this product to make you careless. Remember that a careless fraction of a second is sufficient to inflict serious injury.
![]() WARNING:
WARNING:
Always wear safety goggles or safety glasses with side shields when operating power tools. Failure to do so could result in objects being thrown into your eyes, resulting in possible serious injury.
This product is designed with a cord retainer that prevents the extension cord from being pulled loose while using.
nForm a loop with the end of the extension cord.
nInsert loop portion of extension cord through opening in the bottom of the rear handle and place over cord retainer.
nSlowly pull loop against cord retainer until the slack is
removed .
nPlug product into extension cord.
NOTE: Failure to remove all excess cord slack from extension cord retainer could result in plug loosening from receptacle.
WARNING:
Do not use any attachments or accessories not recom- mended by the manufacturer of this product. The use of attachments or accessories not recommended can result in serious personal injury.
APPLICATIONS
You may use this product for the purpose listed below:
Edging around walkways, driveways, curbs, and flower |
|
beds |
|
Trenching | CORD |
| |
| RETAINER |
Page 11 |
|
OUTLET
END
Fig. 4
