D | G | B |
|
| A | ||
|
|
| |
|
|
| H |
| E |
|
|
C
F
I
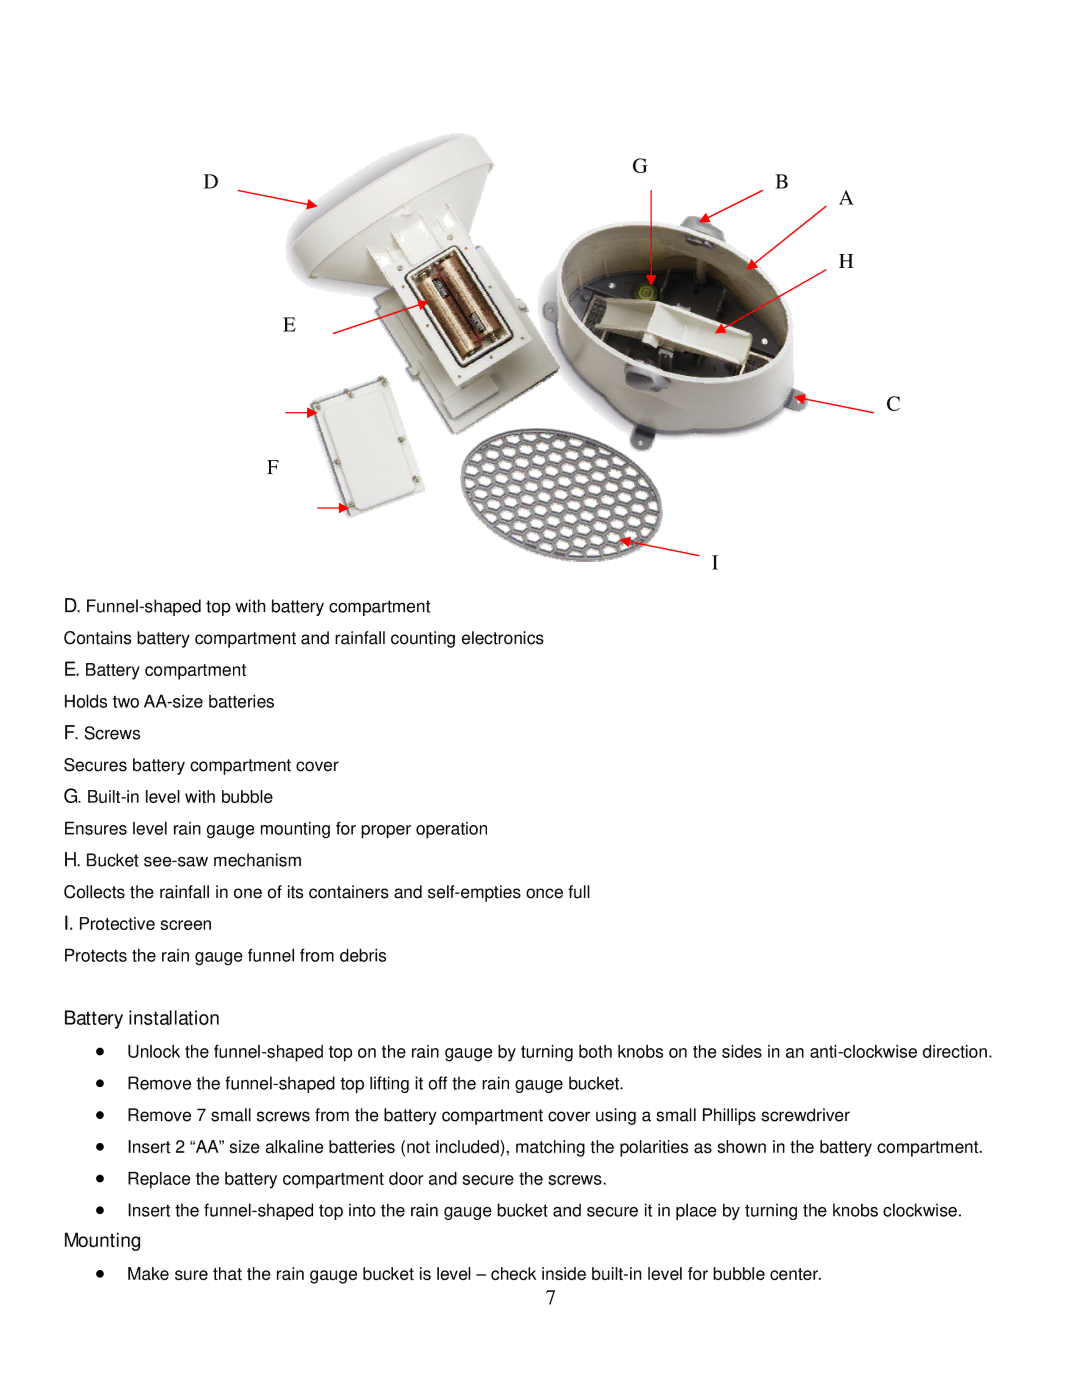
D.
Contains battery compartment and rainfall counting electronics
E. Battery compartment
Holds two
F. Screws
Secures battery compartment cover
G.
Ensures level rain gauge mounting for proper operation
H. Bucket
Collects the rainfall in one of its containers and
I. Protective screen
Protects the rain gauge funnel from debris
Battery installation
•Unlock the
•Remove the
•Remove 7 small screws from the battery compartment cover using a small Phillips screwdriver
•Insert 2 “AA” size alkaline batteries (not included), matching the polarities as shown in the battery compartment.
•Replace the battery compartment door and secure the screws.
•Insert the
Mounting
•Make sure that the rain gauge bucket is level – check inside
7
