DRAIN HOSE KIT: FITTING INSTRUCTIONS
![]() Do not install the product in a room where there is a risk of frost occurring. At temperature around freezing point the product may not be able to operate properly: there is a risk of damage if the water is allowed to freeze in the hydraulic circuit (valves, hoses, pumps).
Do not install the product in a room where there is a risk of frost occurring. At temperature around freezing point the product may not be able to operate properly: there is a risk of damage if the water is allowed to freeze in the hydraulic circuit (valves, hoses, pumps).
For a better product performance the ambient room temperature must be between +2°C and +35°C.
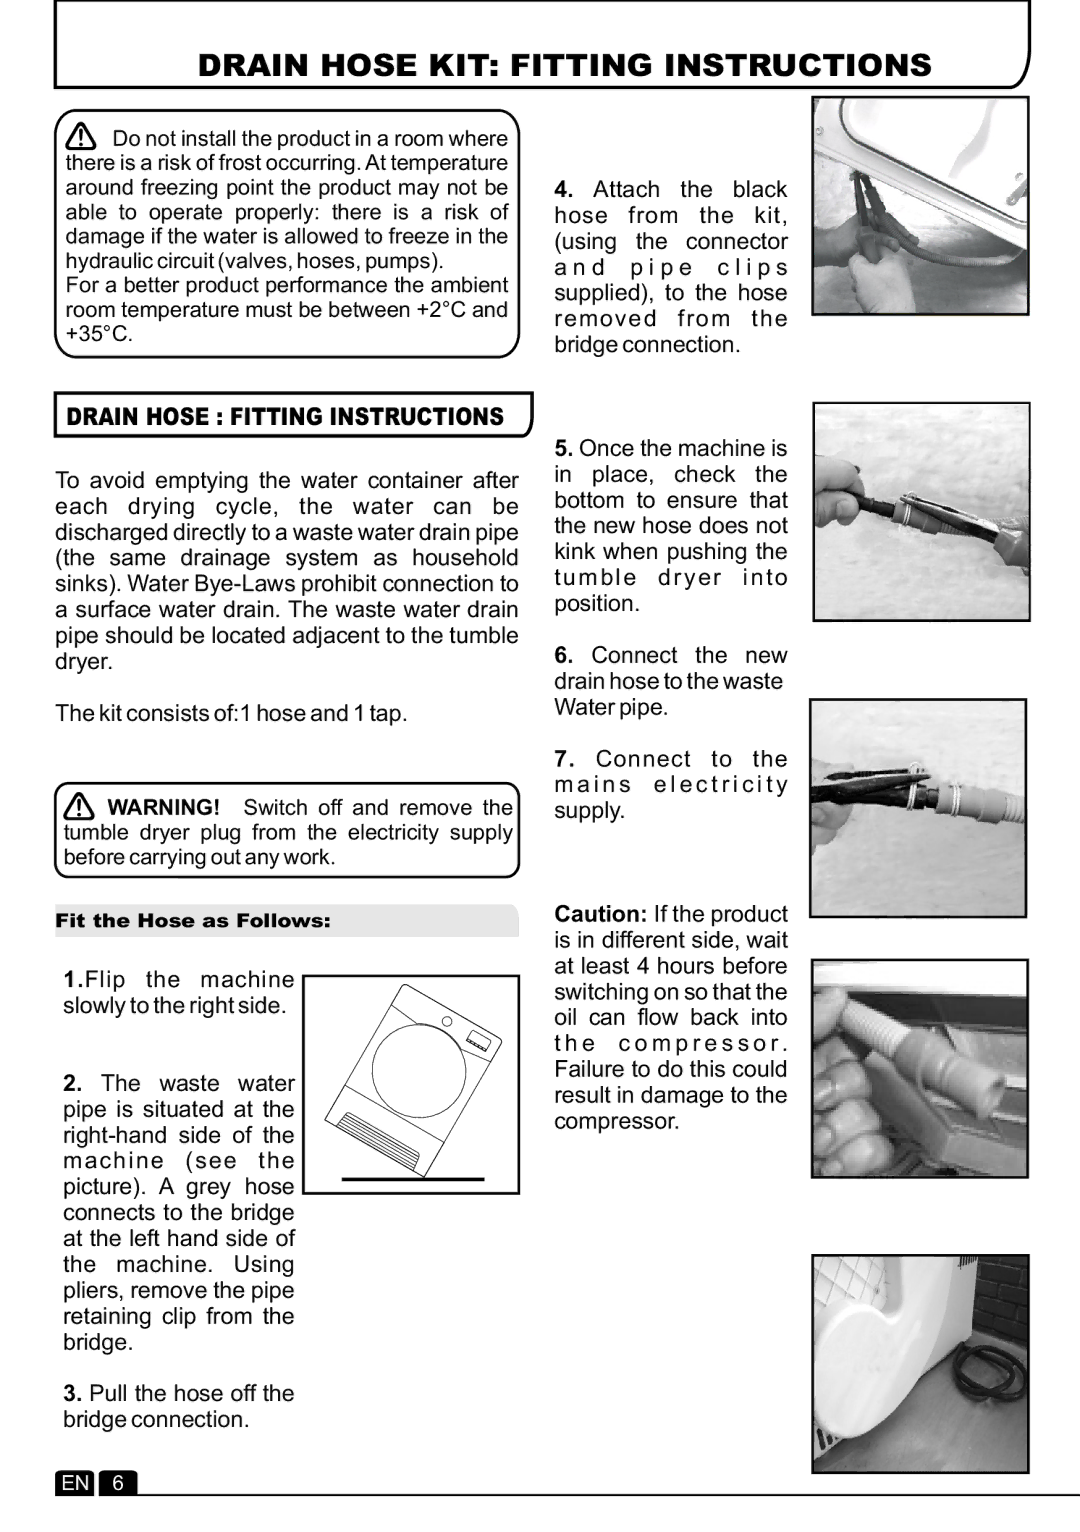
4.Attach the black hose from the kit, (using the connector
a n d p i p e c l i p s supplied), to the hose removed from the bridge connection.
DRAIN HOSE : FITTING INSTRUCTIONS
To avoid emptying the water container after each drying cycle, the water can be discharged directly to a waste water drain pipe (the same drainage system as household sinks). Water
The kit consists of:1 hose and 1 tap.
![]() WARNING! Switch off and remove the tumble dryer plug from the electricity supply before carrying out any work.
WARNING! Switch off and remove the tumble dryer plug from the electricity supply before carrying out any work.
5.Once the machine is in place, check the bottom to ensure that the new hose does not kink when pushing the tumble dryer into position.
6.Connect the new drain hose to the waste Water pipe.
7.Connect to the m a i n s e l e c t r i c i t y supply.
Fit the Hose as Follows:
1.Flip the machine slowly to the right side.
2.The waste water pipe is situated at the
3.Pull the hose off the bridge connection.
Caution: If the product is in different side, wait at least 4 hours before switching on so that the oil can flow back into t h e c o m p r e s s o r . Failure to do this could result in damage to the compressor.
EN 6