Programming cooking
GB
!A cooking mode must be selected before programming can take place.
Programming the duration
1.Press the ![]() icon.
icon.
2.Turn the control dial to set the duration; hold the dial in this position to scroll through the numbers more quickly and make the setting process easier. The display will show a graphic indicating the duration in bar format.
3.Once you have reached the desired duration,
press the ![]() icon again. The duration bar will show the current time, the duration and the end of cooking time as a graphic.
icon again. The duration bar will show the current time, the duration and the end of cooking time as a graphic.
4.Press ![]() to begin cooking.
to begin cooking.
5.The display will indicate the remaining time by filling the duration bar.
6.When cooking has finished, “COOKING FINISHED” appears on the display and a buzzer sounds.
• For example: it is 9:00 a.m. and a duration of 1 hour and 15 minutes is programmed. The programme will stop automatically at 10:15 a.m.
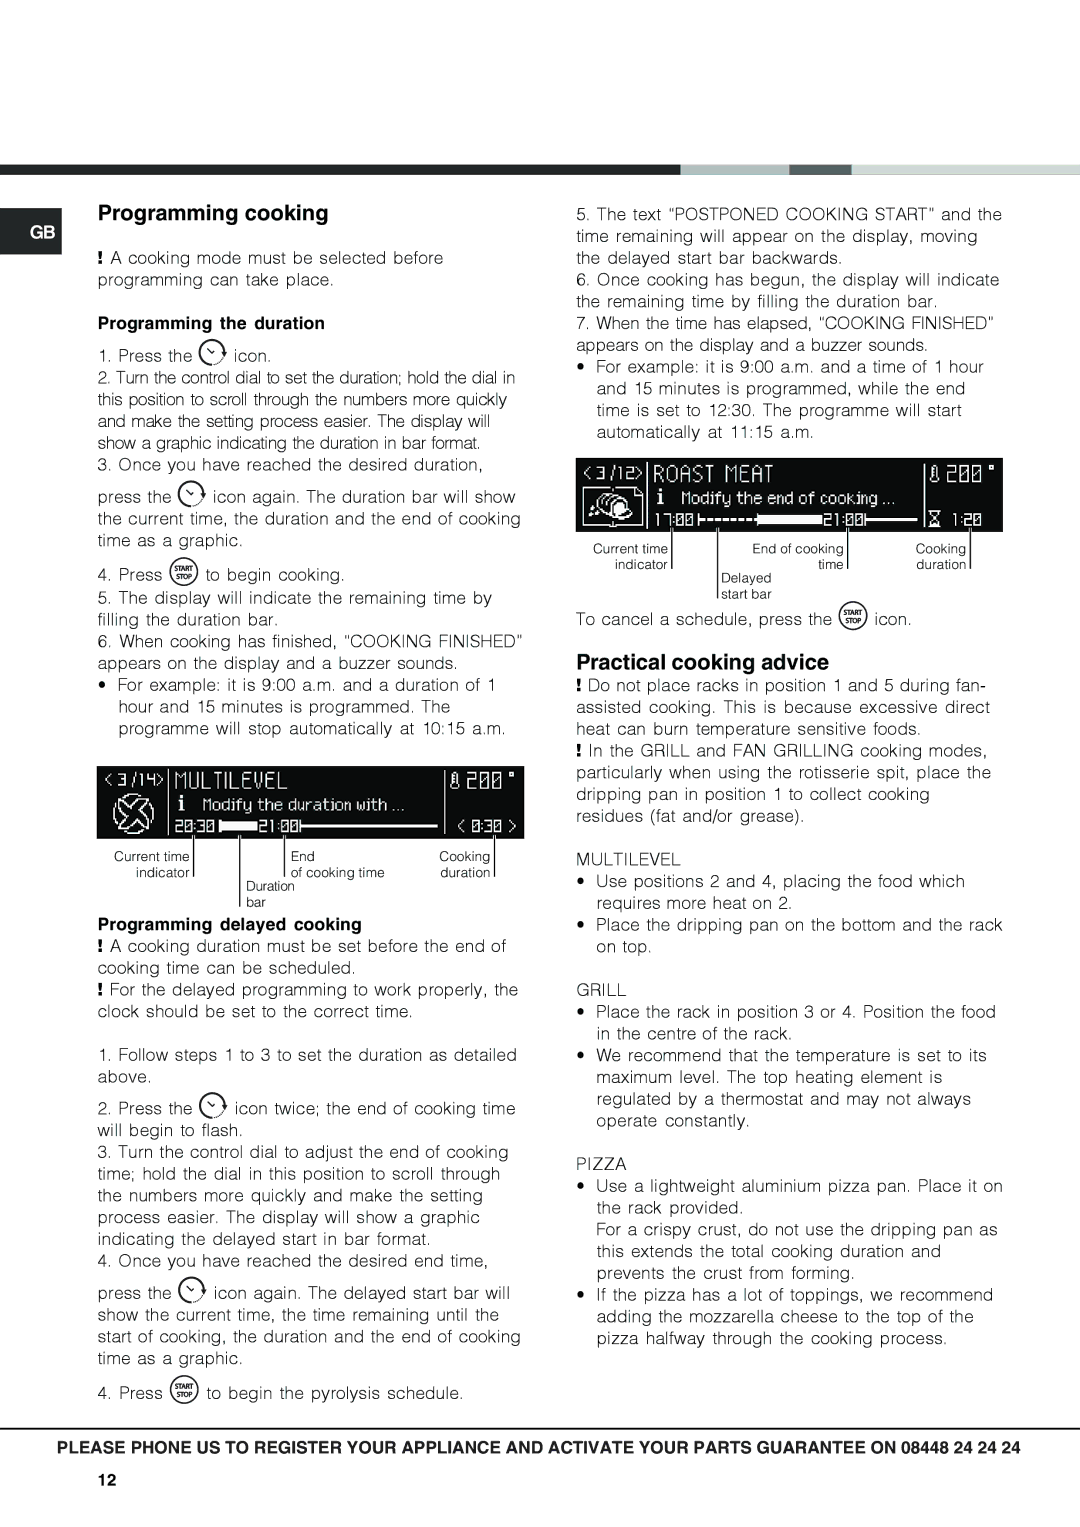
Current time |
|
| End | Cooking |
indicator |
|
| of cooking time | duration |
|
| Duration |
| |
|
| bar |
| |
|
|
| ||
Programming delayed cooking
!A cooking duration must be set before the end of cooking time can be scheduled.
!For the delayed programming to work properly, the clock should be set to the correct time.
1.Follow steps 1 to 3 to set the duration as detailed above.
2.Press the ![]() icon twice; the end of cooking time will begin to flash.
icon twice; the end of cooking time will begin to flash.
3.Turn the control dial to adjust the end of cooking time; hold the dial in this position to scroll through the numbers more quickly and make the setting process easier. The display will show a graphic indicating the delayed start in bar format.
4.Once you have reached the desired end time,
press the ![]() icon again. The delayed start bar will show the current time, the time remaining until the start of cooking, the duration and the end of cooking time as a graphic.
icon again. The delayed start bar will show the current time, the time remaining until the start of cooking, the duration and the end of cooking time as a graphic.
4. Press ![]() to begin the pyrolysis schedule.
to begin the pyrolysis schedule.
5.The text “POSTPONED COOKING START” and the time remaining will appear on the display, moving the delayed start bar backwards.
6.Once cooking has begun, the display will indicate the remaining time by filling the duration bar.
7.When the time has elapsed, “COOKING FINISHED” appears on the display and a buzzer sounds.
• For example: it is 9:00 a.m. and a time of 1 hour and 15 minutes is programmed, while the end time is set to 12:30. The programme will start automatically at 11:15 a.m.
Current time |
| End of cooking |
| Cooking |
indicator |
| time |
| duration |
|
|
Delayed start bar
To cancel a schedule, press the ![]() icon.
icon.
Practical cooking advice
!Do not place racks in position 1 and 5 during fan- assisted cooking. This is because excessive direct heat can burn temperature sensitive foods.
!In the GRILL and FAN GRILLING cooking modes, particularly when using the rotisserie spit, place the dripping pan in position 1 to collect cooking residues (fat and/or grease).
MULTILEVEL
•Use positions 2 and 4, placing the food which requires more heat on 2.
•Place the dripping pan on the bottom and the rack on top.
GRILL
•Place the rack in position 3 or 4. Position the food in the centre of the rack.
•We recommend that the temperature is set to its maximum level. The top heating element is regulated by a thermostat and may not always operate constantly.
PIZZA
•Use a lightweight aluminium pizza pan. Place it on the rack provided.
For a crispy crust, do not use the dripping pan as this extends the total cooking duration and prevents the crust from forming.
•If the pizza has a lot of toppings, we recommend adding the mozzarella cheese to the top of the pizza halfway through the cooking process.
PLEASE PHONE US TO REGISTER YOUR APPLIANCE AND ACTIVATE YOUR PARTS GUARANTEE ON 08448 24 24 24
12