Dryer Description
The front | The back |
GB
Control Panel
Drum
Rating plate
Model & Serial numbers
Filter
Caution: Hot!
Air Intake Vent
Vent Tube fitted here
Important Information |
|
Installation |
Description |
|
TheDisplay |
Control panel
PROGRAMMES | START/PAUSE |
|
| |
|
| |||
Knob |
| Clean Filter | ||
Button & Light |
| |||
| Indicator |
|
| Light |
|
|
|
|
|
|
|
|
|
|
|
|
|
|
|
ON/OFF | OPTION |
| Progress or Delay |
Button | Buttons & Lights |
| Lights |
|
Programmes | Start and |
|
|
Laundry |
|
|
|
Suggestions | Warnings |
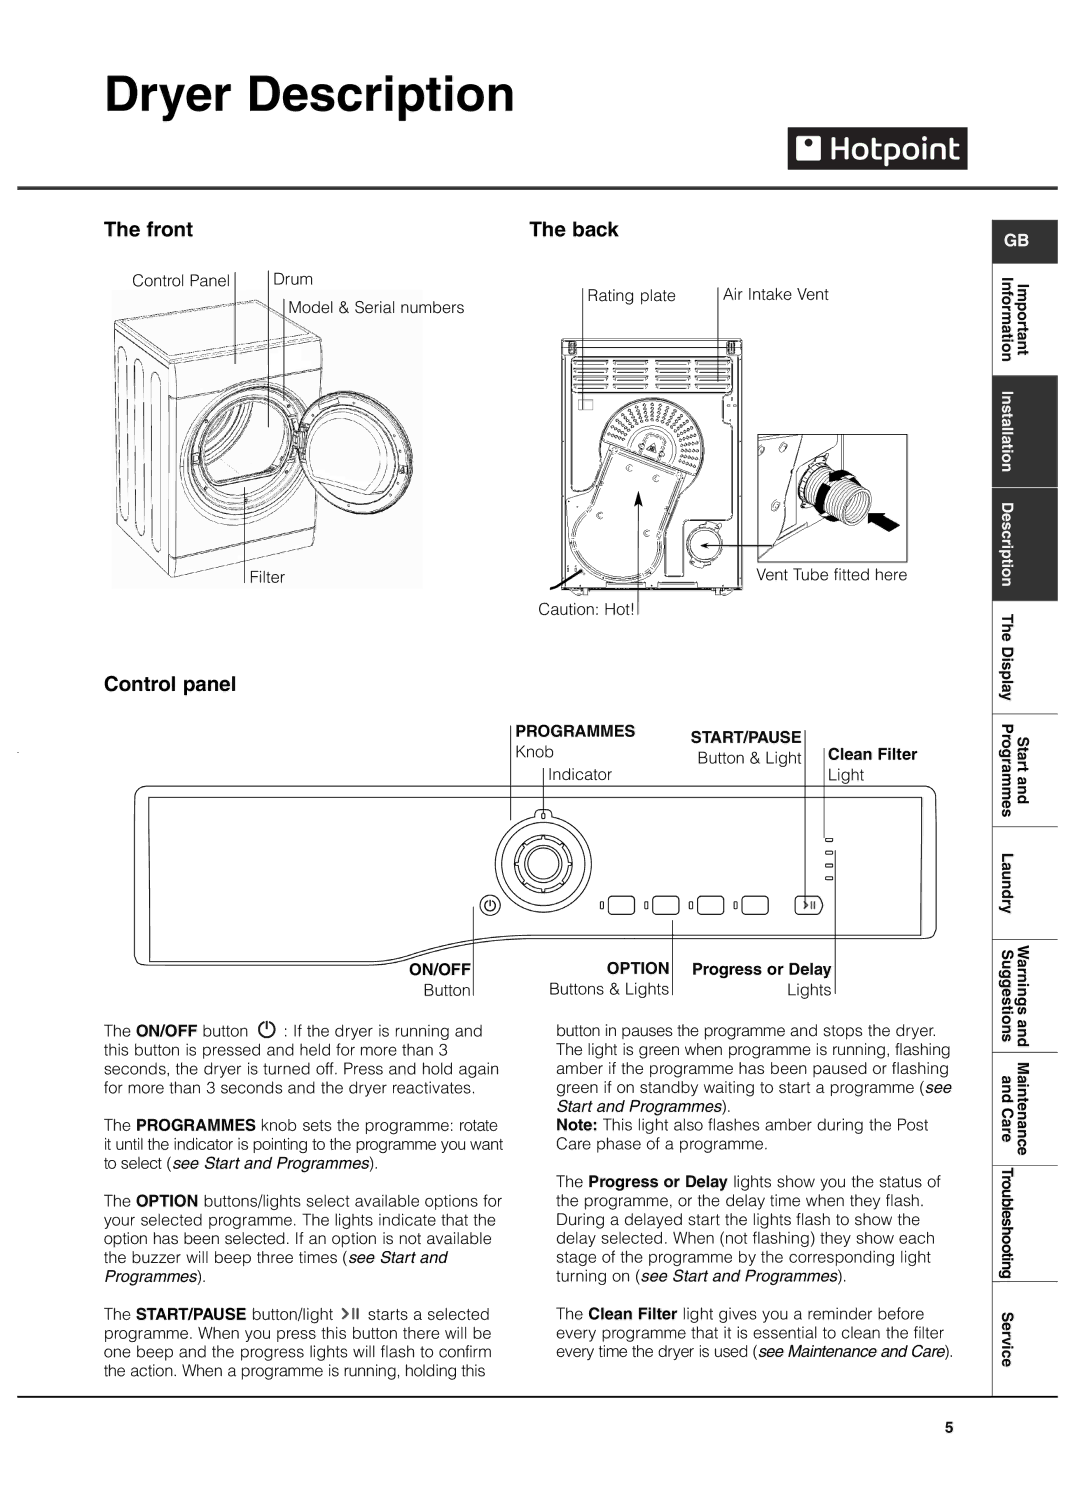
The ON/OFF button ![]() : If the dryer is running and this button is pressed and held for more than 3 seconds, the dryer is turned off. Press and hold again for more than 3 seconds and the dryer reactivates.
: If the dryer is running and this button is pressed and held for more than 3 seconds, the dryer is turned off. Press and hold again for more than 3 seconds and the dryer reactivates.
The PROGRAMMES knob sets the programme: rotate it until the indicator is pointing to the programme you want to select (see Start and Programmes).
The OPTION buttons/lights select available options for your selected programme. The lights indicate that the option has been selected. If an option is not available the buzzer will beep three times (see Start and Programmes).
The START/PAUSE button/light ![]() starts a selected programme. When you press this button there will be one beep and the progress lights will flash to confirm the action. When a programme is running, holding this
starts a selected programme. When you press this button there will be one beep and the progress lights will flash to confirm the action. When a programme is running, holding this
button in pauses the programme and stops the dryer. The light is green when programme is running, flashing amber if the programme has been paused or flashing green if on standby waiting to start a programme (see Start and Programmes).
Note: This light also flashes amber during the Post Care phase of a programme.
The Progress or Delay lights show you the status of the programme, or the delay time when they flash. During a delayed start the lights flash to show the delay selected. When (not flashing) they show each stage of the programme by the corresponding light turning on (see Start and Programmes).
The Clean Filter light gives you a reminder before every programme that it is essential to clean the filter every time the dryer is used (see Maintenance and Care).
and |
|
Maintenance and Care |
|
Troubleshooting |
Service |
5
