Hardware Upgrades
Removing a 5.25” Drive
1.Turn off the computer properly through the operating system and turn off any external devices.
2.Disconnect the power cord from the power outlet and the computer, and disconnect any external devices.
3.Remove both the right and left access panels.
4.Remove the front bezel.
5.Disconnect the power, data, and audio cables, as necessary, from the back of the drive.
✎In some cases it may be easier to slide the drive part way out of the drive bay before removing the cables.
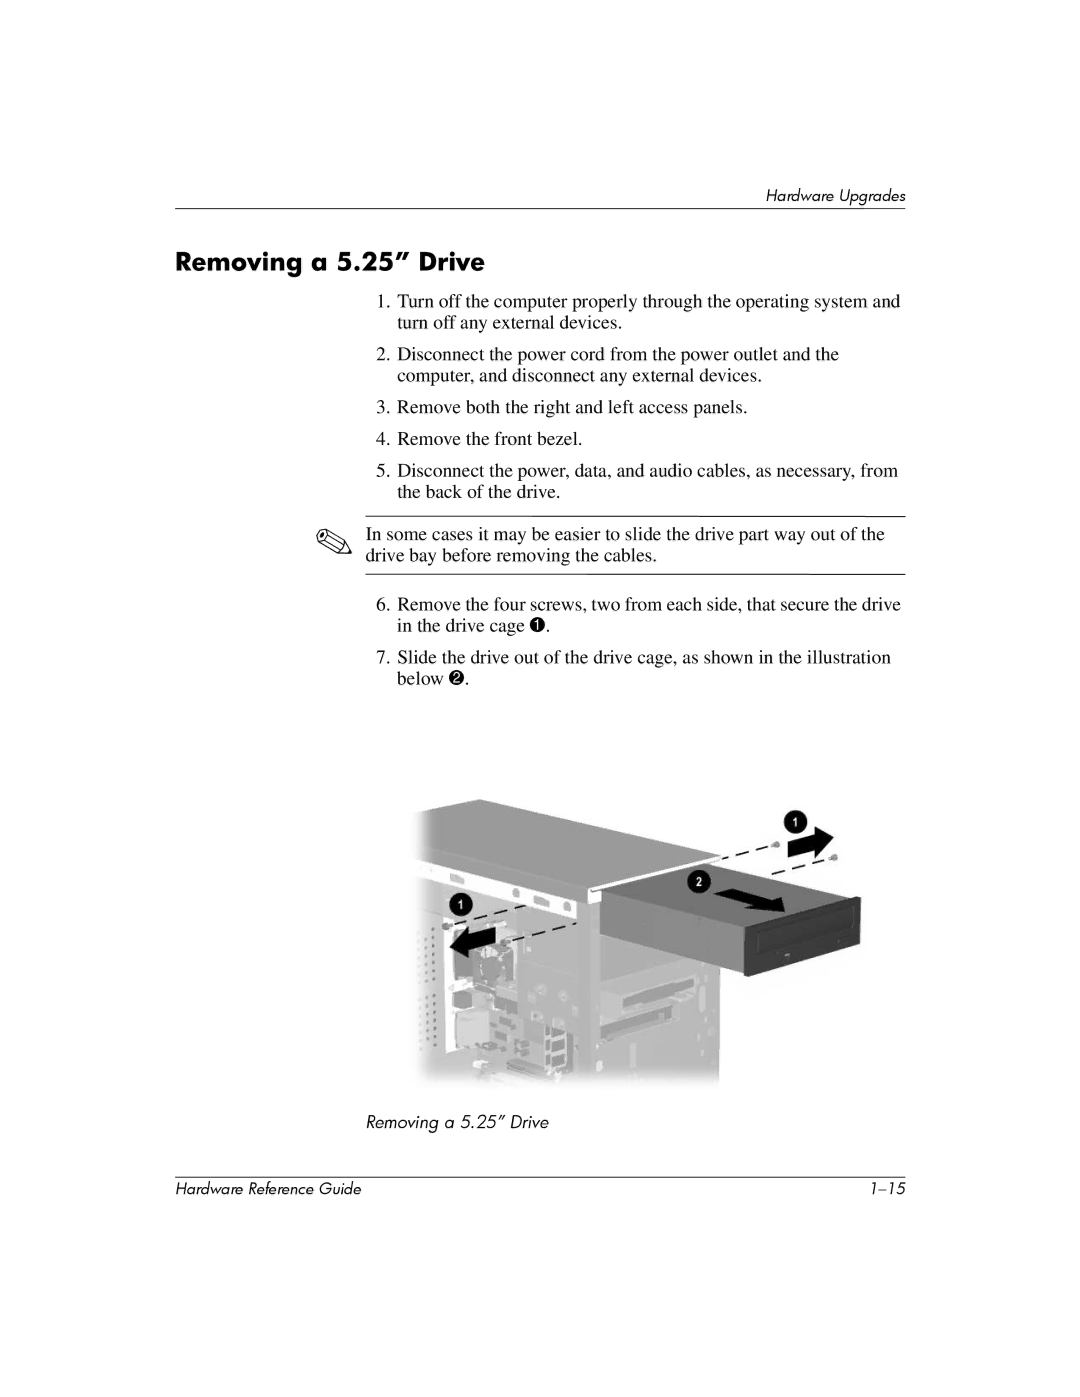
6.Remove the four screws, two from each side, that secure the drive in the drive cage 1.
7.Slide the drive out of the drive cage, as shown in the illustration below 2.
Removing a 5.25” Drive
Hardware Reference Guide |
