Hardware Upgrades
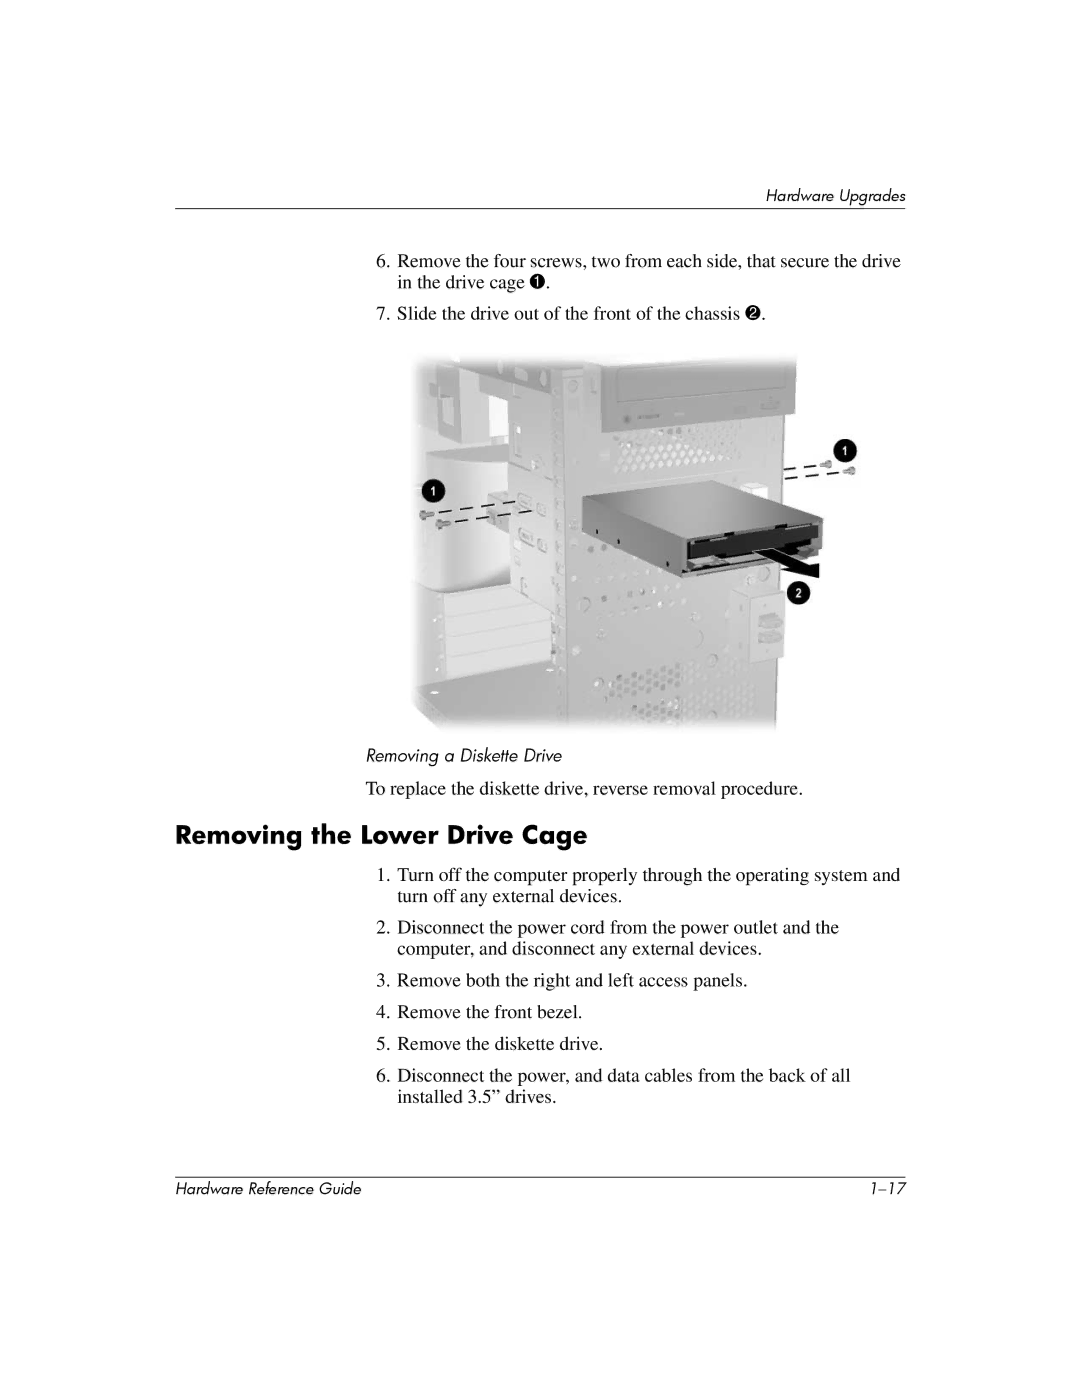
6.Remove the four screws, two from each side, that secure the drive in the drive cage 1.
7.Slide the drive out of the front of the chassis 2.
Removing a Diskette Drive
To replace the diskette drive, reverse removal procedure.
Removing the Lower Drive Cage
1.Turn off the computer properly through the operating system and turn off any external devices.
2.Disconnect the power cord from the power outlet and the computer, and disconnect any external devices.
3.Remove both the right and left access panels.
4.Remove the front bezel.
5.Remove the diskette drive.
6.Disconnect the power, and data cables from the back of all installed 3.5” drives.
Hardware Reference Guide |
